How to Display User Appointments with the Listing Grid Widget
See how easy it is to create informative listings and display them on the front end using the Listing Grid widget.
This feature allows you to build listing items for future/past appointments with the help of the JetEngine and JetAppointment plugins and then display them on the front end. In such a way, you’ll let your customers know what dates, time slots, providers, and services are already booked.
Getting Started
To ensure everything works properly on the front end, pay attention to the back-end preparations. You’ve got to be having Appointments set up; if you haven’t done it yet, check out this tutorial. And make sure to have some booked appointments, something about like so:
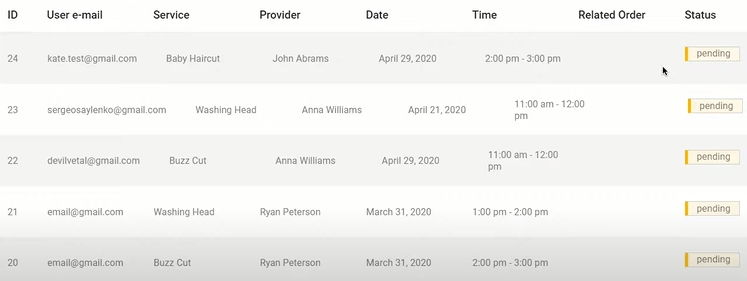
As soon as you’re done with these preparations, you are good to create listings for the appointments.
Building a Listing with Elementor
Create a new listing
Go to JetEngine > Listings.
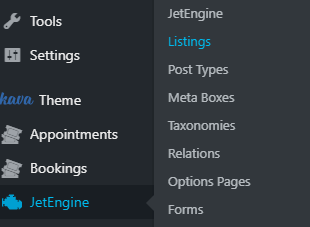
Click the Add New button.

You’ll see a Setup Listing Item window.
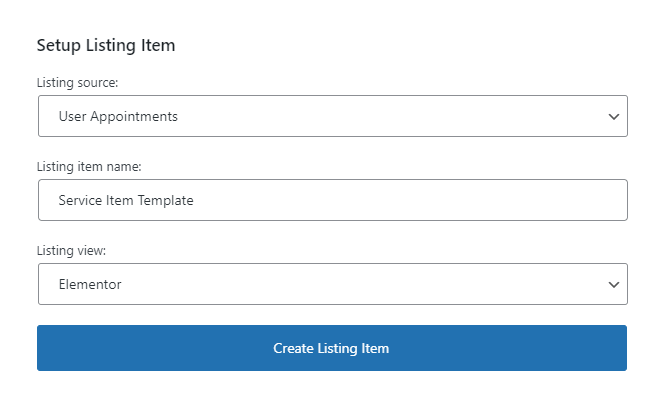
Make sure to pick User Appointments as a source, then enter the listing item name of your choice, choose the listing view (we’re going to be working in Elementor but you can opt for Gutenberg blocks, as well), and click the Create Listing Item button.
Right afterward, you’ll be redirected to Elementor.
Build the listing in Elementor
Now, search for the Dynamic Field widget.

Drag and drop it to the working area and build your listing by duplicating this field as many times as you need.
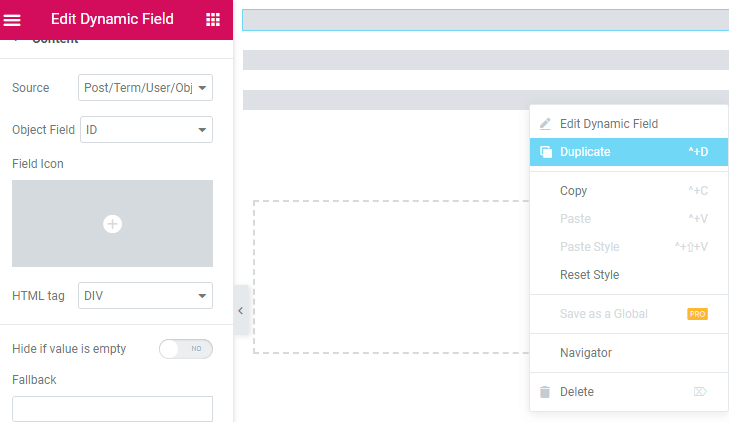
Then proceed to the left-side toolbar and pick the appointment-related data to be displayed from the Object Field.
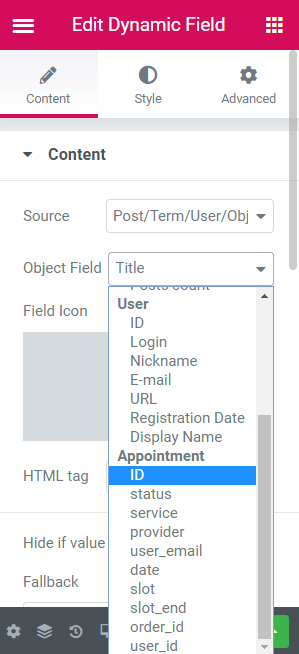
To create a listing, we’ll need ID, service, provider, date, slot, slot_end, order_id, and user_id, where:
- ID is the ID of a booked appointment from your Appointments list;
- service is the type of service that has been booked;
- provider is the person that is going to provide the requested service;
- date is the preferred date for the service to be provided;
- slot is the actual time of the service provision;
- slot_end is the end time of the provided service;
- order_id is the ID of a WooCommerce order, which will be displayed in case WooCommerce integration is enabled;
- user_id is the ID of a user who booked your service.
Configure the listing output
Now, let’s set up all of our dynamic fields.
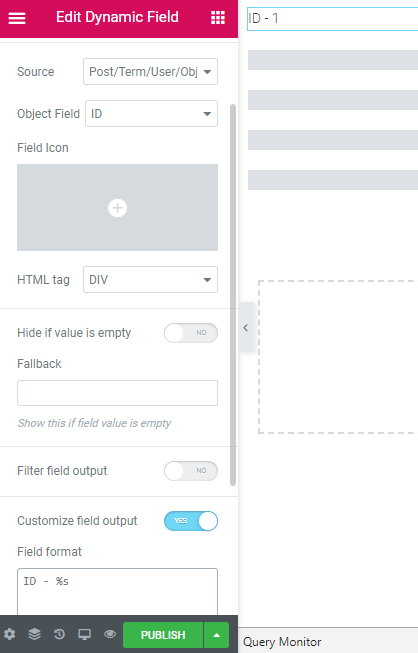
Choose ID in the Object Field, then toggle on Customize field output and specify the desired Field format.
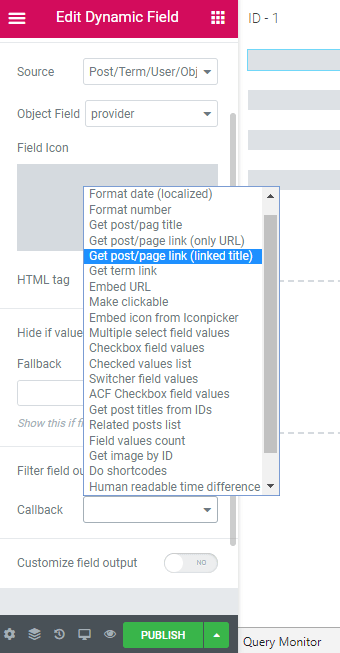
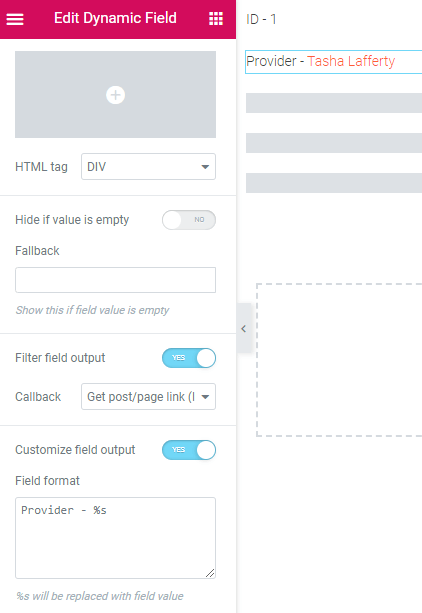
For the second field, choose Provider in the Object Field, then toggle on Filter field output, and in the newly-appeared Callback select, pick Get post/page link (linked title).
Afterward, toggle on Customize field output and specify the desired Field format.
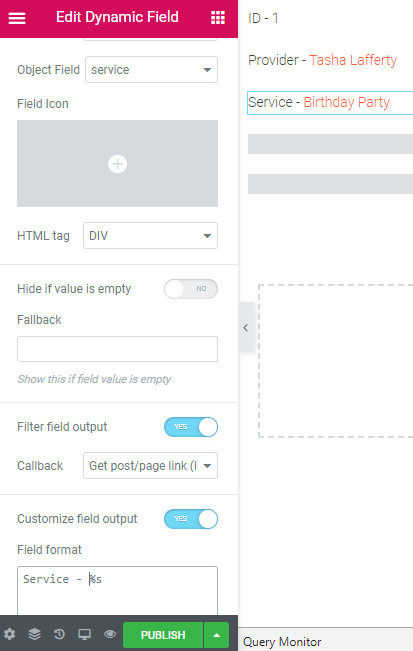
For the third field, which is going to be a service, choose Service in the Object Field, then toggle on Filter field output, and in the newly-appeared Callback select, pick Get post/page link (linked title). Just like previously, you should then toggle on Customize field output and specify the desired Field format.
The fourth field is going to show the date. So, choose Date in the Object Field, then toggle on Filter field output, and in the newly-appeared Callback select, pick Format date.
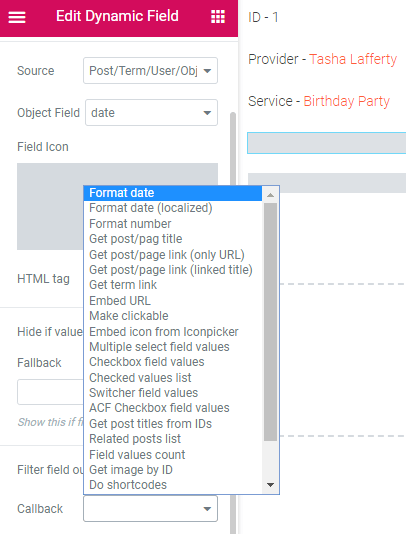
As you can see, the Format will be adjusted automatically. After that, toggle on Customize field output and specify the desired Field format.

Last but not least, we need to indicate the time, and this field requires all your attention. In the Object Field, choose Slot, then toggle on Filter field output, and in the newly-appeared Callback select, pick Format date.
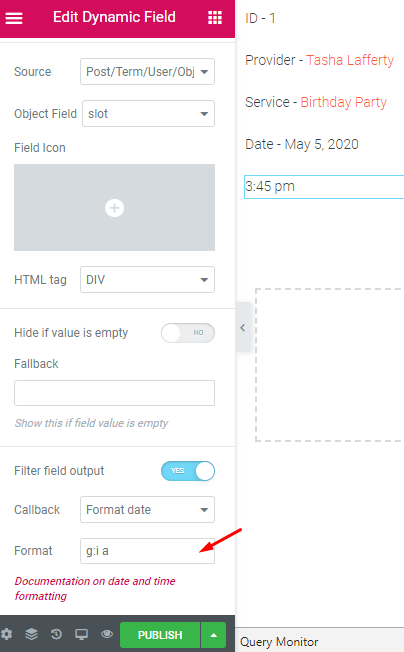
In the Format field, make sure to enter the proper format code. For instance, “g:i a” gives us hours, minutes, and a.m./p.m. an indication.
After that, enable Customize field output and specify the desired Field format, as you would normally do.
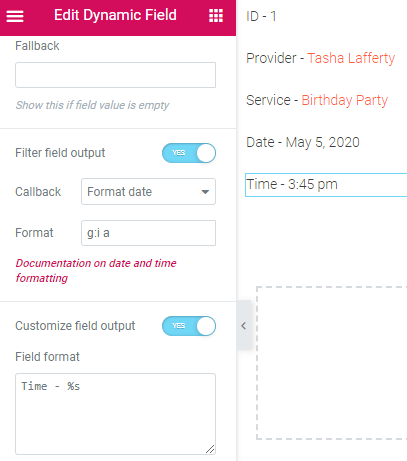
With a little bit of styling magic, you can achieve something like that:

Once you are satisfied with your listing item, click Publish.
Displaying the Listing on the Front End
Now, it’s time to publish the listing on the front-end page of your choice.
Choose the Single webpage
Click Edit with Elementor to actually edit it.

In the newly-opened Elementor tab, search for the Listing Grid widget.

Then drag and drop it to the desired section of the page.
Configure the listing output
The next step is to select the actual listing you want to display on this page.
Pick Appointments Listing (it’s the one you have previously created) in the Listing select field.

And there you have it, guys, that’s the listing we’ve built!

You can adjust the number of columns to make your listing look fancier.
Check Appointments Query
To ensure the smooth performance of your Appointments Listing on the front end, make sure to apply the necessary Appointments Query settings.

As you can see, there are three drop-down fields there – User, Status, and Date.
You can pick any field values here, depending on the information you want to showcase on the front end.
For instance, we’ve picked the following:
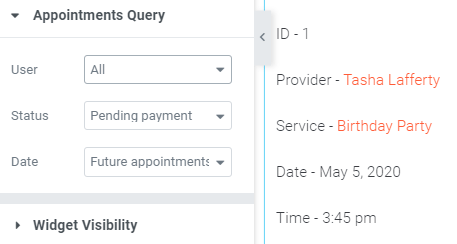
As you can see, this particular appointment has been booked but hasn’t been paid for yet.
Once you’ve configured the listing in Elementor, click Publish. That’s it!
We hope that you’ve found this tutorial helpful and become a guru of building listings for appointments.