How to Create a Listing Template for Post Types in Elementor
Learn how to use the Listing functionality from the JetEngine plugin to create listing templates for dynamic content.
With the JetEngine plugin, you can dynamically pull the content from the backend to the Elementor page builder to display it on the front end. This tutorial will uncover how to create a listing to display the content in the Listing Grid widget.
Listing Creation
Add a new listing item
Proceed to the JetEngine > Listings tab on the WordPress Dashboard. Here you’ll see the Listing Items screen, and you need to press the “Add New” button.
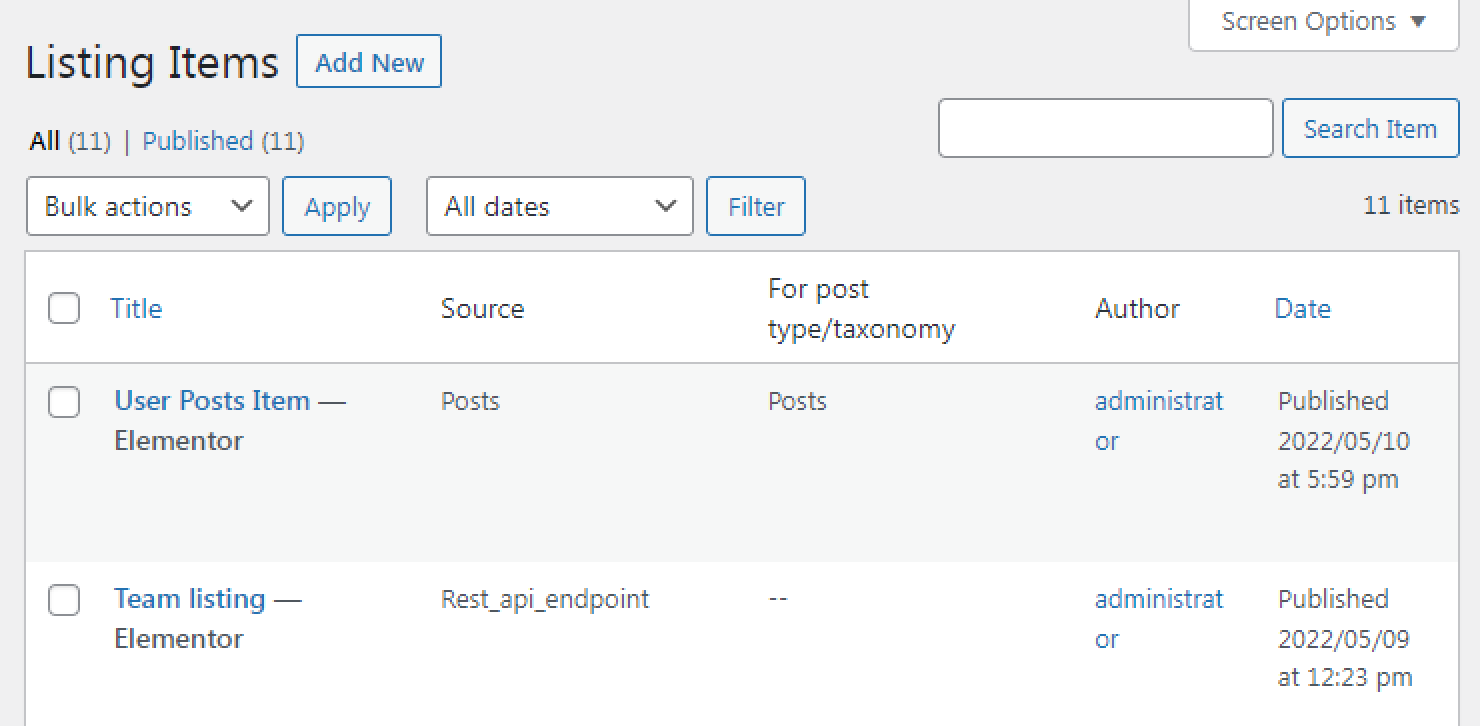
Set up listing item
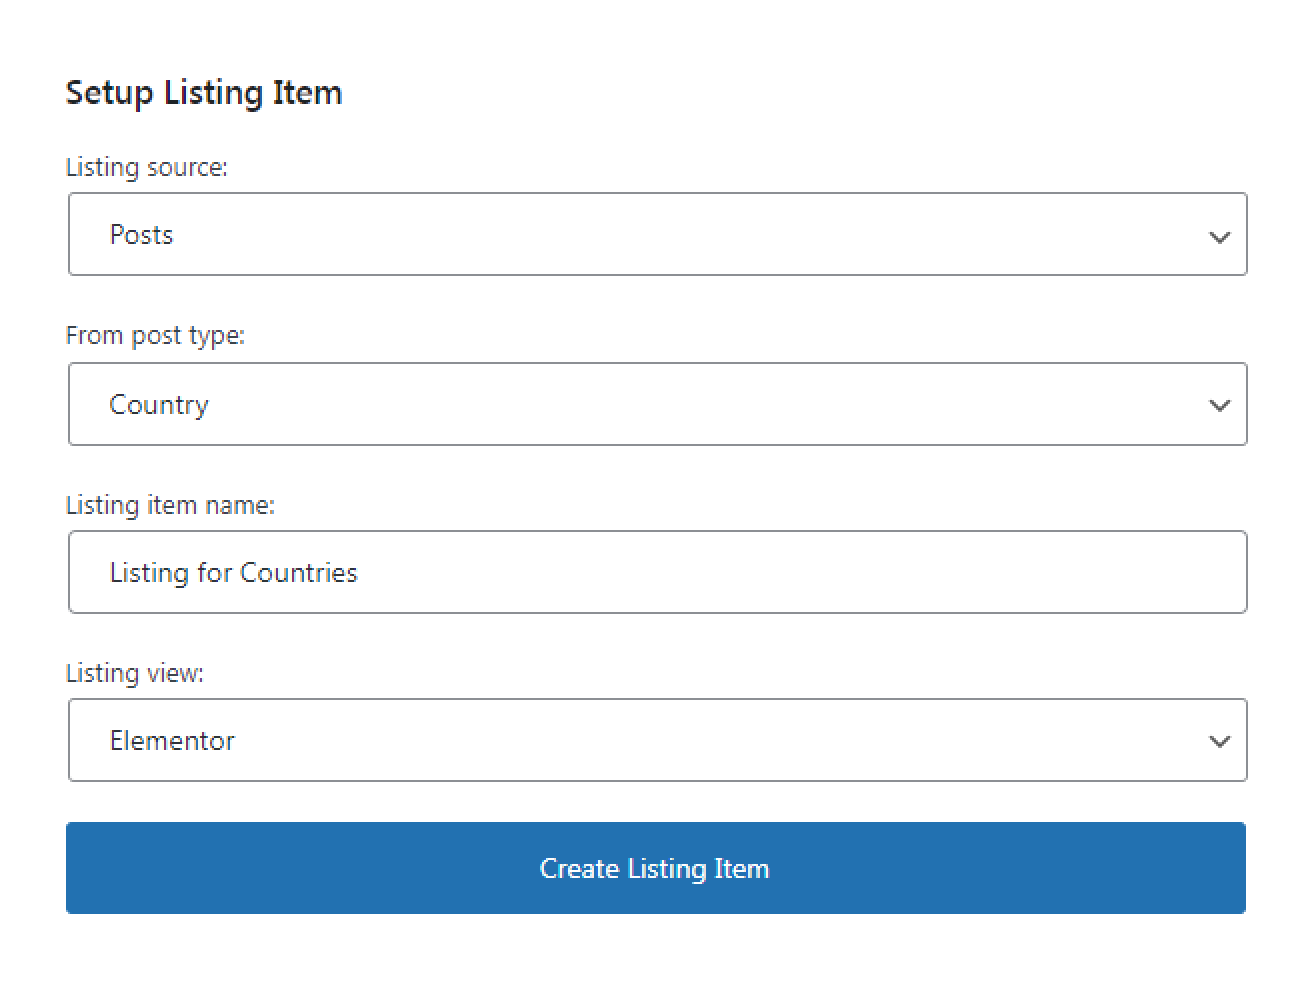
Once the Setup Listing Item window has opened, you should fill in the fields:
- Listing source. We are now talking about the Listing Template for the Posts, so choose the “Posts” option in this drop-down menu;
- From post type. Here you have to select the post type from which the content will be pulled. For example, it can be named “Country.” Take into consideration that you can create a listing template for the default WordPress Posts as well;
- Listing Item Name. Type the name for the listing here;
- Listing View. In this drop-down menu, you can choose to create the listing using the Elementor or Gutenberg editor.
Afterward, click the “Create Listing Item” button.
Filling Listing with Content
Let’s ensure we have all the necessary content added to the listing. You should choose dynamic widgets depending on what you need to display. In our case, we want to show the title of the post and the image from the meta field. Follow these tutorials on Dynamic Field and Dynamic Image widgets to learn more.
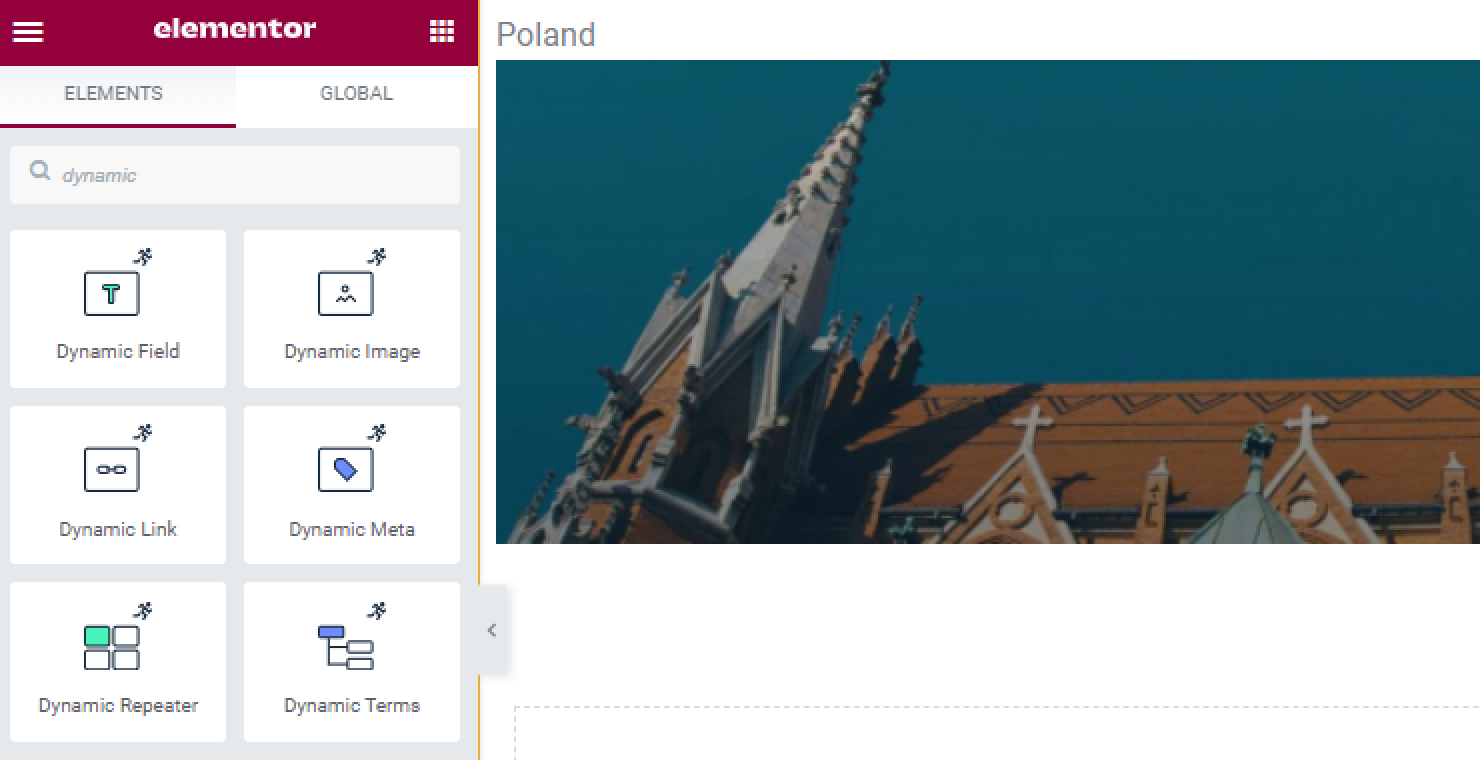
Moreover, you can adjust the needed settings for the listing in the Listing Item Settings section, which you can open by clicking the gear icon at the bottom of the page.
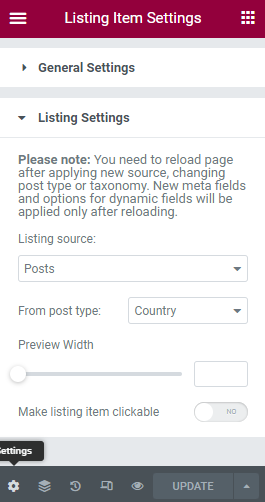
Here, you can select another Listing source. In the From post type drop-down list, you can pick another post type. It is also possible to change the Preview Width and Make listing item clickable (in that case, you can add links to the listings).
When everything is done, click the “Publish/Update” button. Now we are ready to display the listing through the Listing Grid widget.
How to Show the Author of the Post
Create a user listing
Proceed to the JetEngine > Listings and press the “Add New” button.
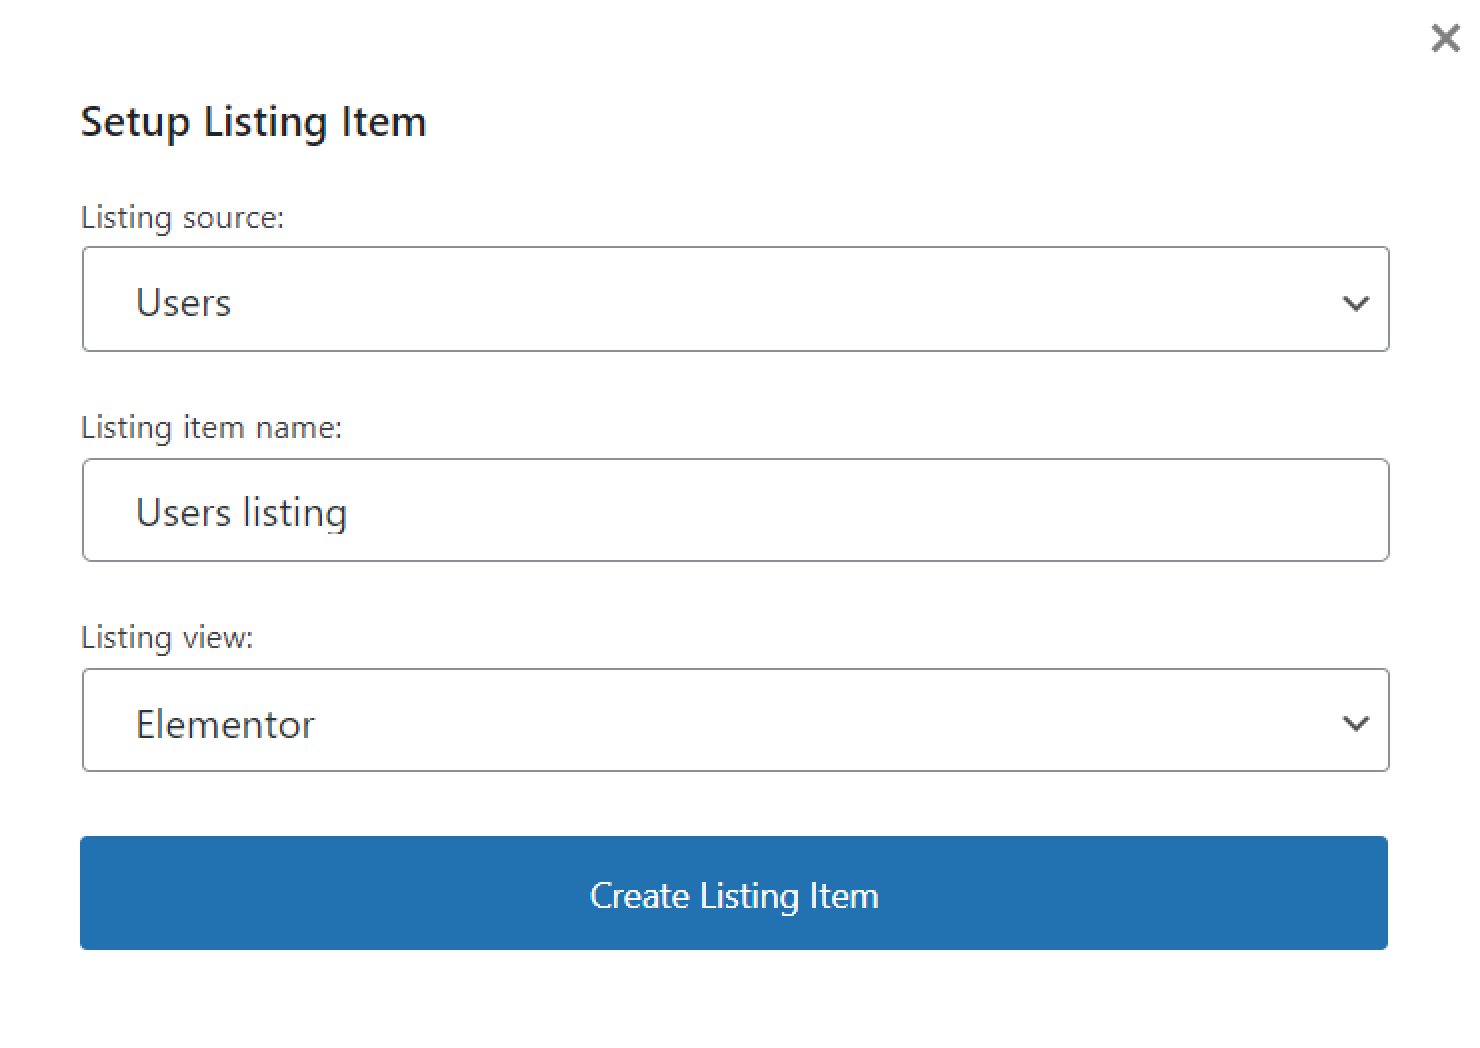
In the appeared pop-up, select the “Users” Listing source, enter the Listing item name, and pick the “Elementor” or “Blocks (Gutenberg)” Listing view. Hit the “Create Listing Item” button.
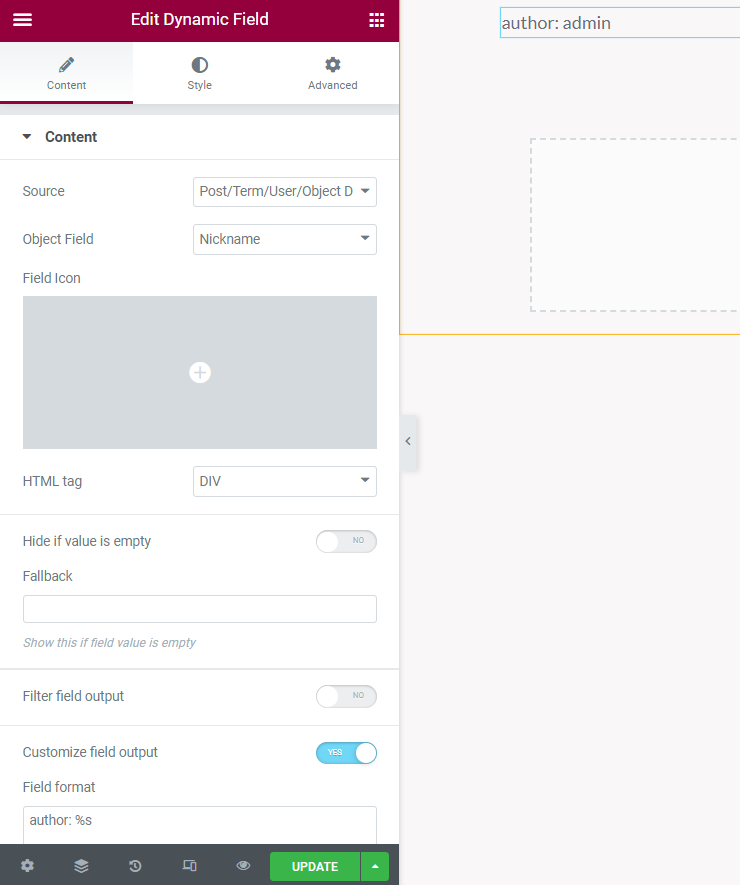
Using the Dynamic Field, Dynamic Image, and other dynamic widgets or blocks, display the user information in the listing template. When you finish, hit the “Update” button.
Create a custom query for users with the Query Builder
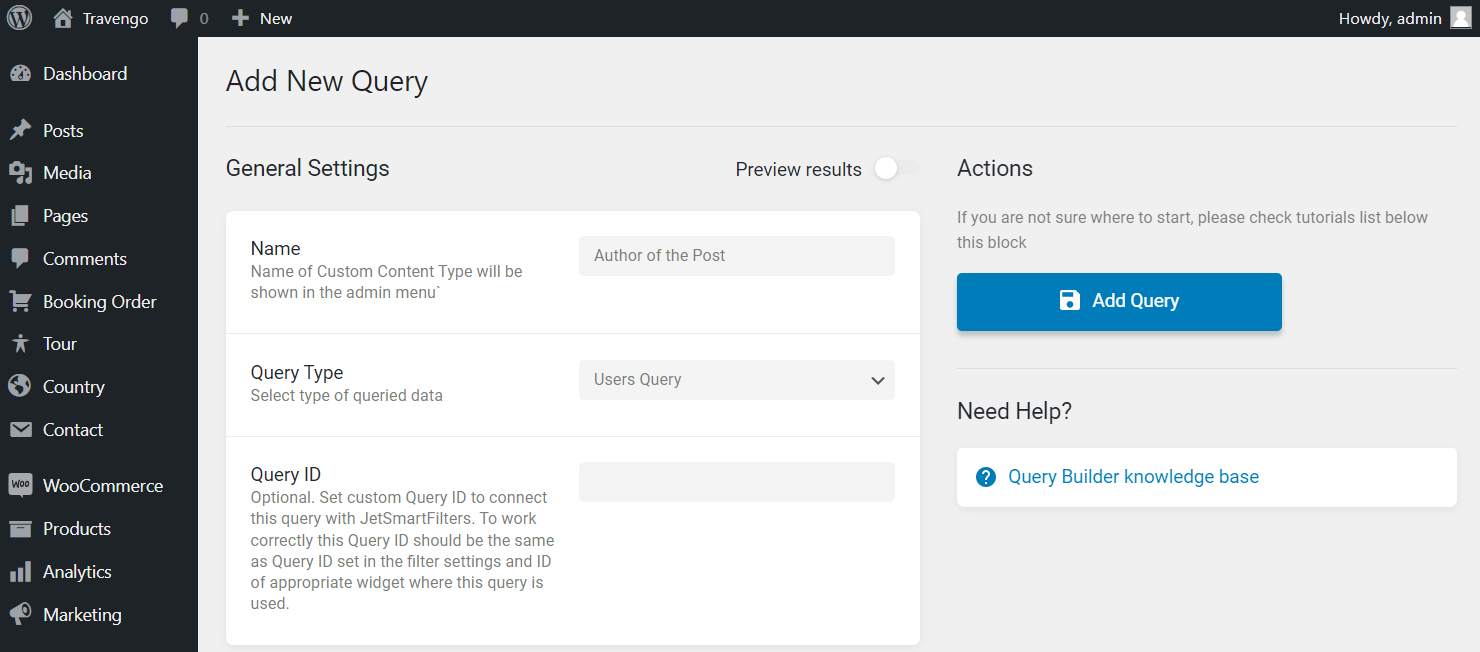
Move to JetEngine > Query Builder and push the “Add New” button.
Enter the query Name and select the “Users Query” Query Type.
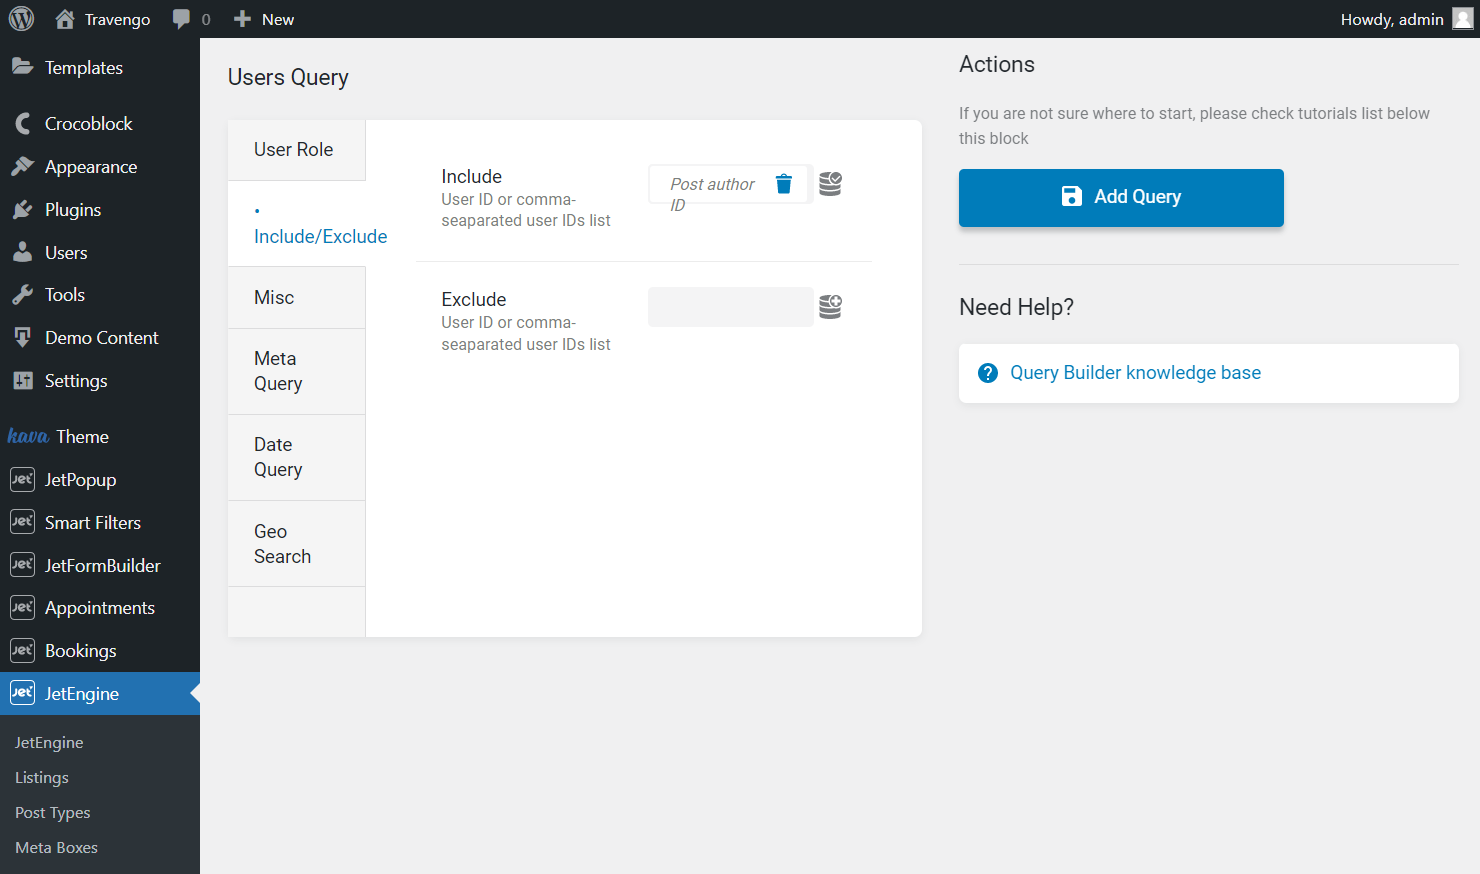
In the Include/Exclude tab, hit the macros trigger and choose the “Post author ID” macro.
You can set other query settings as needed. When you’re done, click the “Add/Update” button.
Add the user listing grid to the post listing template
Go to JetEngine > Listings and click to edit the listing template for posts or add new ones if you haven’t done it yet.
Place the Listing Grid widget or block to the page and select the users Listing in the drop-down menu.
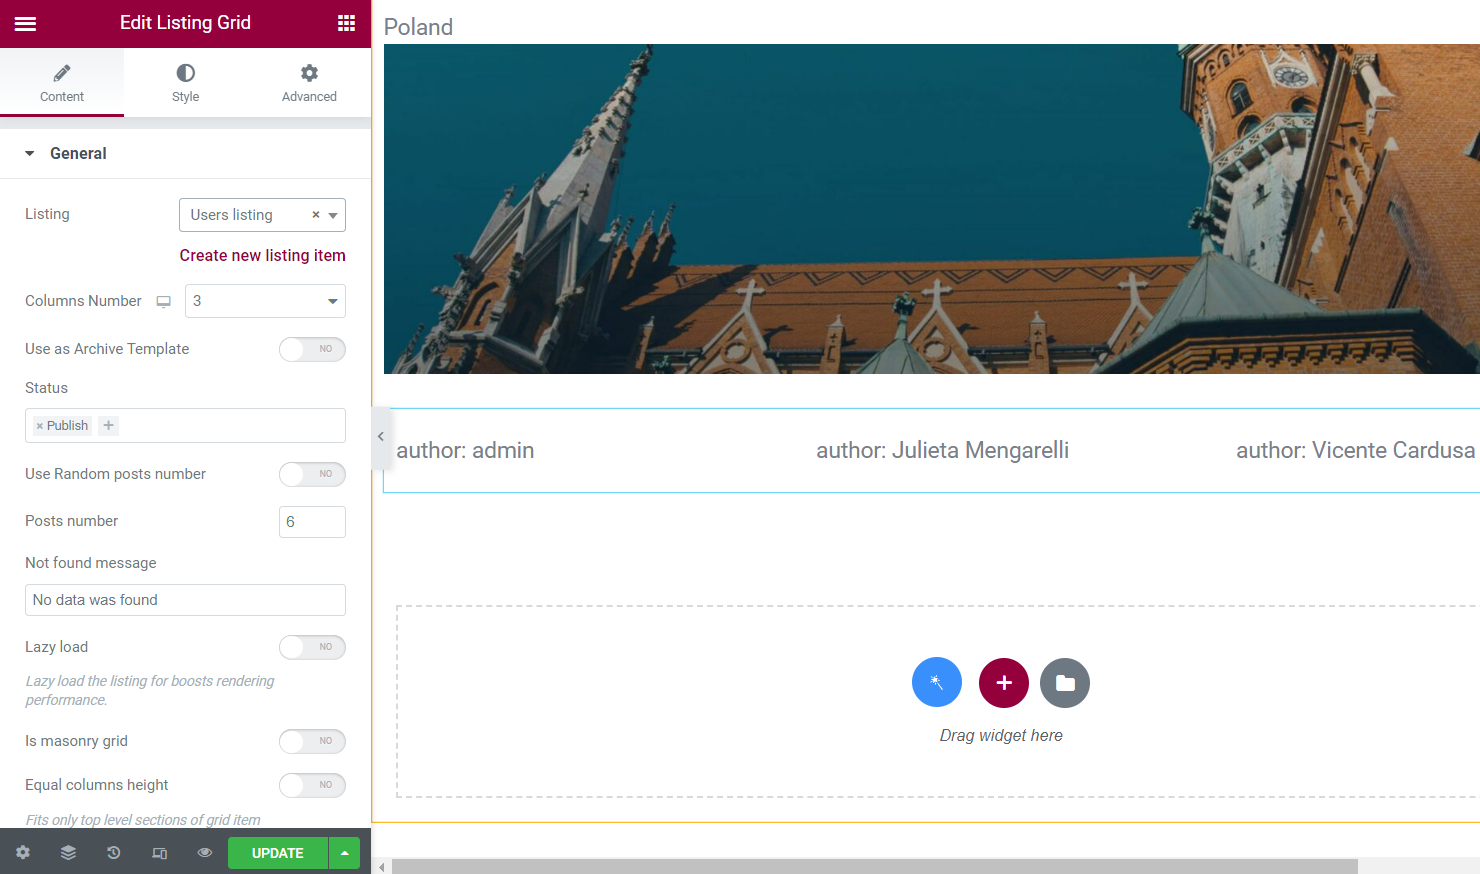
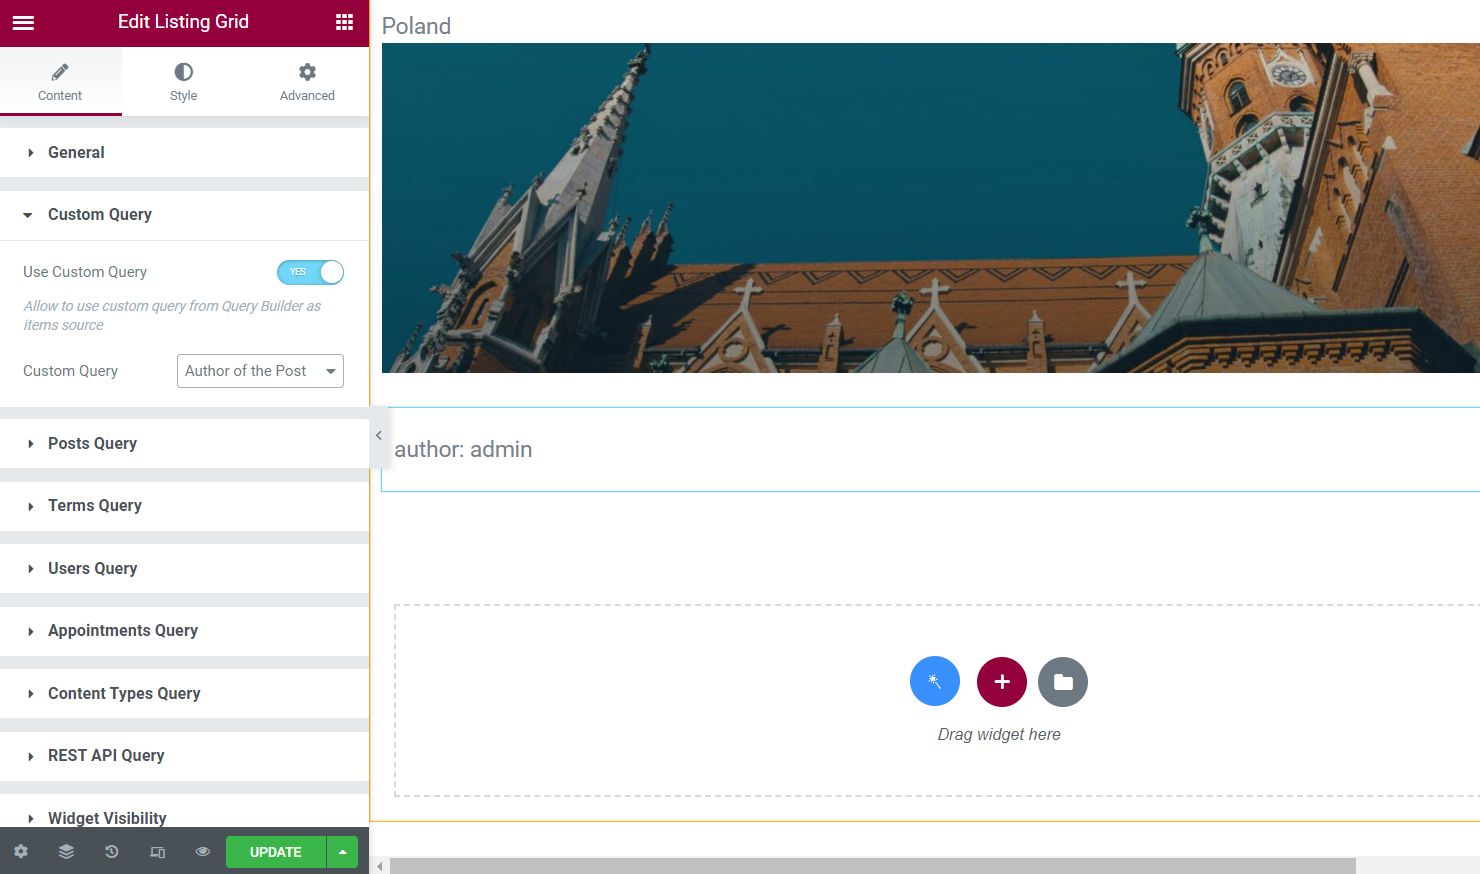
Navigate to the Custom Query tab, enable the Use Custom Query toggle and select the needed Custom Query name in the drop-down menu. Then, hit the “Update” button.
Displaying Listing Template
Add the listing grid widget
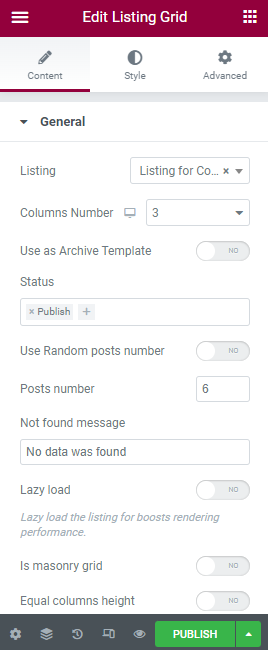
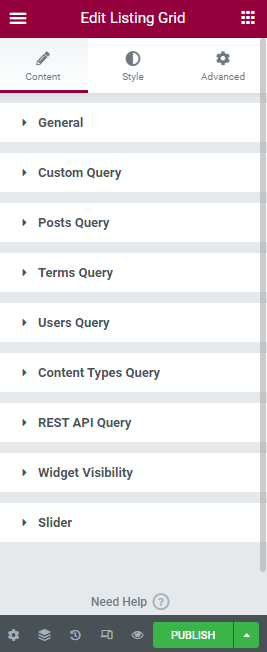
Open the page in the Elementor editor where you want to show the listing. Drag and drop the Listing Grid widget and select the listing you have just created from the dropdown. Learn more about it in the Listing Grid functionality overview.
Also, you can customize the Content and Style options of the widget right here.
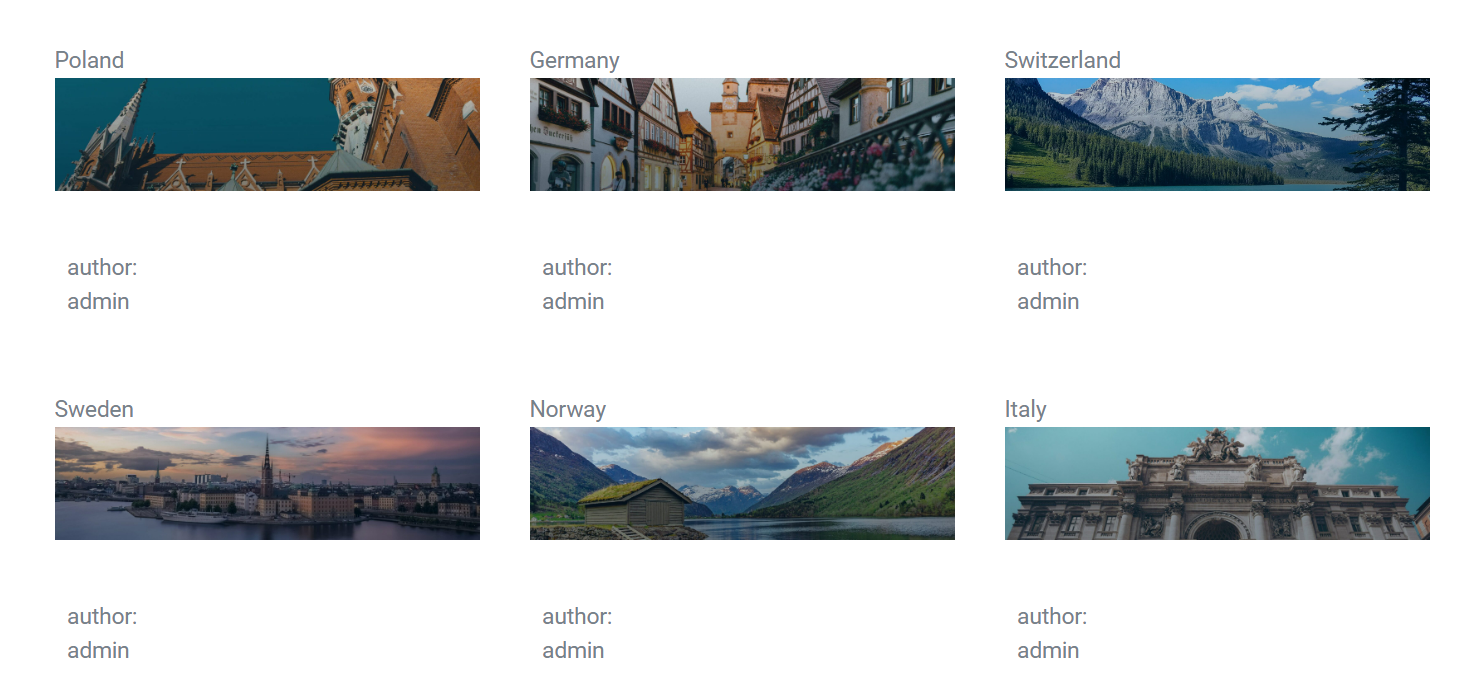
As you might have noticed, the appearance of the posts is exactly like the listing template we have created previously.
Customize the queries
You can include or exclude some posts with their ID, sort posts by ascending and descending order or create any other sorting combinations by customizing the Query according to your needs.
Check this tutorial about the Listing Grid Posts Query. To create a Custom Query, you should learn about the Query Builder.
Then update the changes, and feel free to view the page.
That is pretty much it. Now you are ready to create your listings templates, pulling dynamic content with the JetEngine plugin.