How to Import and Export Custom Content Type
Read how to import and export custom content types, items, and relations using the JetEngine plugin and WP Ultimate CSV Importer Pro plugin.
Before you start, check the tutorial requirements:
- Elementor (Free version) or Block editor (Gutenberg);
- JetEngineplugin installed and activated;
- WP Ultimate CSV Importer Pro plugin installed and activated.
Custom Content Type (CCT) import or export often is necessary while developing a site. This tutorial details the export/import of CCTs, CCT items, meta fields, categories, taxonomies, and relations associated with CCTs.
Export/Import of Custom Content Type
The JetEngine plugin proceeds the export/import of CCTs. It allows importing Custom Post Types, Taxonomies, listing items, etc., and exporting combinations of them.
JetEngine CCT module activation
Open the WordPress Dashboard and follow JetEngine > Modules >External Modules.
Move on to the Custom Content Types toggle to activate the CCT module for further import/export of CCTs. Press the “Save” button.
Selecting the necessary setting(s)
Navigate the Skins Manager tab, unroll the Export Skin tab, and tick the option(s) you need.
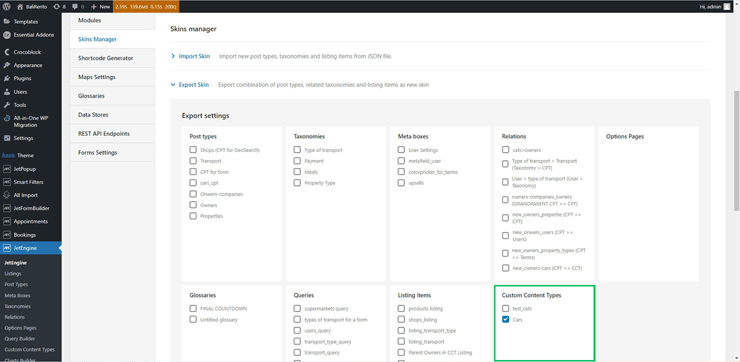
You can select the CCT(s) only or the associated data from one or some categories such as Post Types, Taxonomies, Meta Fields, etc.
Choosing a CCT
The JetEngine plugin can export one CCT item as a sample. To activate this option, scroll down the Export settings tab, move on to the Sample content toggle, and click the “Export” button.

The sample(s) of CCT will be exported as a .json file for further downloading, transferring, copying, etc.
Import of the CCT
To import the CCT, move JetEngine > Skins Manager > Import Skin, add the necessary .json file, and click on the “Import” button.
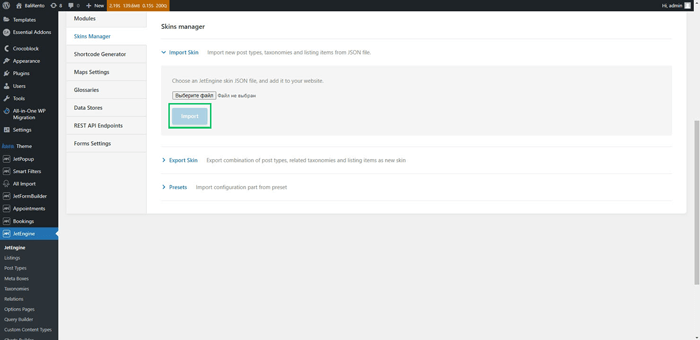
This way is appropriate for importing or exporting the CCT, its settings, and meta fields, but not the CCT Items.
Export/Import of Custom Content Type Items
To export items, the WP Ultimate CSV Importer plugin was used.
Export items
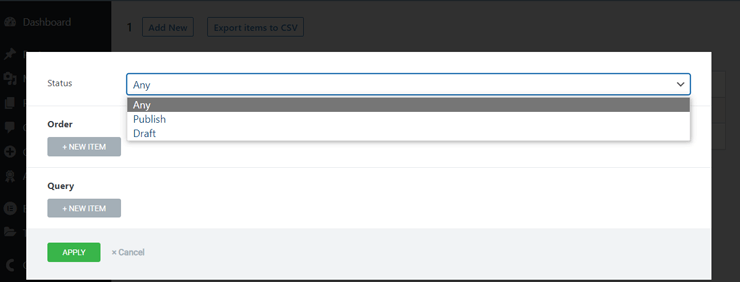
To export the Custom Content Type items, navigate to the CCTs tab and press the “Export Items to CSV” button to start uploading.

Adding attributes for exporting items
Fill in the form for exporting the item: select its Status from the drop-down menu, add Order, Query.
To import CCT items, use the WordPress Ultimate CSV Importer plugin.
Read the tutorial to learn more about Data Import and Export with WP Ultimate CSV Importer Pro.
Uploading files
Navigate to the WP Ultimate CSV Importer plugin’s tab of the WordPress Dashboard, and click the Import/Export tab.
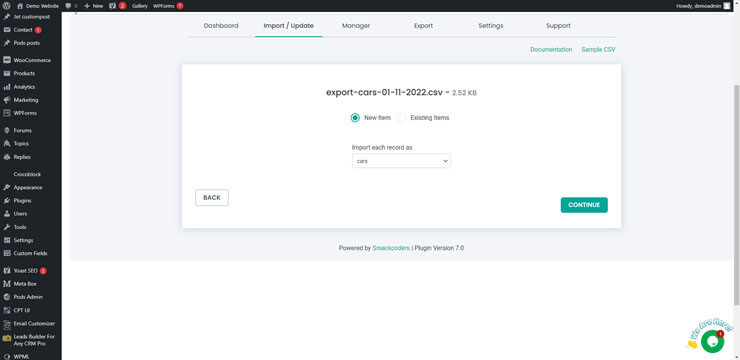
Choose a file you need and press the “Upload from Desktop” button.
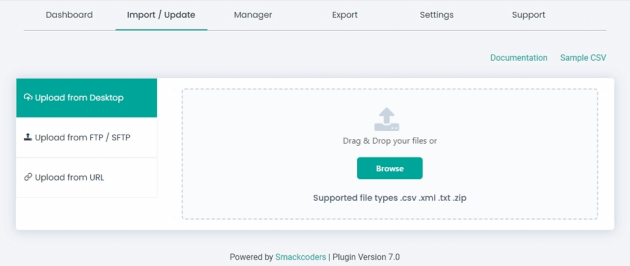
Select the CCT from the drop-down list.
Checking the meta fields match
On the next page, make sure the meta fields from your file and your CCT match.
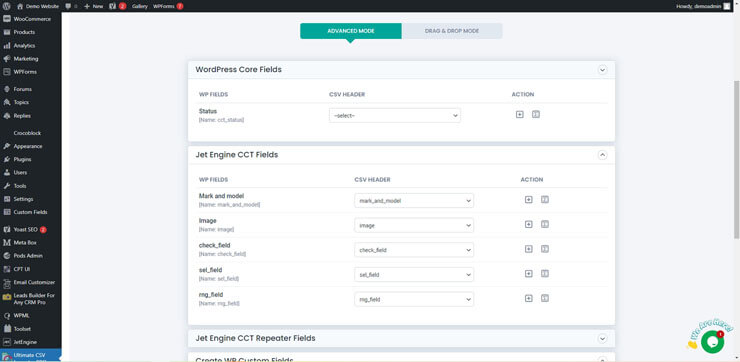
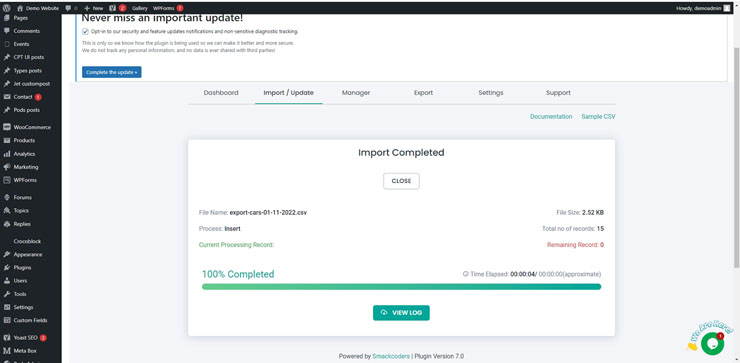
If everything is correct, click the “Next” button. The plugin will redirect to the page indicating the download and its completion.
Export/Import of Taxonomies and Relations
Customization of taxonomies
Since the CCT does not set up taxonomies, use a relation between the CCT item and the taxonomy to customize them.

Follow the Related Custom Content Type Items tutorial to learn more details on how to build relations with CCT items.
The JetEngine one to one & one to many relations import export – CSV Importer video explains how to export/import relations.
That’s all about importing and exporting of Custom Content Types.