How to Create an Archive Page Template for the Custom Taxonomy
Get to know how to create an Archive Page template for the JetEngine custom taxonomy to display it in the form of a listing with the help of the Listing Grid widget.
With JetEngine and JetThemeCore plugins, you can create an Archive Page template even for the custom taxonomy. That’s an opportunity to style posts dedicated to each taxonomy and the specific terms of this taxonomy.
How to Create an Archive Page Template in the Elementor Editor
Creating a listing template for an archive
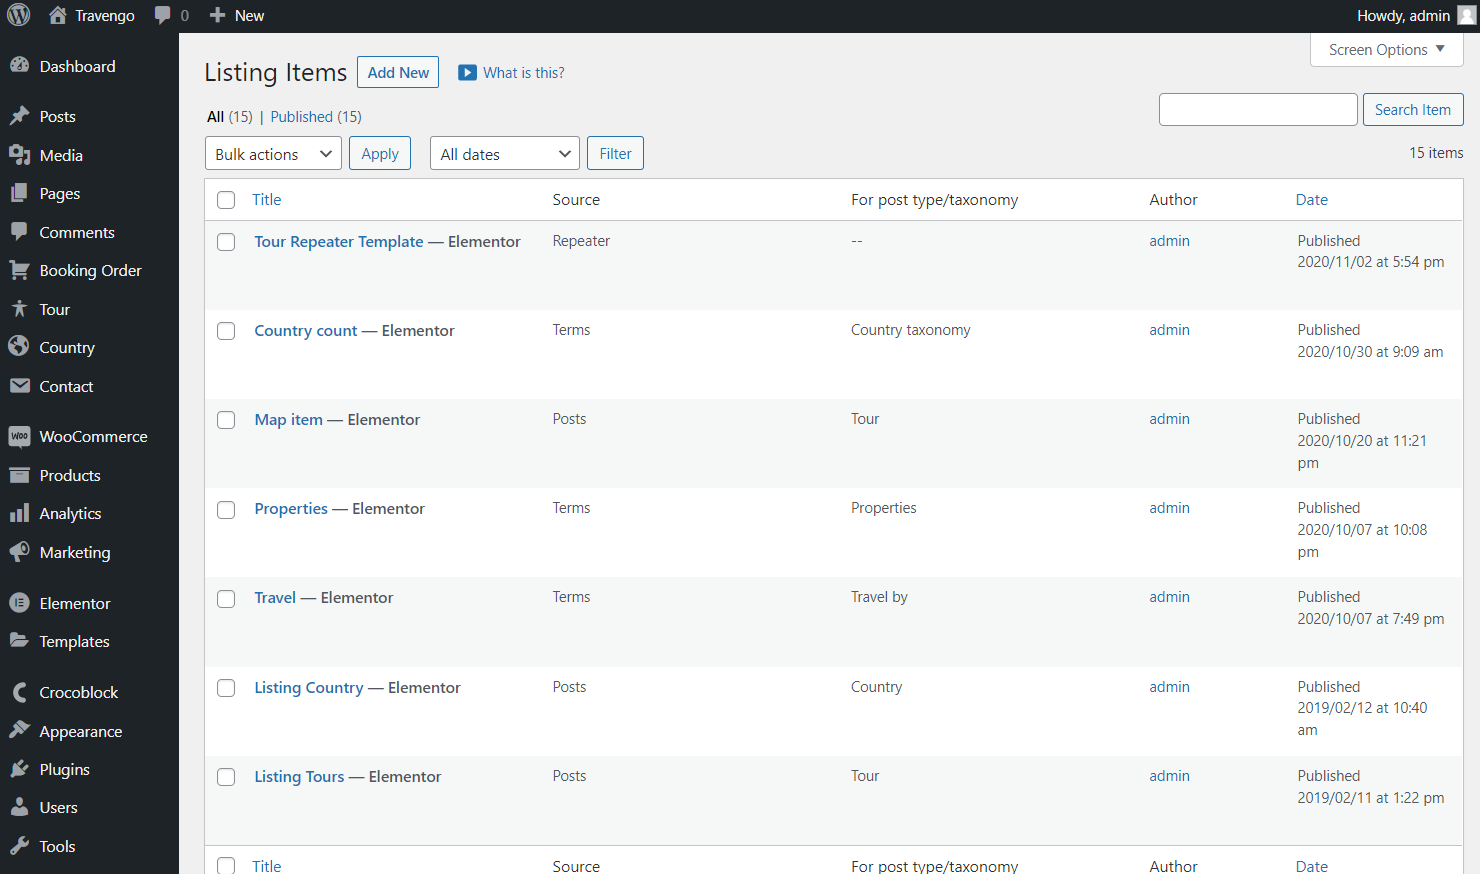
The first thing you should do is create a listing template for the taxonomy. Go to JetEngine > Listings and click on the “Add New” button.
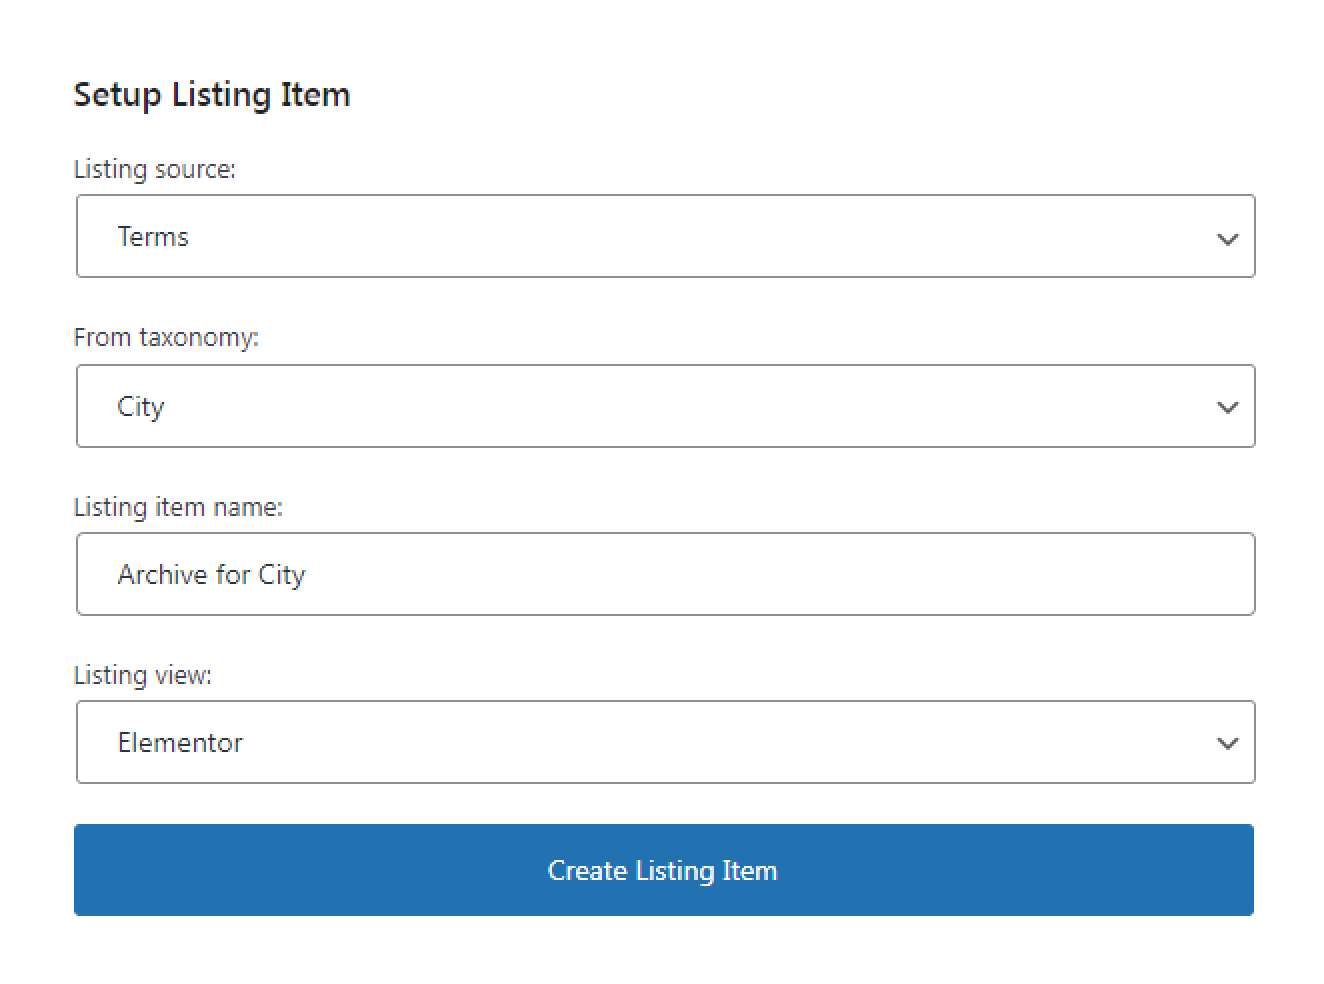
In the pop-up window, select “Terms” in the Listing source field.
Then, choose a taxonomy for which you need to create an archive. In my case, it is the “City.”
Select the “Elementor” editor in the Listing view field.
Type the Listing item name and click the “Create Listing Item” button.
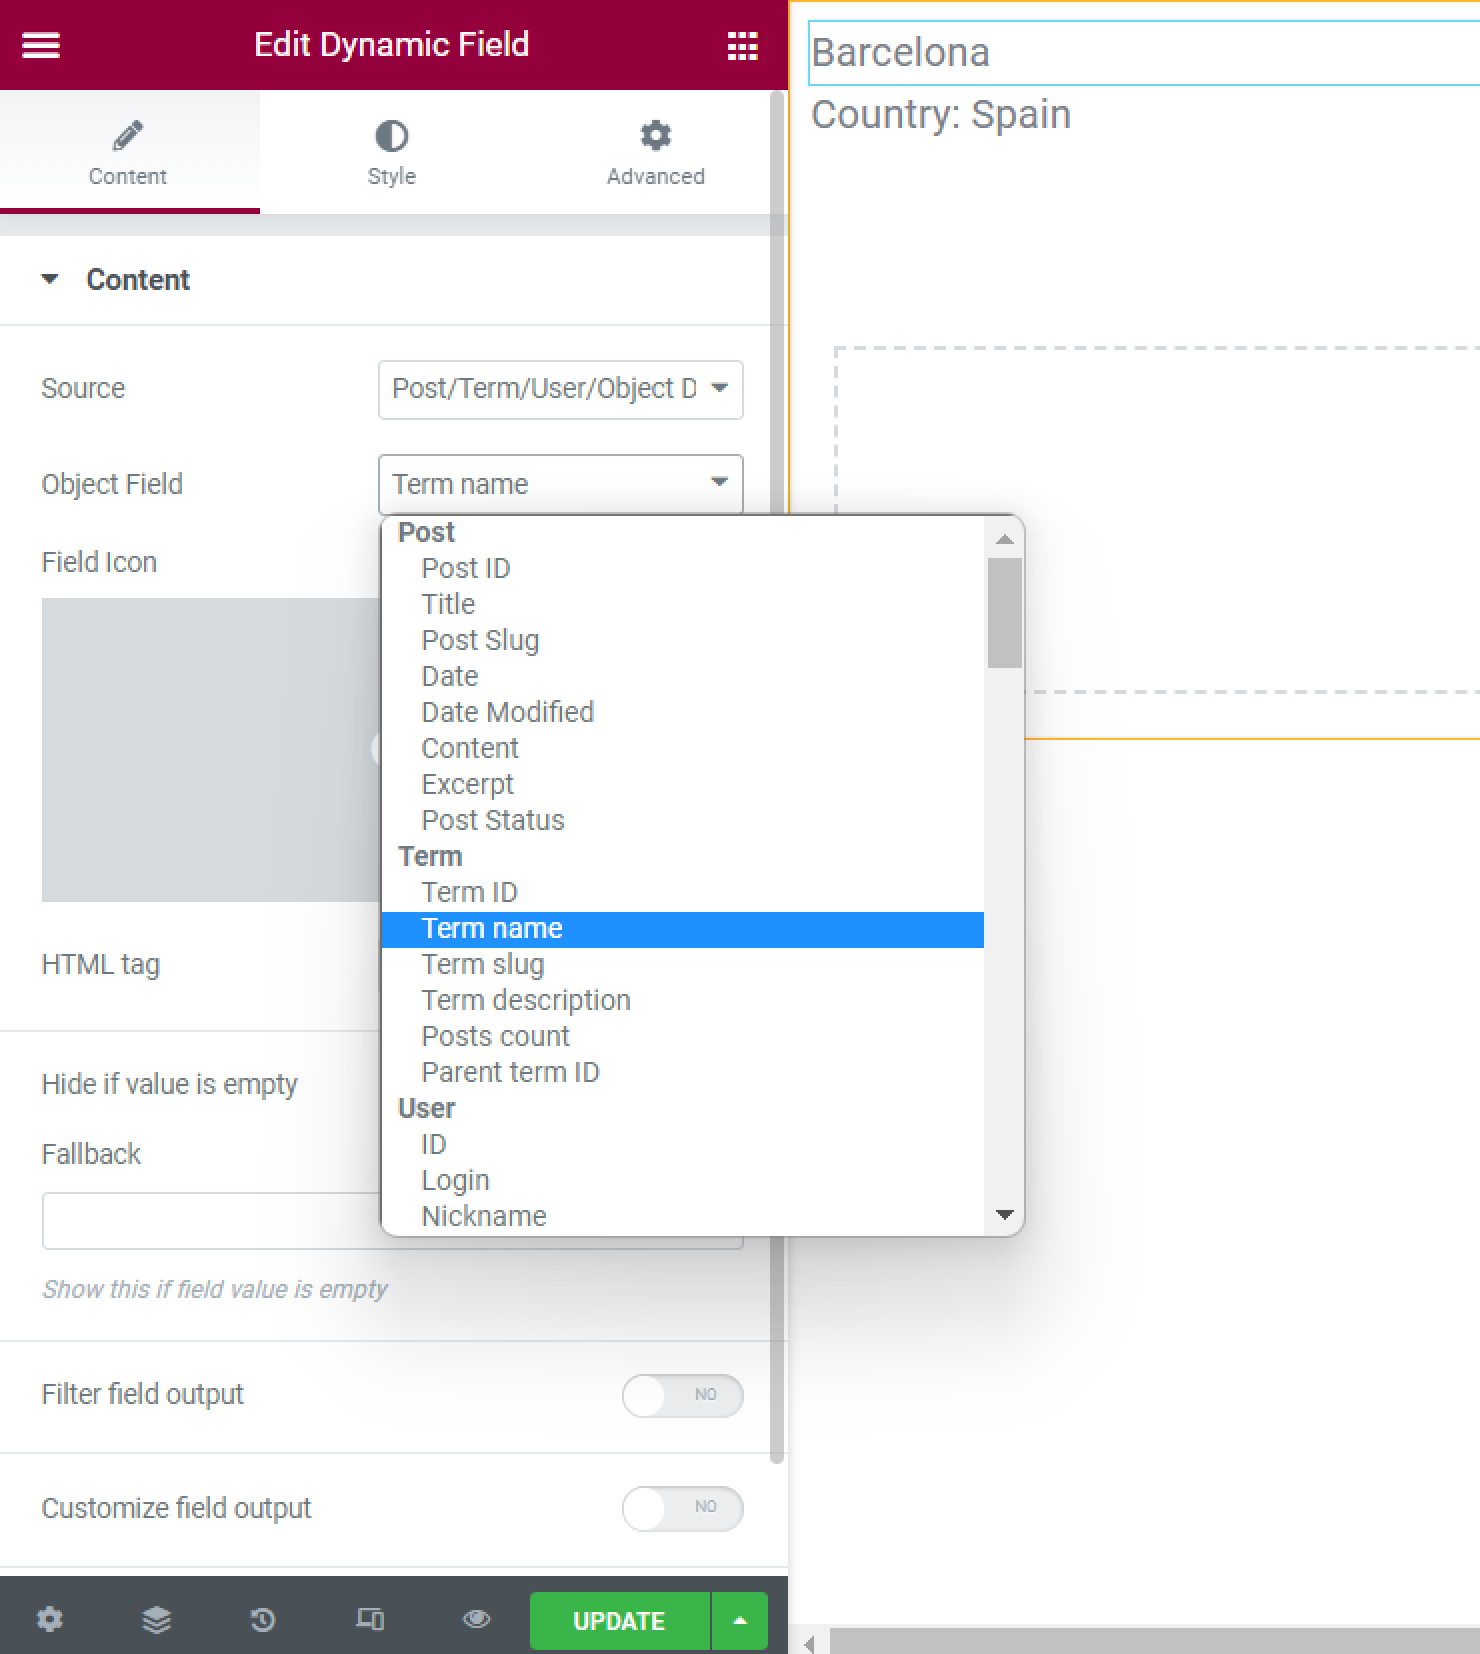
In the Elementor editor, you need to drag and drop Dynamic Widgets to create a template for the chosen taxonomy.
In my case, I need to display the term name, description, and image. So I drop the Dynamic Field widget twice, and in the Object Field block, select “Term name” in the first widget and “Term description” in the second.
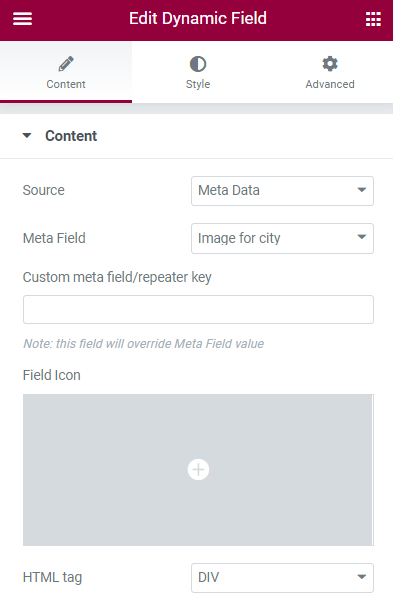
Also, I drag the Dynamic Field widget once again and select the “Meta Data” option in the Source field. Then, select the needed Meta Field. In my case, it is Image.
Take into consideration that for the image that can be displayed, you should enable the Filter field output option. Then, select the “Get image by ID” option from the Callback dropdown.
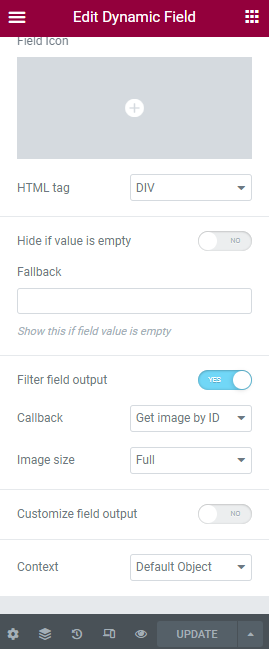
Finally, click the “Publish/Update” button and go back to the Dashboard.
Creating an archive page template for the taxonomy
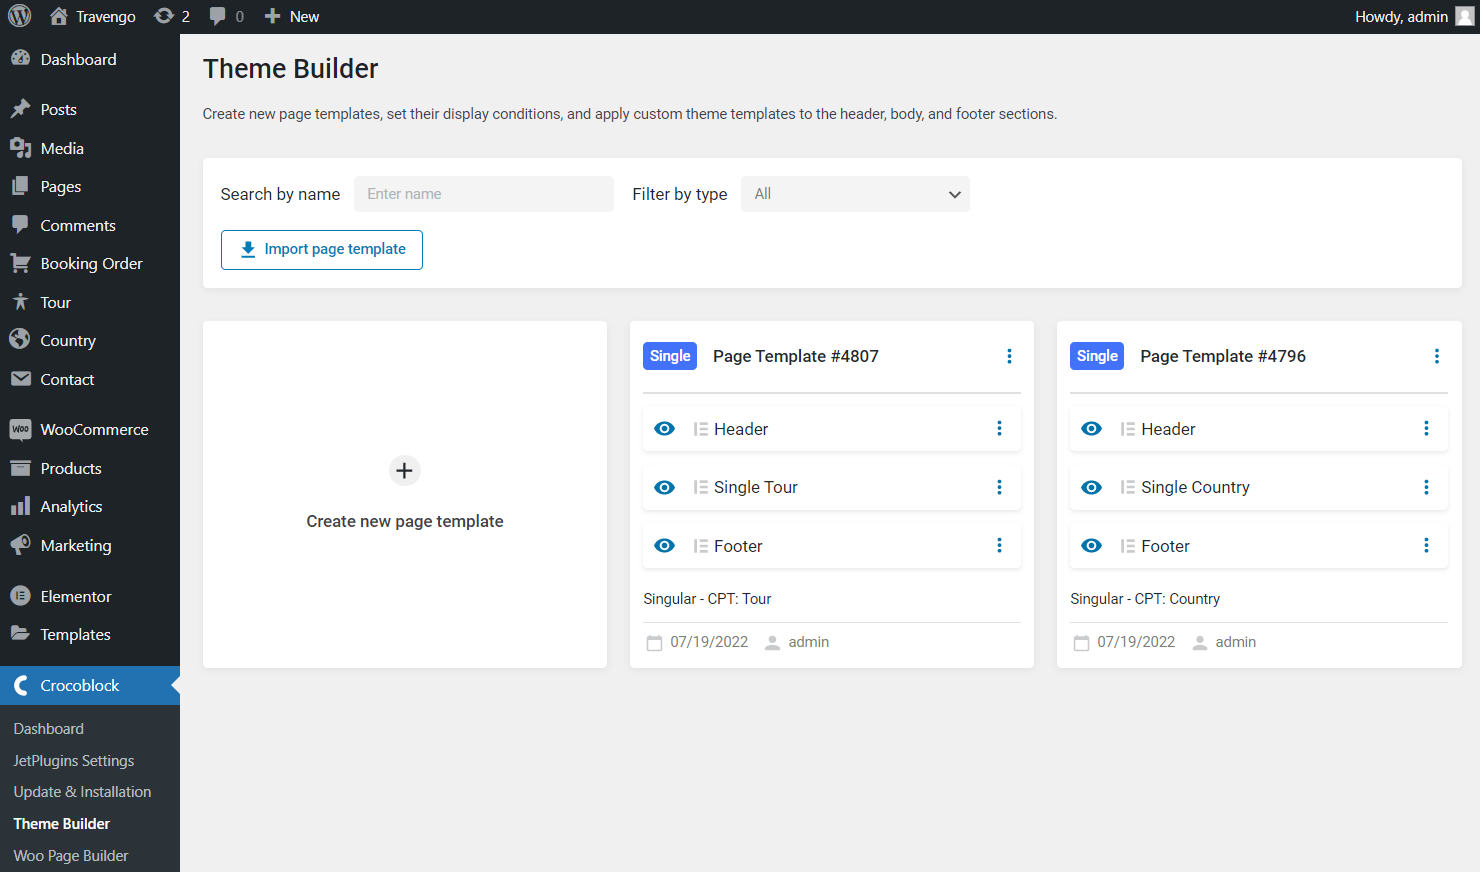
Go to the Crocoblock > Theme Builder tab on the WordPress Dashboard and hit the “Create new page template” button.
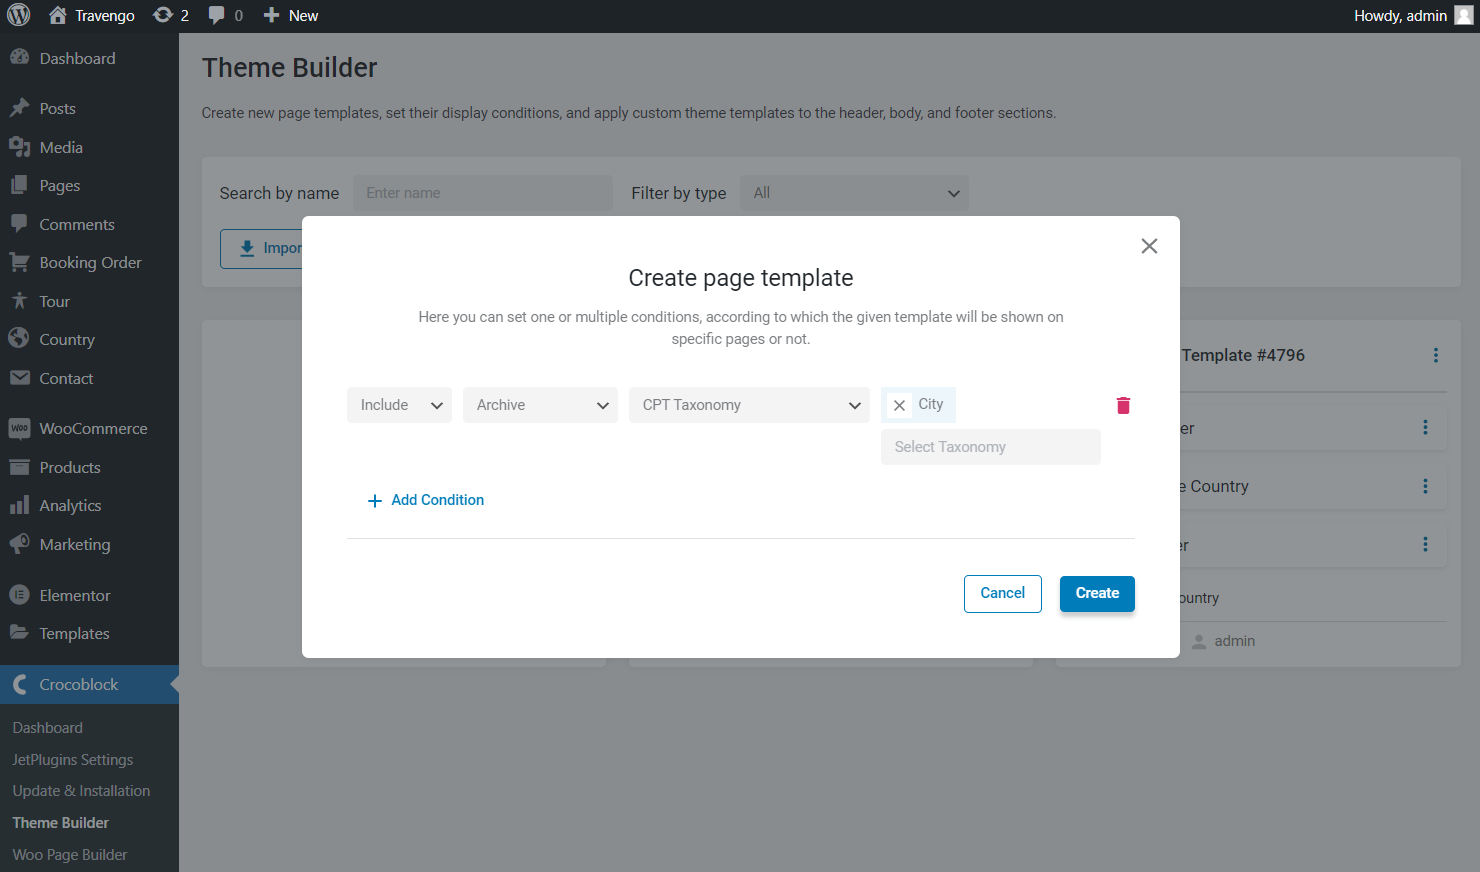
In the appeared pop-up, click the “Add Condition” button, select the “Include,” “Archive,” and “CPT Taxonomy” conditions, and in the last drop-down menu, choose the needed taxonomy. Then, hit the “Create” button.
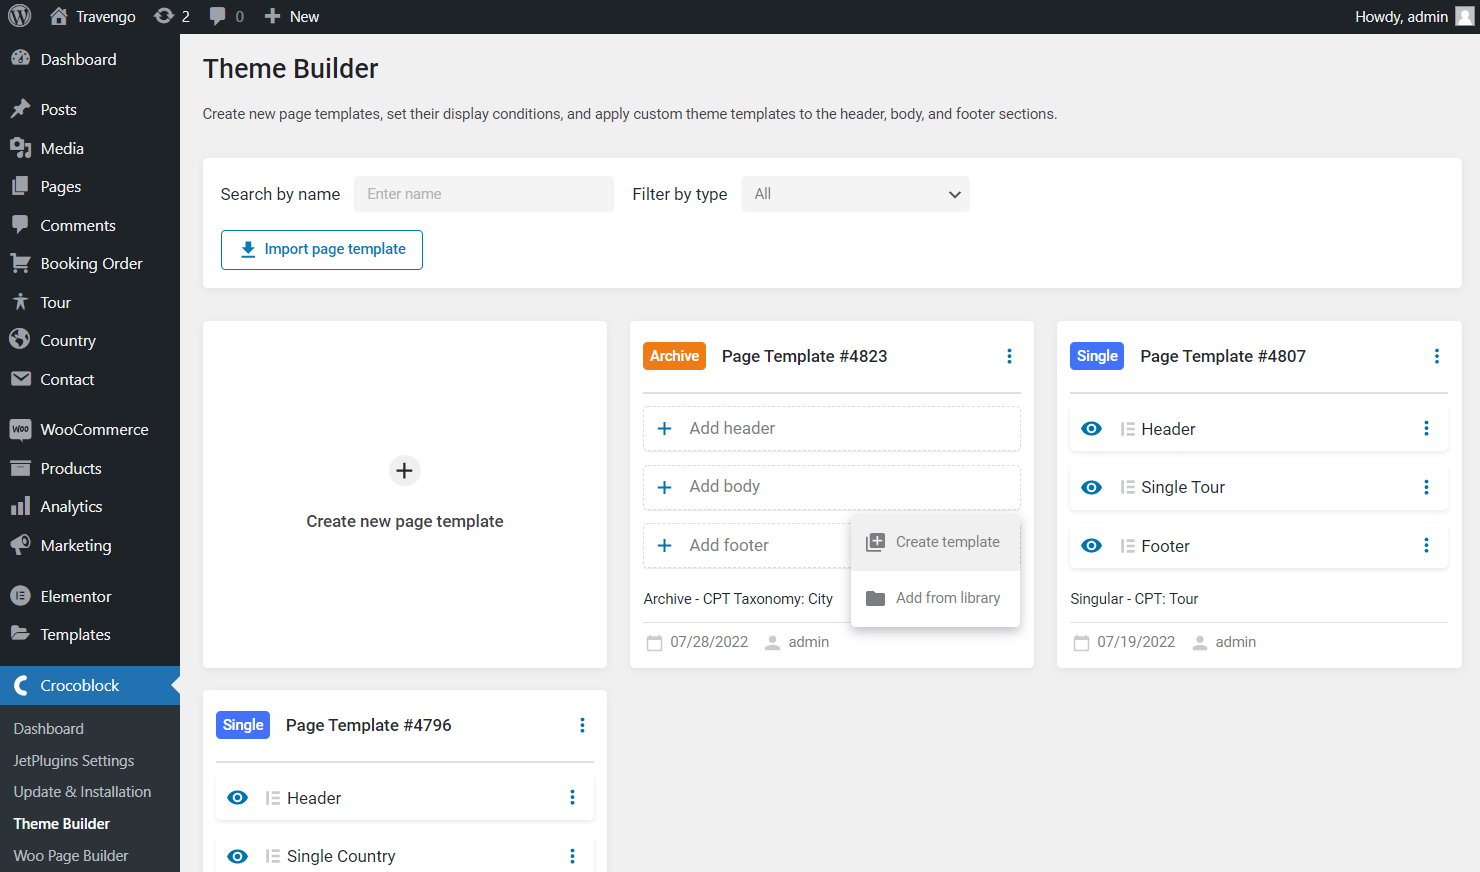
In the newly created page template, push the “Add body” and “Create template” buttons.
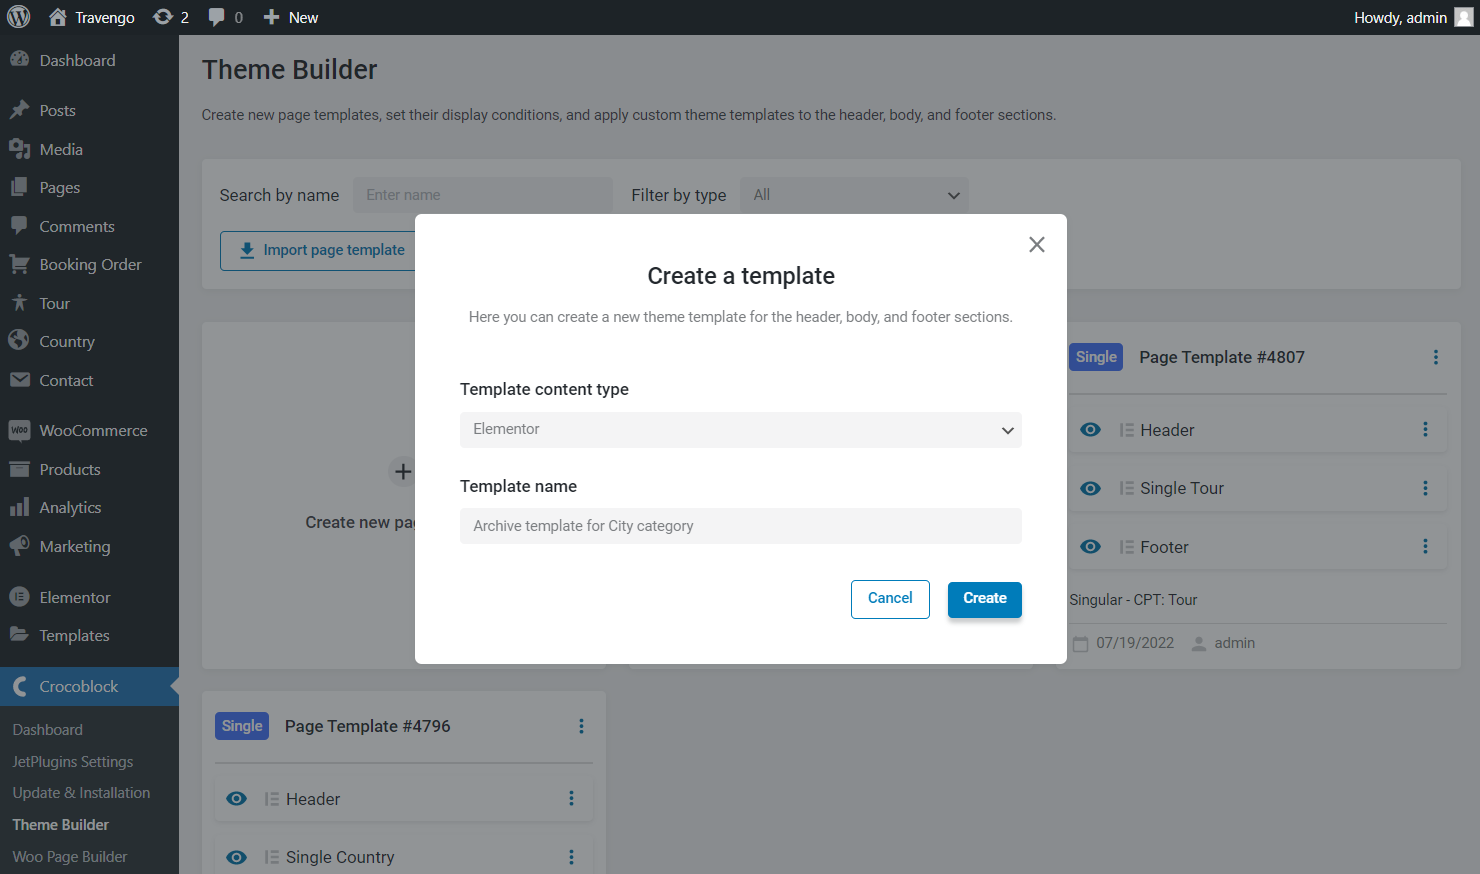
In the pop-up, select the “Elementor” Template content type, enter the Template name and press the “Create” button.
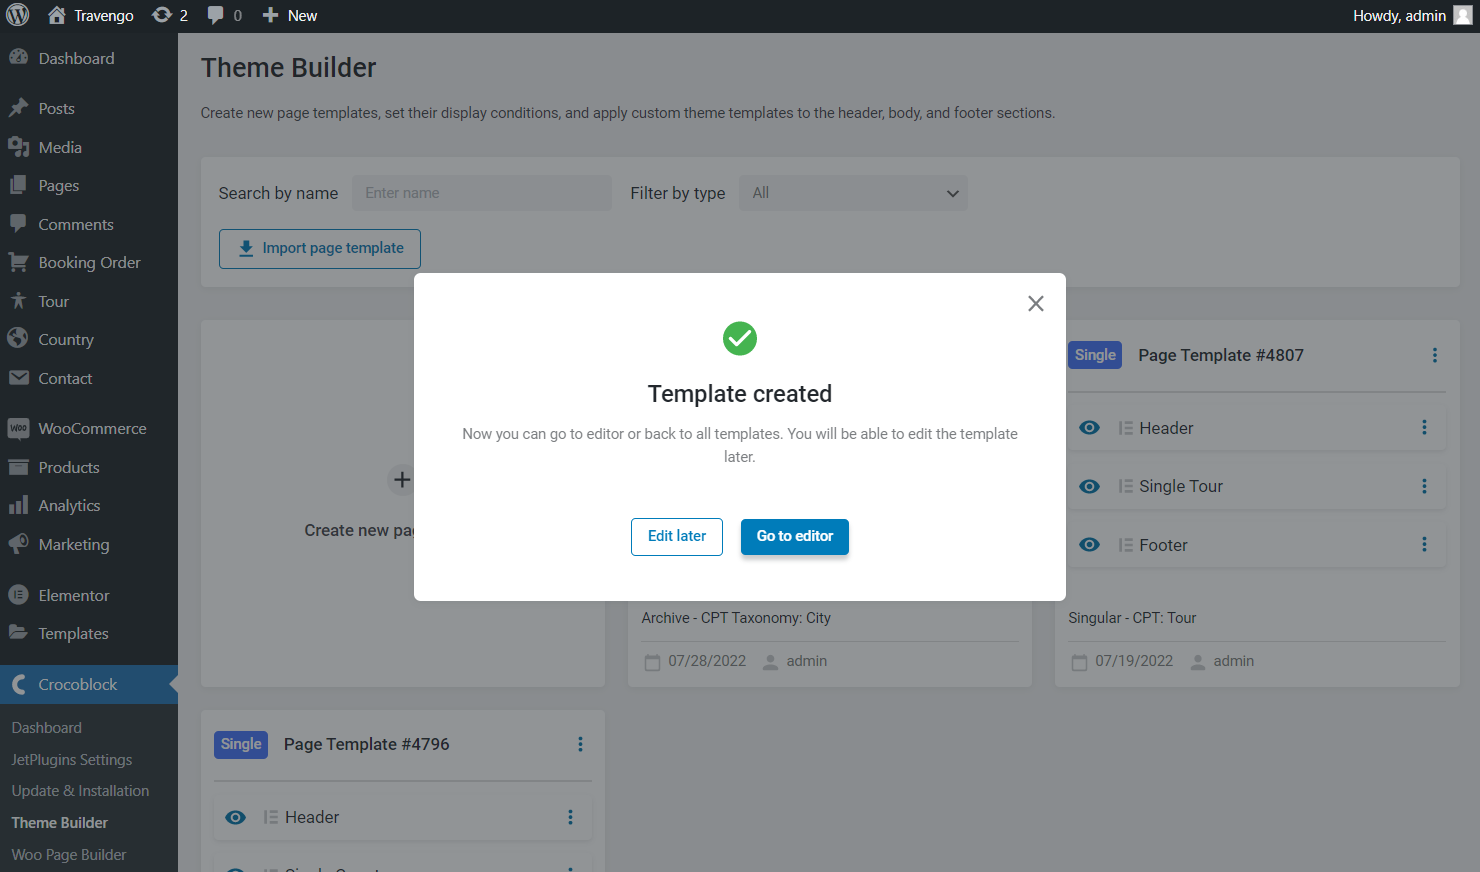
In the next pop-up, push the “Go to editor” button.
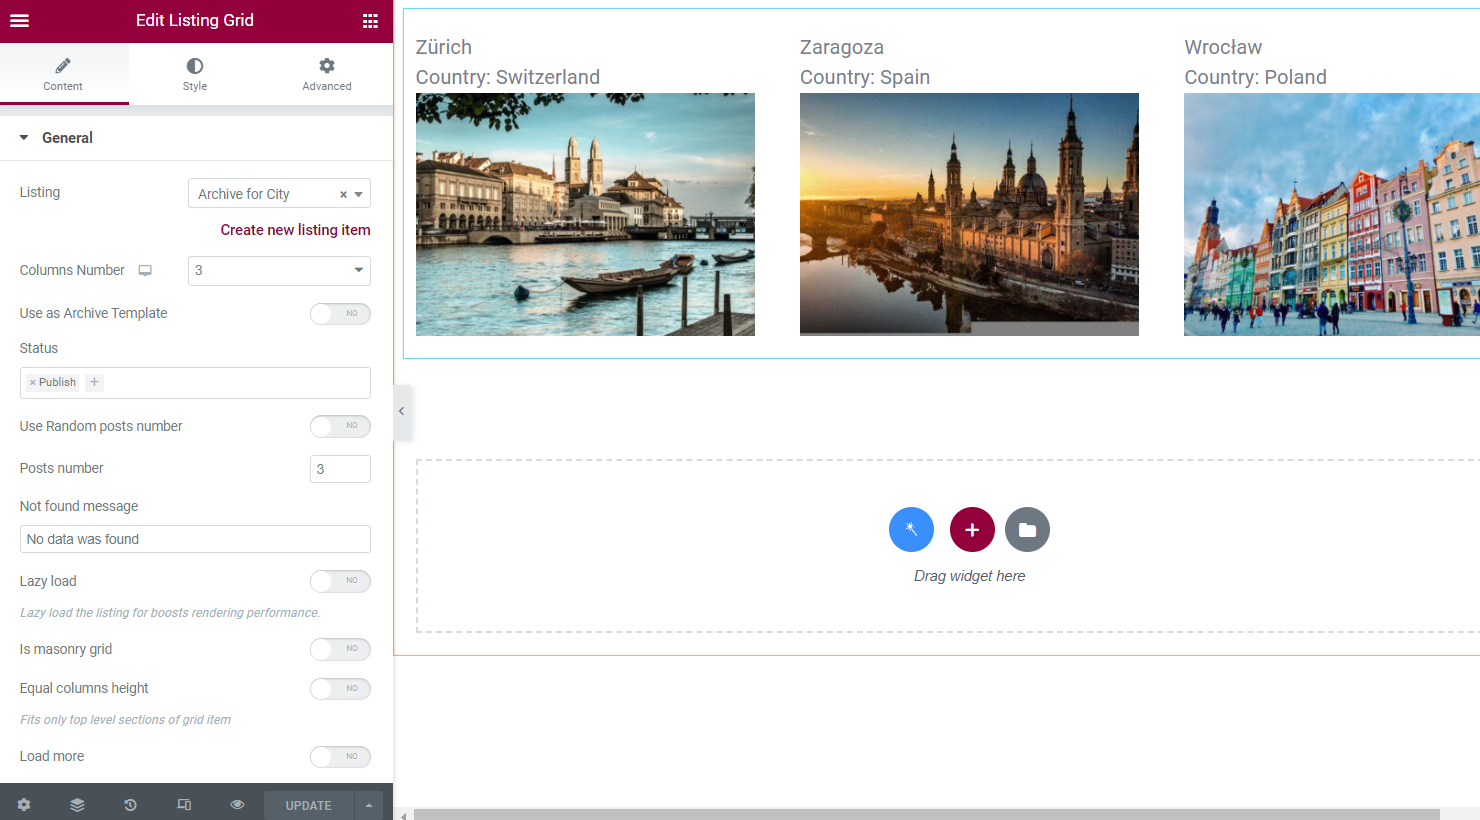
Place the Listing Grid widget on the archive template and pick the needed Listing from the drop-down menu. Customize the Listing Grid settings whatever you want and hit the “Publish/Update” button.
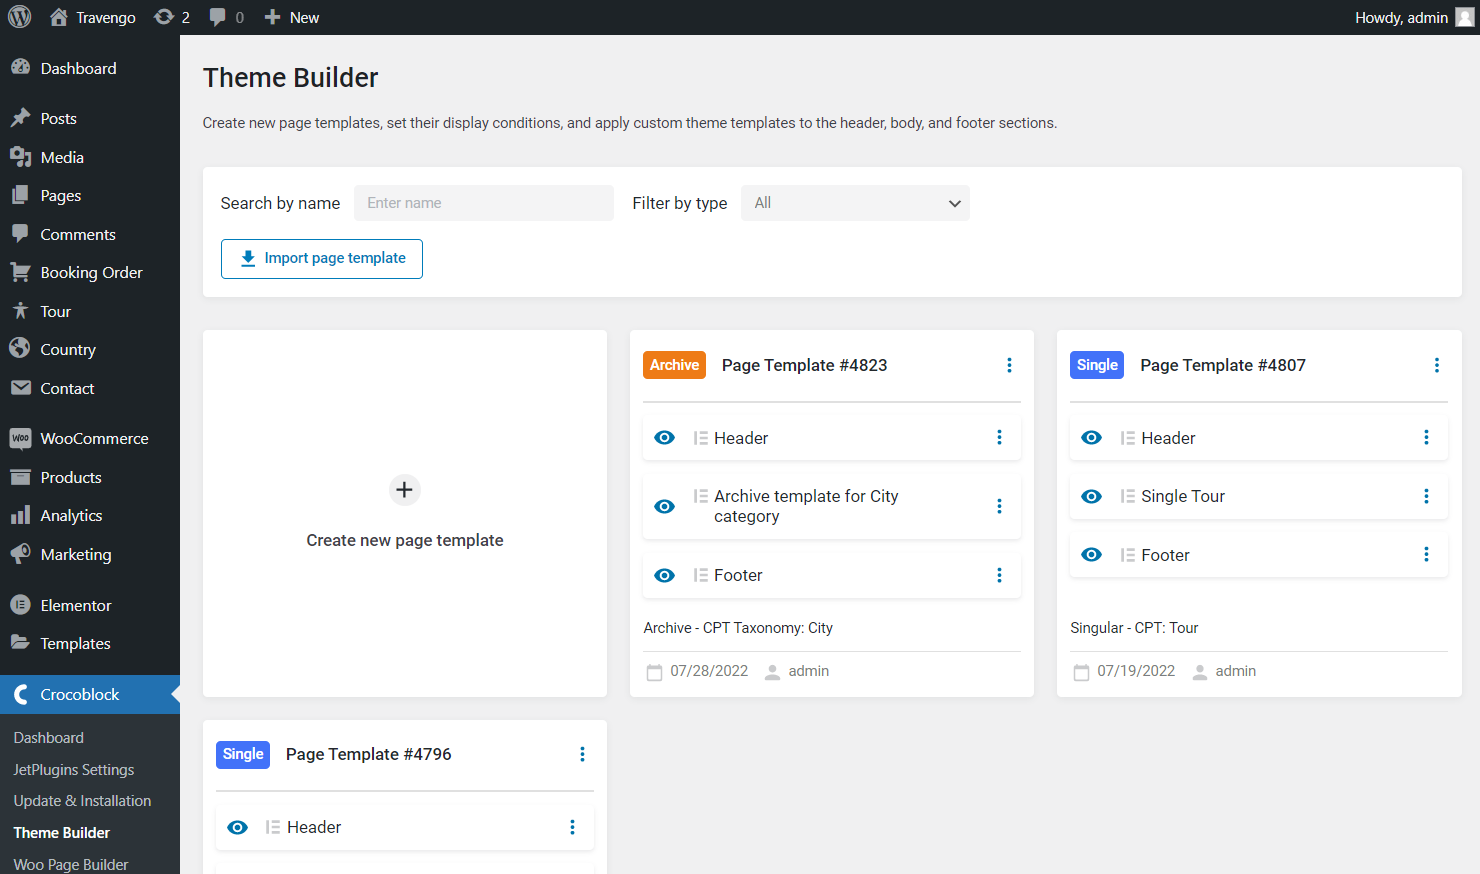
Return to Crocoblock > Theme Builder and add the header and footer to the Archive Page template. You can add already created templates from the library or create new ones.
Observe the Archive Page template on the front end.

How to Create an Archive Page Template in the Gutenberg (Block) Editor
Creating a listing template for an archive
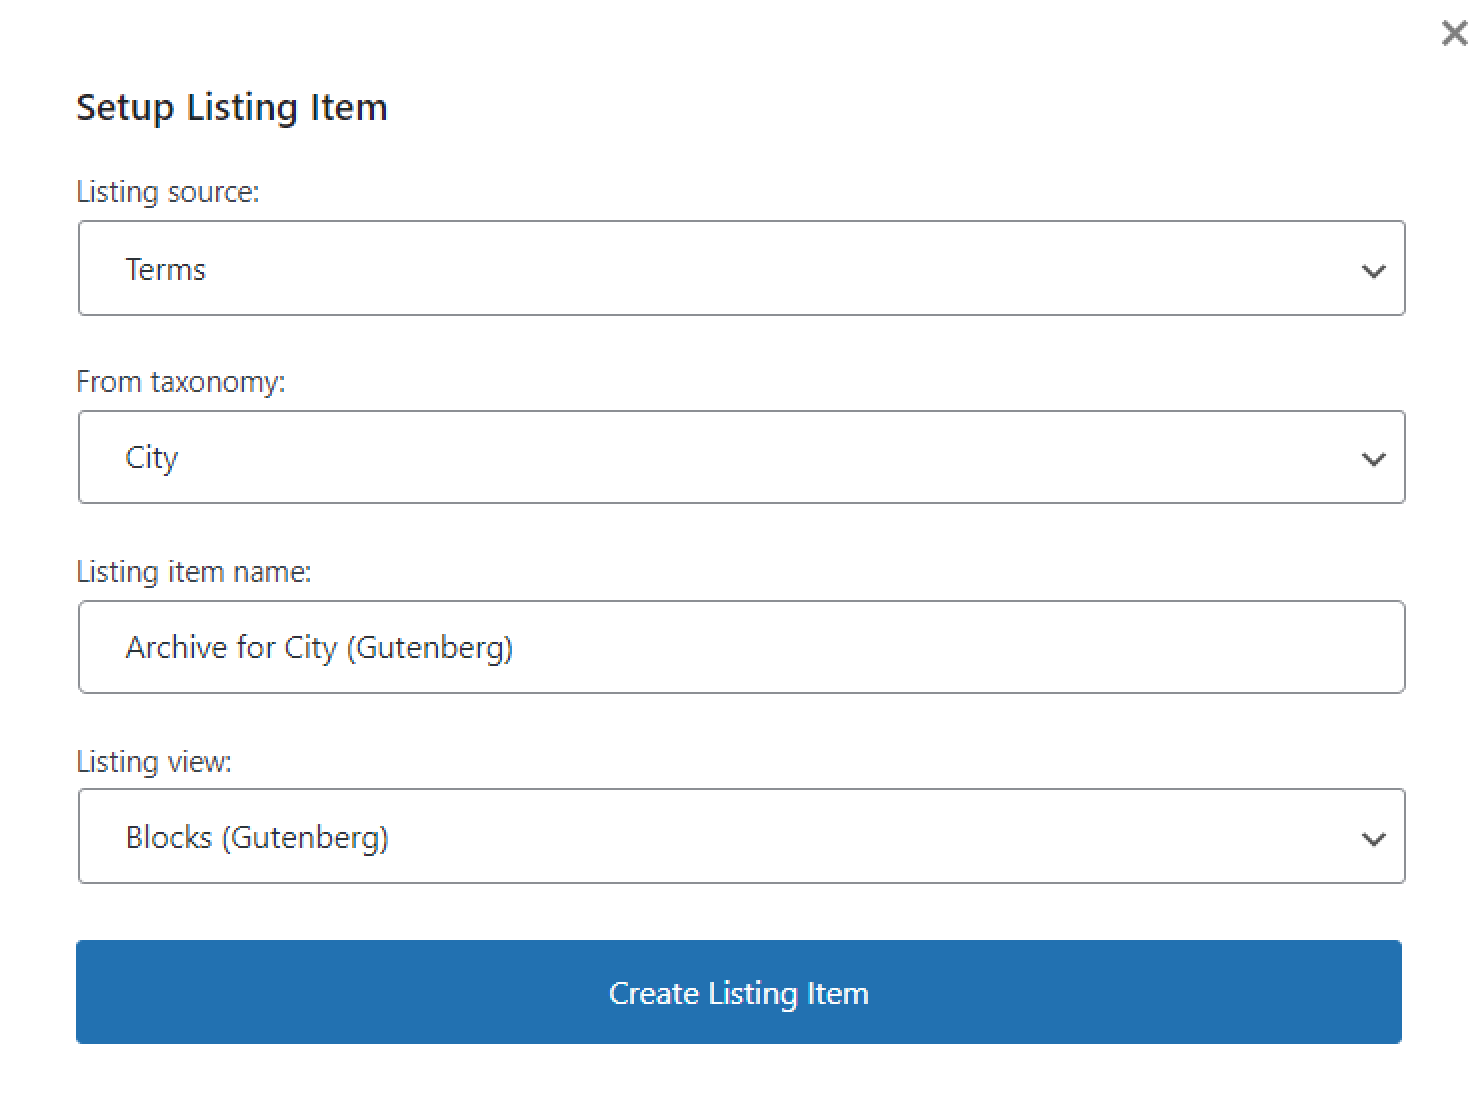
The first thing you should do is create a listing template for the taxonomy. Go to JetEngine > Listings and click on the “Add New” button.
In the pop-up window, select “Terms” in the Listing source field. Then, choose a taxonomy for which you need to create an archive. In my case, it is the “City.”
Select the “Blocks (Gutenberg)” editor in the Listing view field. Type the Listing item name and click the “Create Listing Item” button.
In the Gutenberg editor, you need to drag and drop Dynamic Blocks to create a template for the chosen taxonomy.
In my case, I need to display the term name, description, and image. So I drop the Dynamic Field block twice, and in the Object Field block, select “Term name” in the first widget and “Term description” in the second.
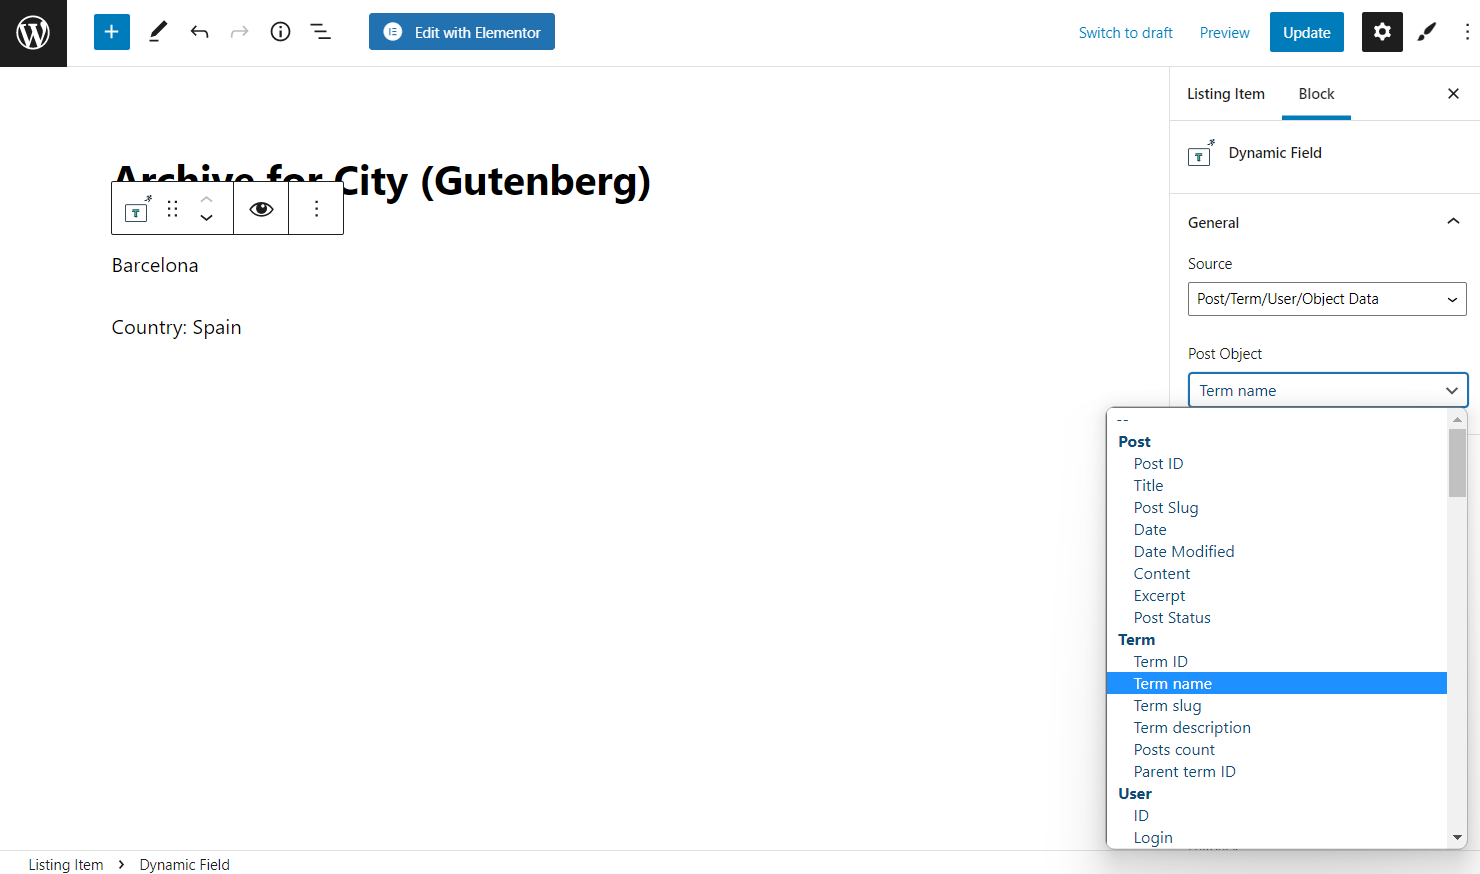
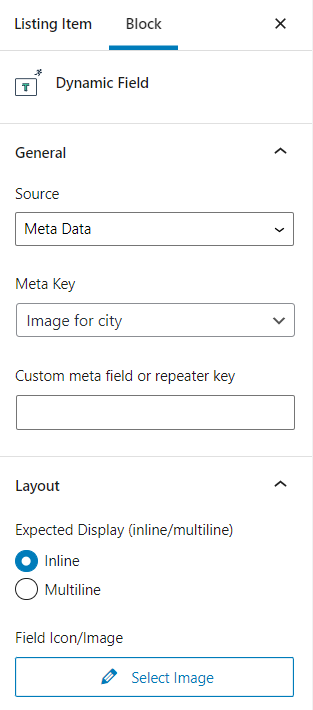
Also, I drag the Dynamic Field widget once again and select the “Meta Data” option in the Source field. Then, select the needed Meta Field. In my case, it is Image.
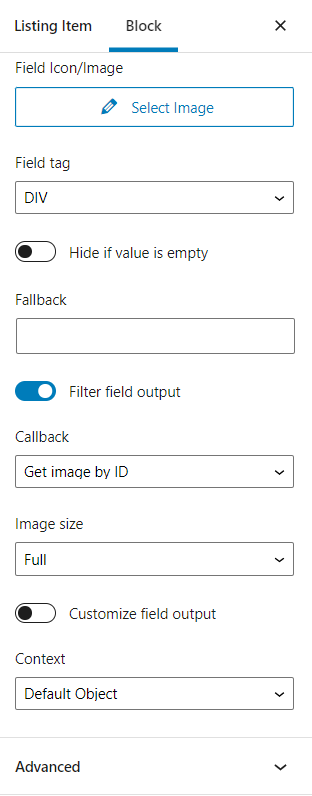
Take into consideration that for the image that can be displayed, you should enable the Filter field output option. Then, select the “Get image by ID” option from the Callback dropdown.
Finally, click the “Publish/Update” button and go back to the Dashboard.
Creating an Archive Page template for the Taxonomy
Go to the Crocoblock > Theme Builder tab on the WordPress Dashboard and hit the “Create new page template” button.

In the appeared pop-up, click the “Add Condition” button, select the “Include,” “Archive,” and “CPT Taxonomy” conditions, and in the last drop-down menu, choose the needed taxonomy. Then, hit the “Create” button.

In the newly created page template, push the “Add body” and “Create template” buttons.

In the pop-up, select the “Block Editor” Template content type, enter the Template name and press the “Create” button.
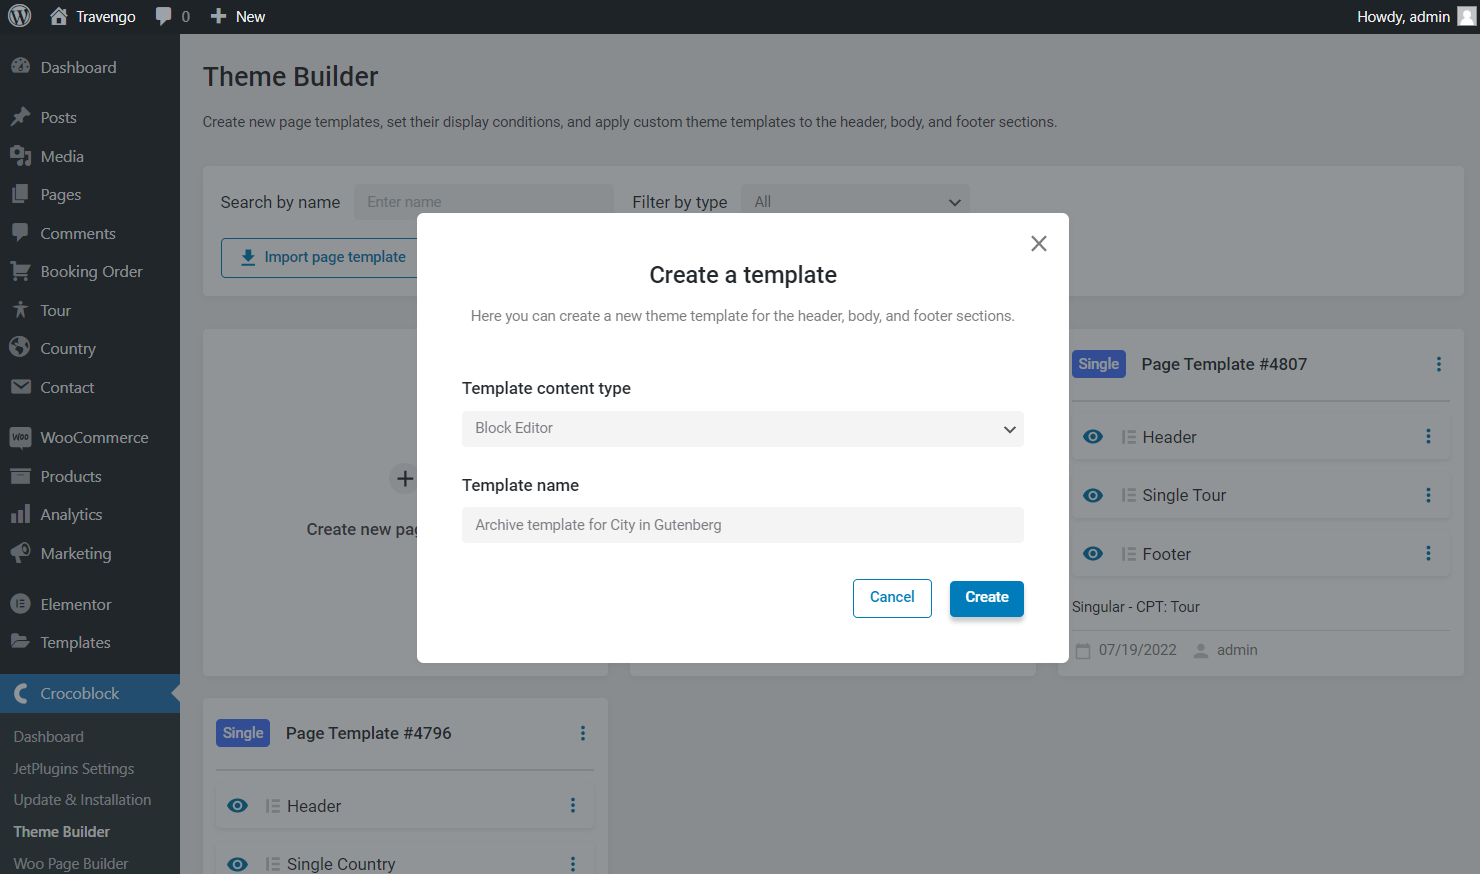
In the next pop-up, push the “Go to editor” button.

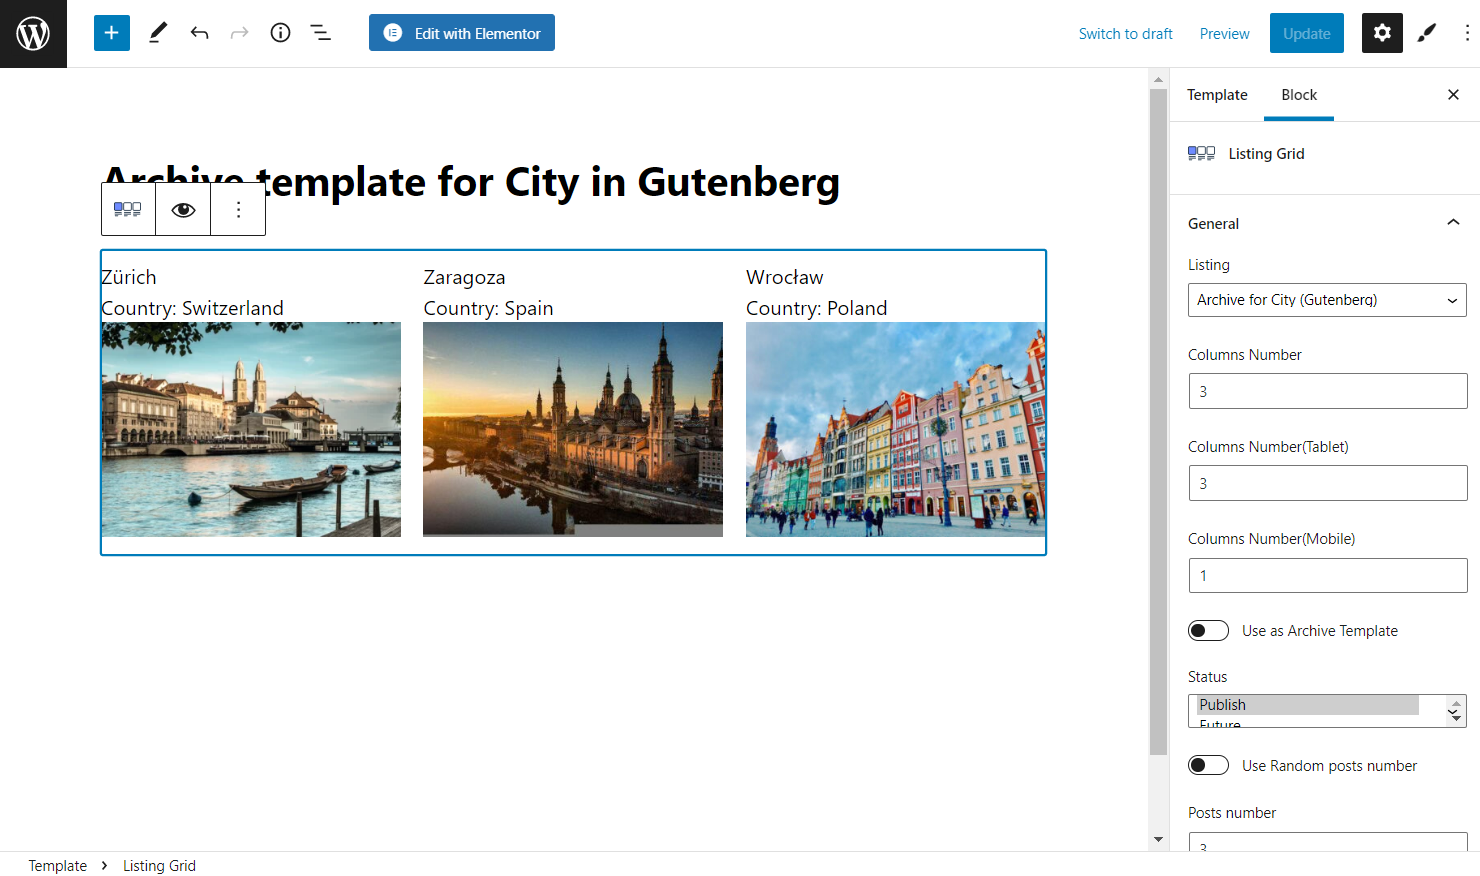
Place the Listing Grid block on the archive template and pick the needed Listing from the drop-down menu. Customize the Listing Grid settings whatever you want and hit the “Publish/Update” button.
Return to Crocoblock > Theme Builder and add the header and footer to the Archive Page template. You can add already created templates from the library or create new ones.
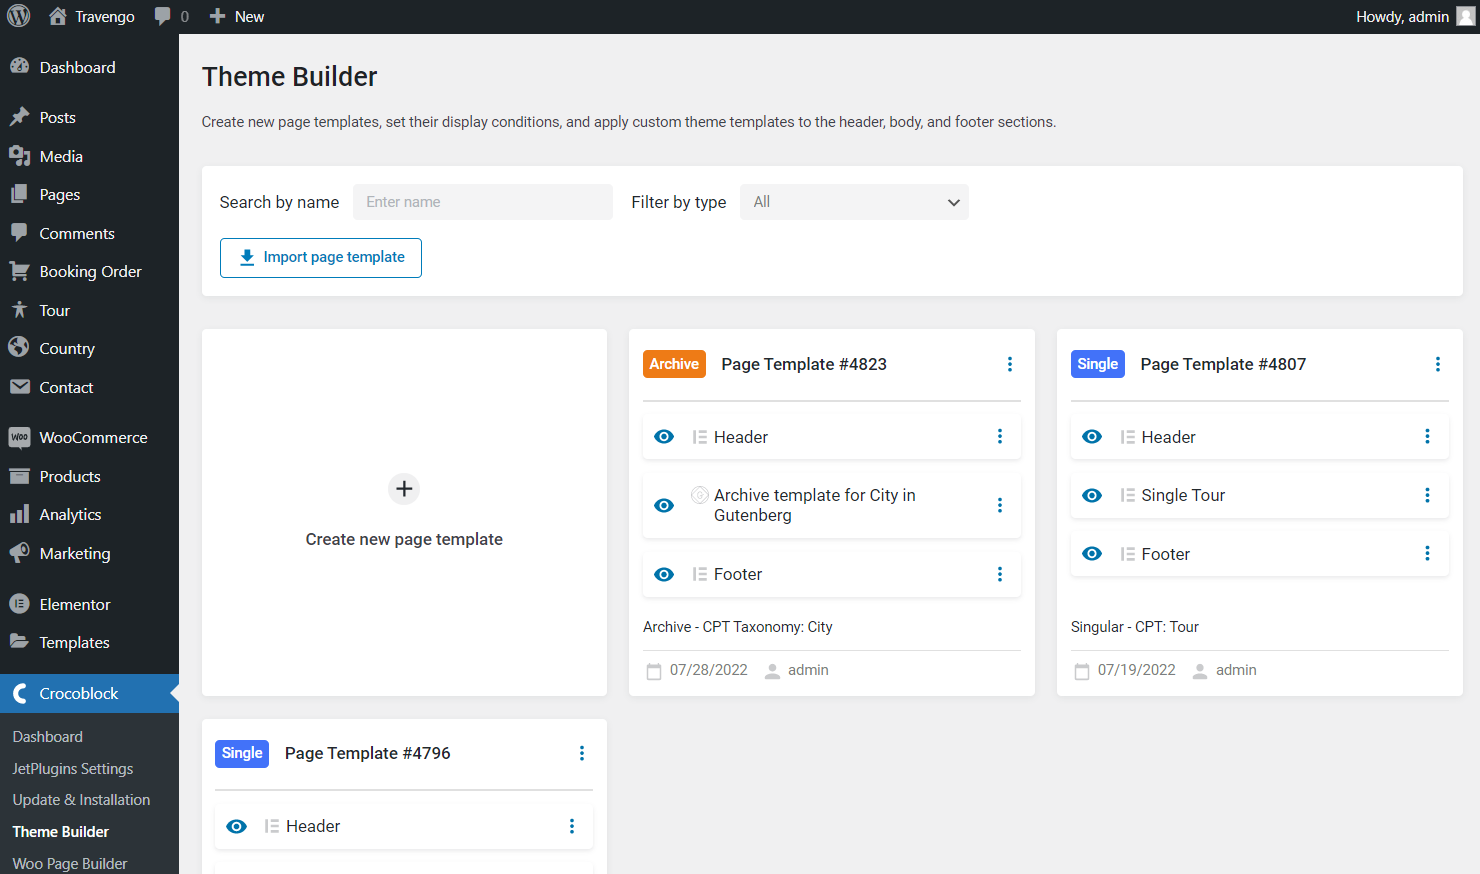
Observe the Archive Page template on the front end.

That’s it. Now you know how to create the Archive Page template for the custom taxonomy in WordPress using the JetThemeCore and JetEngine plugins.