How to Create Nested Listings
This detailed guide reveals step-by-step instructions on creating posts listing with nested terms listing.
Before you start, check the tutorial requirements:
- Elementor (Free version)
- JetEngine plugin installed and activated with posts filled in, and custom taxonomy created. Create a Listing Item Template for Custom Post Type as well.
A nested listing is simply a listing of listings or any list with another list as an element (a sublist).
With JetEngine, you can build it in several steps. Here is a step-by-step tutorial on how to show related info to the current item.
You can use nested listings for different cases, but let’s imagine that you need to show a Category content of the Related Posts. This tutorial uses images as an example, but you can also display any category content.
Add Images to Categories
There are two ways to add an image to the category: the default Featured Image field or the custom media meta field.
Head to WordPress Dashboard > JetEngine > Meta Boxes and create Custom Meta Box for your Custom or default Taxonomy. Select the “Media” Field type and “Media ID” Value format.
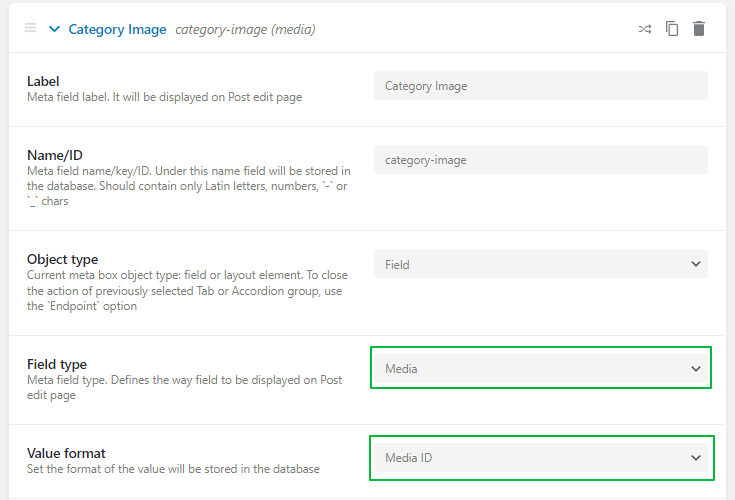
Navigate to WordPress Dashboard > JetEngine > Taxonomies.
If you work with Custom Taxonomy, edit it and create a new media meta field.
Or, if you deal with the Default Taxonomy or created via another plugin, you can enable the Built-in toggle in the top right corner to find the needed taxonomy. Then press the “Edit” button and add the field.

Now you are ready to upload media. Find the taxonomy and edit categories where you need images. Upload images to the image field and save changes.
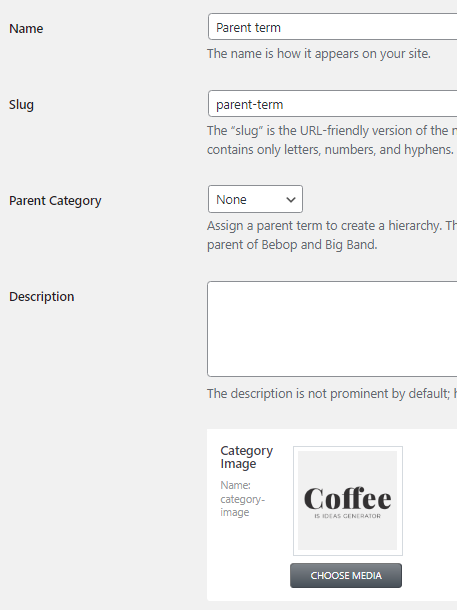
Create Terms Listing
Navigate to JetEngine > Listings > Add new and create Terms listing.
Add a Dynamic Image widget and select your media field in the Source dropdown field.
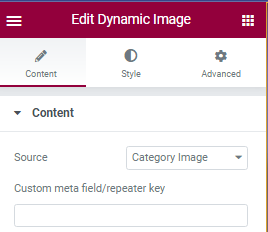
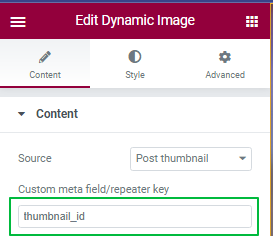
If it’s a featured image, find the Custom meta field/repeater key field and paste the “thumbnail_id” value, it’s a featured image field key.
Check other widgets settings and adjust some if needed. You can enable the Linked image option, change the alignment and use the Style tab to customize your terms listing.
You can add the content you want besides the media with the Dynamic Field, Dynamic link, or other widgets. Save changes by pushing the “Publish/Update” button.
Create Terms Query
Head to WordPress Dashboard > JetEngine > Query Builder and press the “Add New” button. Name the query and select the “Terms Query” Query Type.
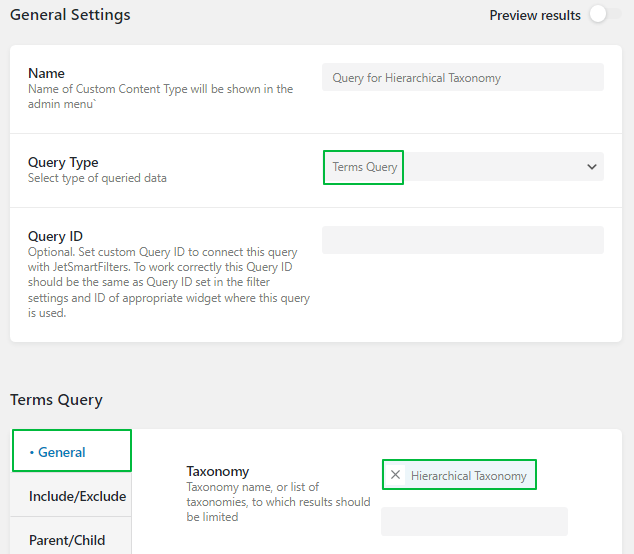
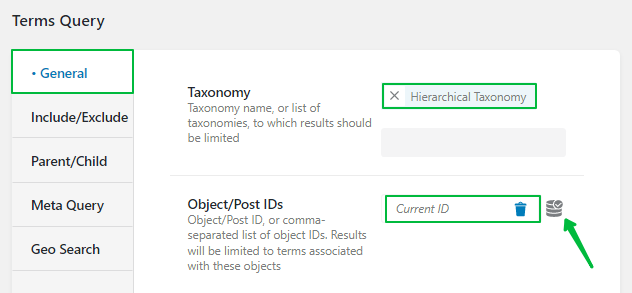
In the General tab, choose your Taxonomy name and move to the Object/Post IDs field. Click the Dynamic Tag icon and select the “Current ID” option from the appeared list.
Thus we specify post IDs to get the categories. In our case, current post ID. Save changes and close the query.
Insert Nested Listing
Open the JetEngine > Listings directory, and create or edit the Posts listing. Find the Listing Grid widget in the Elementor editor area.
In the Listing field of the General tab, start typing your Terms listing name and select it.
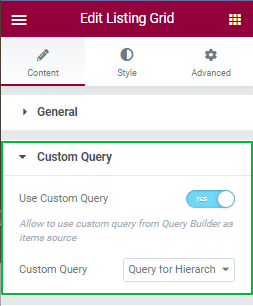
Head to the Custom Query tab, activate the Use Custom Query switcher and choose your Terms query in the Custom Query field. Change the number of columns if you wish so. Adjust the Listing Grid widget settings if you need and save the result.
Remember that you can add other query conditions, such as showing only parent or child categories, using the “Current ID” dynamic macro in the Parent/Child tab. You can also add order conditions. You can even query to show categories with specific meta field value.
Check Result
The last step is to add your Posts listing widget to the needed page.
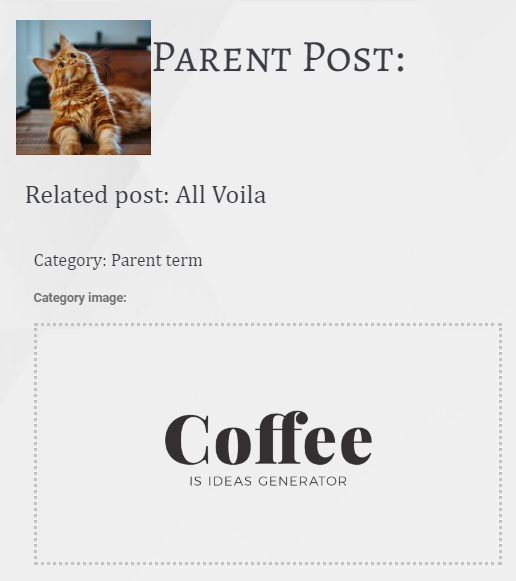
In the described case, it’s a related post listing, so a related query is added. Feel free to pass this step if you have another setup.
Remember that the workflow is the same for other listing types. Now you know how to use nested listings and show the category’s content in the Posts listing.