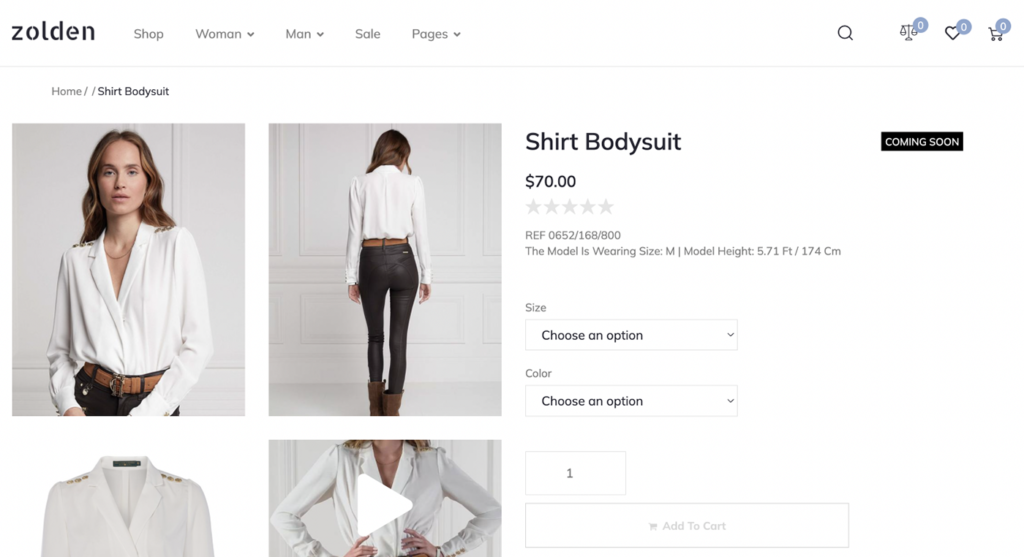
Adding Custom Stock Status Using JetEngine
Create custom stock product status badges with the JetEngine plugin. Save money on woo custom stock status plugins for WordPress and WooCommerce.
There is no need to spend extra money on additional third-party plugins, as Crocoblock allows you to create a custom stock status easily with the help of the JetEngine plugin.
Creating the “In Stock” Custom Badge
Go to the WordPress Dashboard > Crocoblock > Woo Page Builder directory and open a Single Product Page Template to start creating the badges.
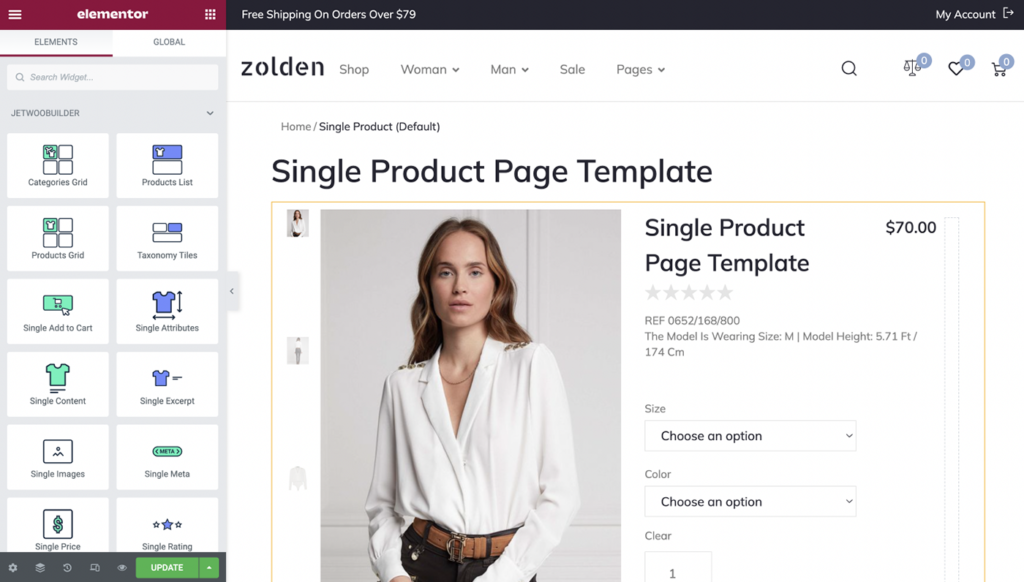
Drop the Dynamic Field Widget onto the Canvas
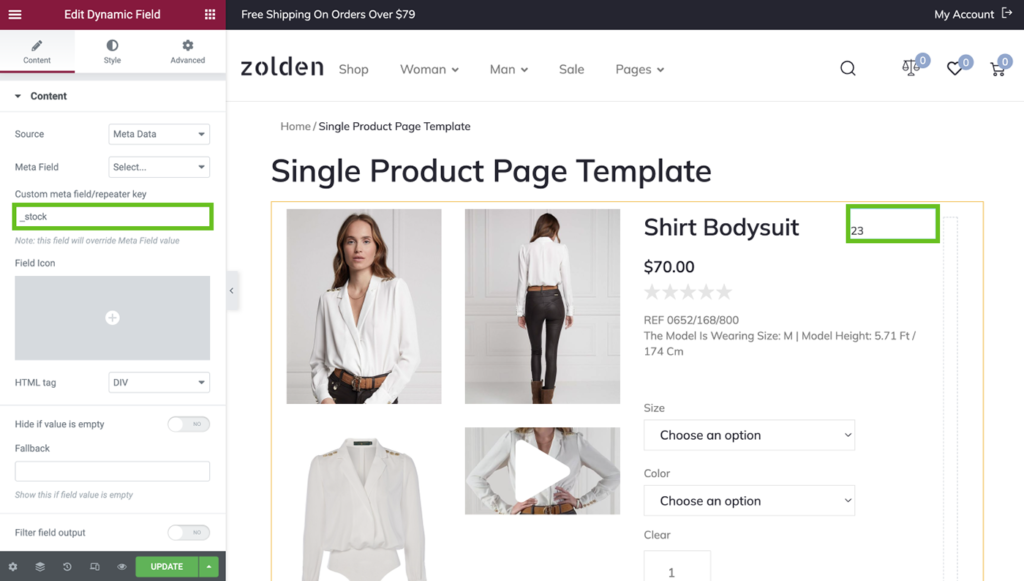
In the Source of the widget, select Meta Data from the list. In the Custom Meta Field, specify the field name, which is _stock.
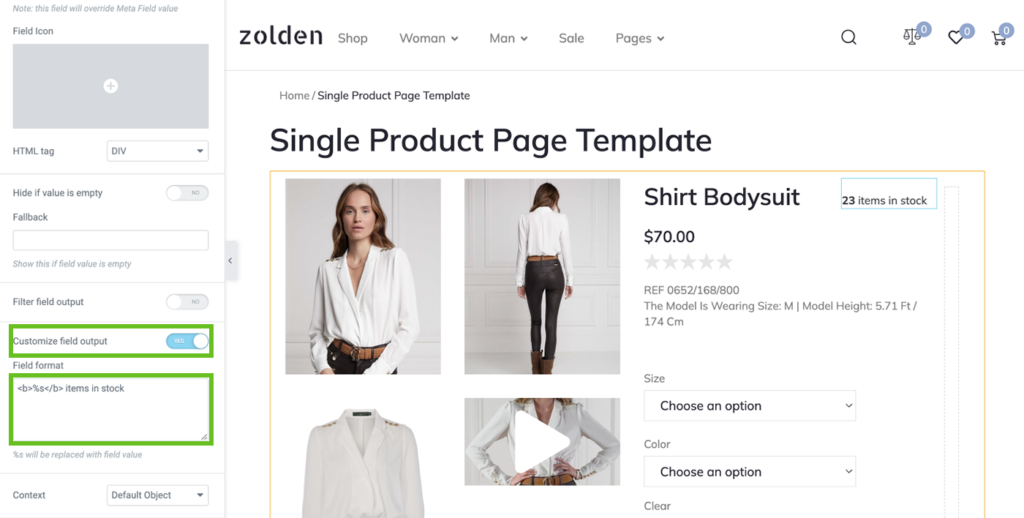
If you want to display something besides quantity, like some additional text, scroll down to the bottom of the Content tab and enable the Customize field output option. Enter the needed text to the Field format box, e.g., items in stock.
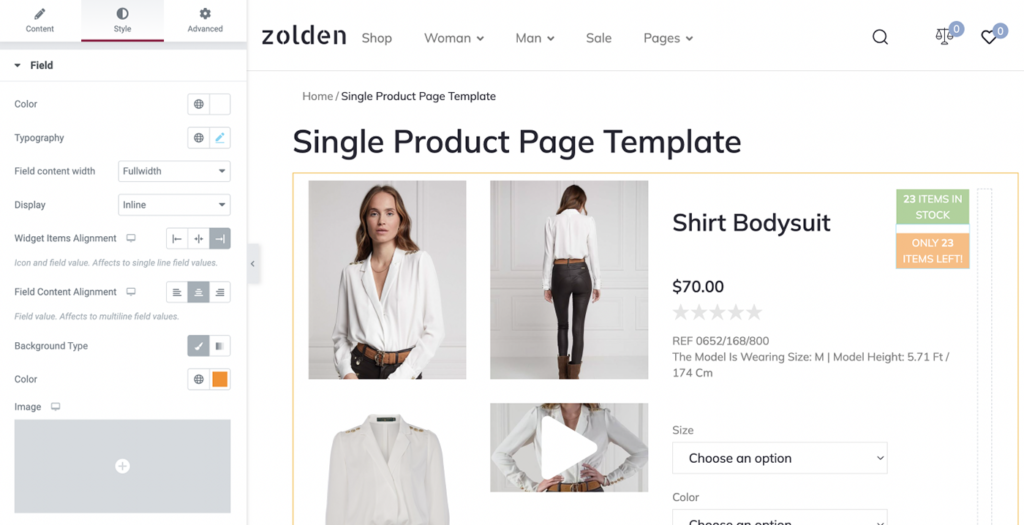
Styling the Custom Stock Status Badge
Proceed to the Style tab and customize the badge according to your needs.
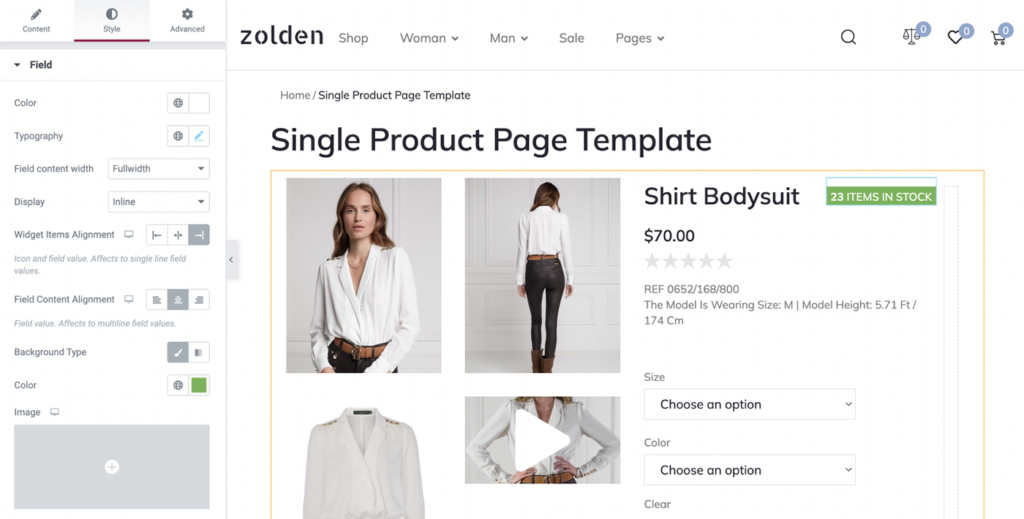
Enabling Dynamic Visibility
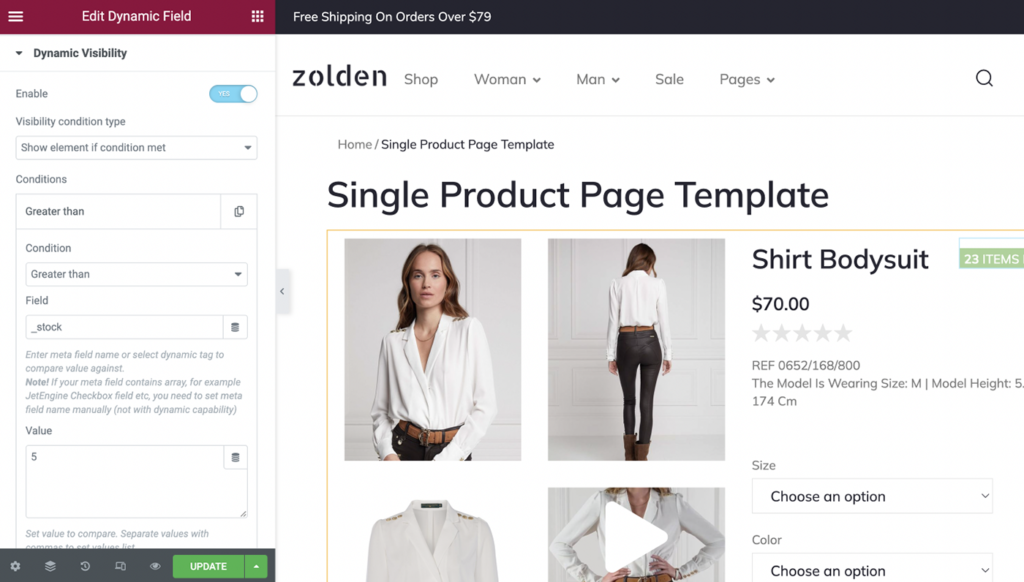
Once the badge is ready, you need to set up the Dynamic Visibility Conditions. For that, open the Advanced tab and enable Dynamic Visibility.
Set the Condition type to “Show element if condition met” and then add a condition “Greater than.”
In the Field, enter the field name, which is _stock, and set the value to, e.g., “5.”
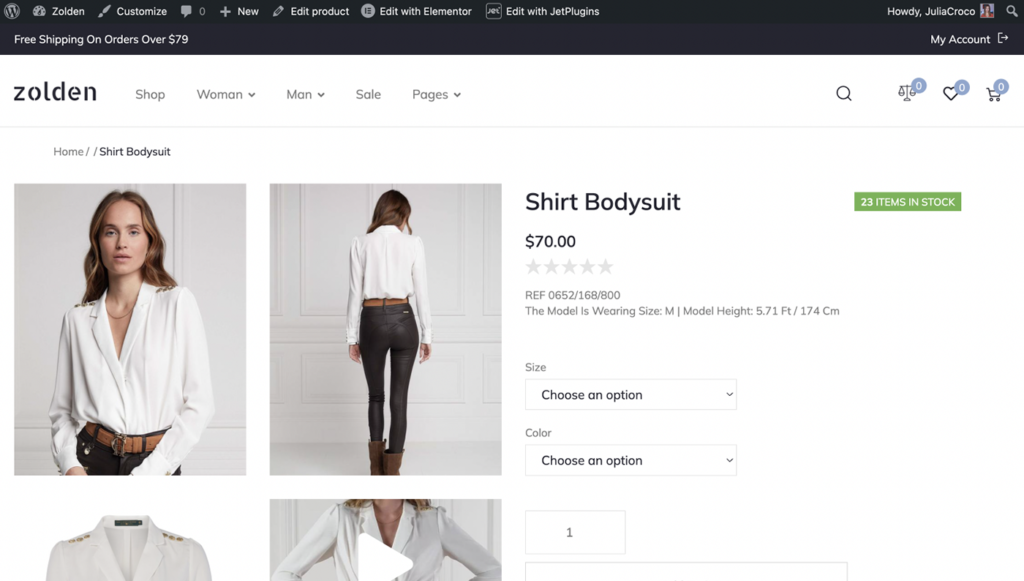
In this case, the badge will be shown near the product name if more than five products are available.
Don’t forget to update the template and check out the front end.
Adding “Only a Couple of Items Left” Badge
To display a badge indicating that a product will be out of stock shortly, duplicate the Dynamic Field widget and change the Field format to “Only” in front of the number and “items left!” after it.
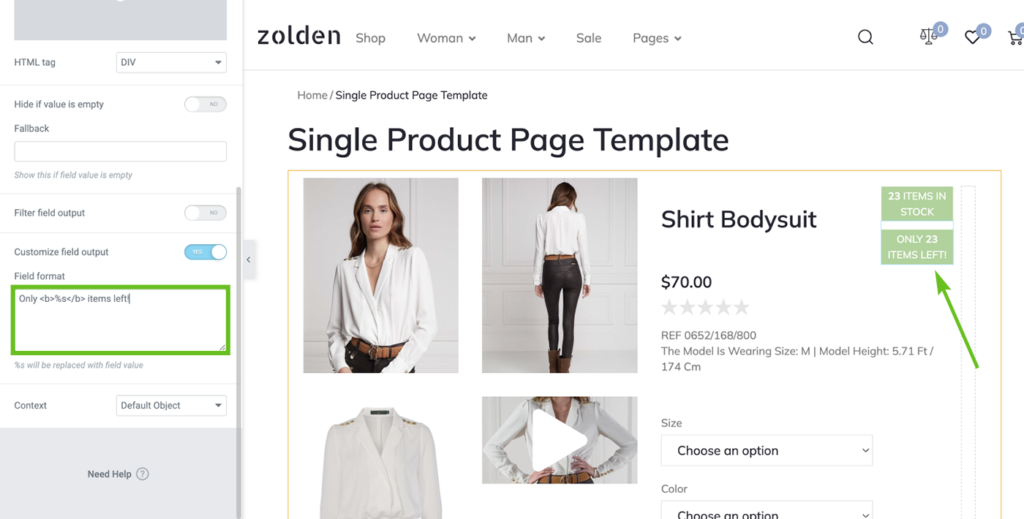
Move on to the next tab and change the background color of the second badge.
Proceed to the Dynamic Visibility section and change the value here to “1.” Then duplicate the condition, change it to “Less than,” and set the value to “6.”
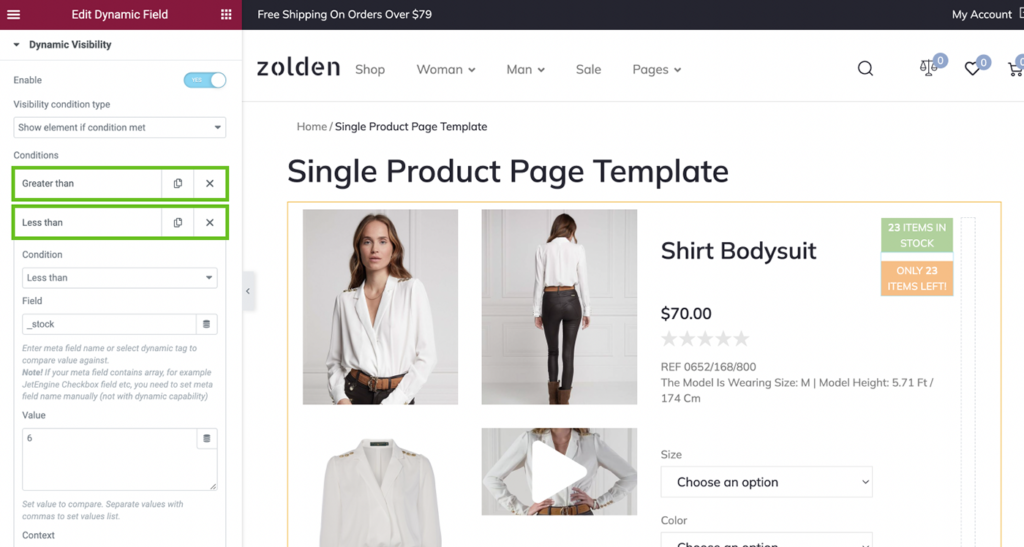
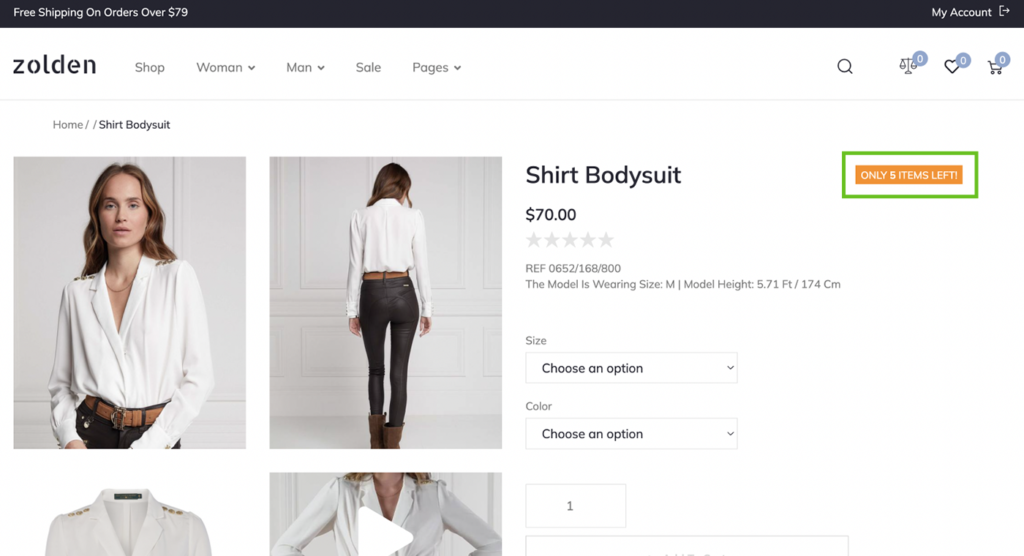
This way, it’ll show the badge for the products, the quantity of which is between two and five items inclusive. If there are more items, it’ll show the “In Stock” badge, but if there’re fewer items, e.g., one, the badge will be hidden.
Creating the “Last Item” Badge
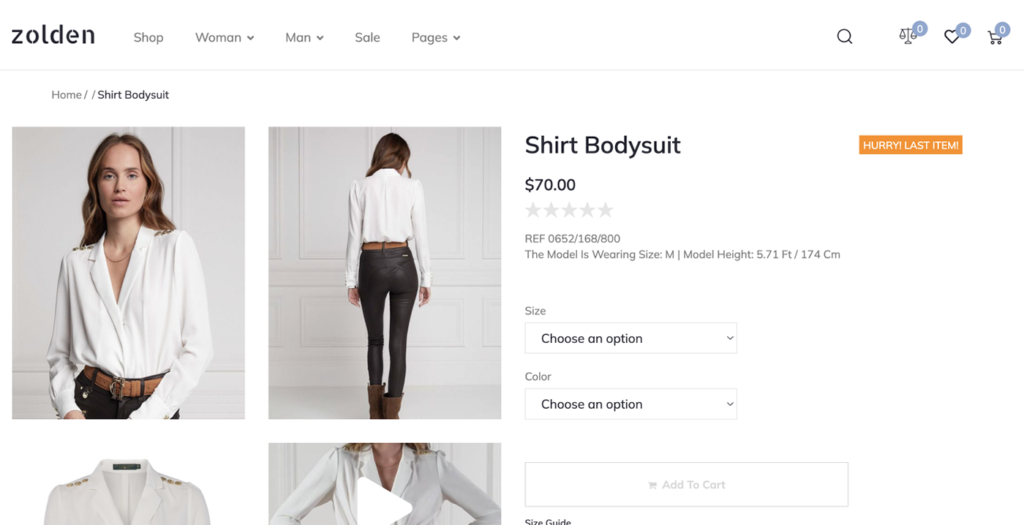
Go back to the Elementor editor and create another badge for the Last Item. For this purpose, you can actually use any widget, e.g., the Button widget.
Drop it onto the canvas, change the text to “Hurry! Last item!” and style it according to your needs.
Then enable Dynamic Visibility, choose the Condition type “Show element if condition met” and add a condition “Equal,” enter the field name _stock, and set Value to “1.”
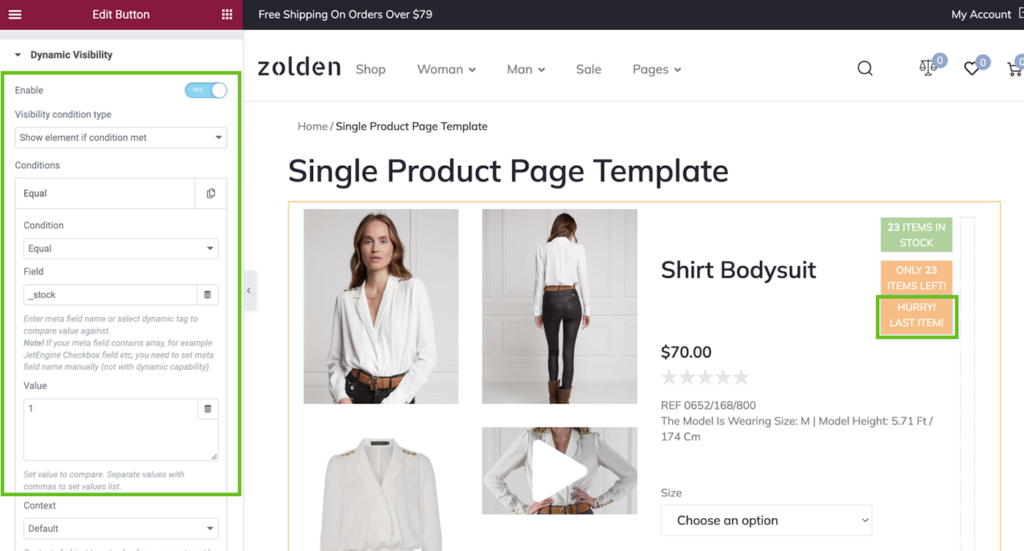
Once there’s only one product left, the third badge will show up.
Building a “Sold Out” Badge
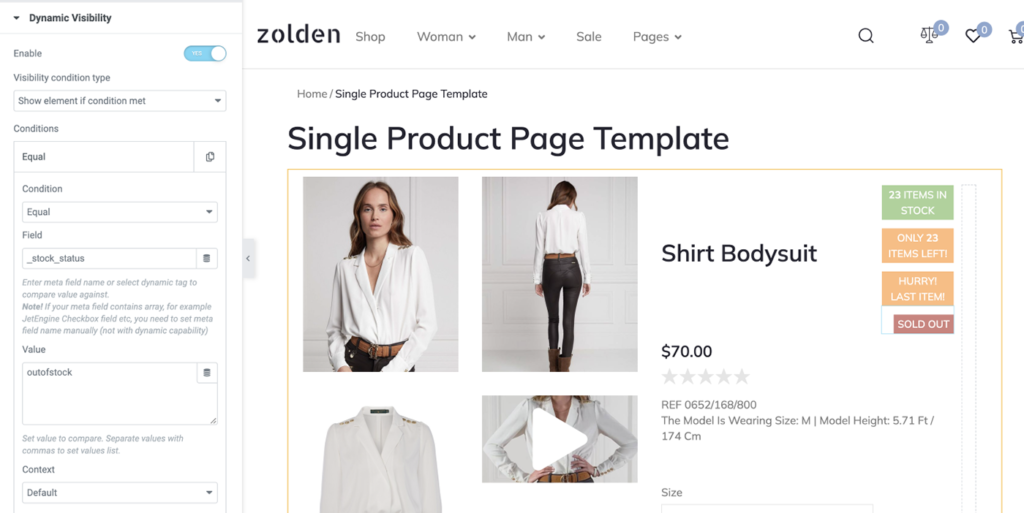
To create a “Sold Out” badge, go back to the Elementor editor and duplicate the Button widget. Change the Text to “Sold Out” and adjust the background color.
Now proceed to the Dynamic Visibility settings and change the existing condition. Previously, we displayed the Product’s Stock Status according to the _stock meta field because we needed to know the number of products available. Now we will display this badge based on the _stock_status meta field.
Enter _stock_status into the Field and add “outofstock” to the Value box. Update the template.
Adding a “Coming Soon” Badge
To create a badge for the “On backorder status,” head back to the Single Product Page Template and duplicate the last widget.
Change the text to “Coming Soon” and set a different color for the button background.
Next, go to the Dynamic Visibility settings and change the value of the condition to “onbackorder” without spaces.
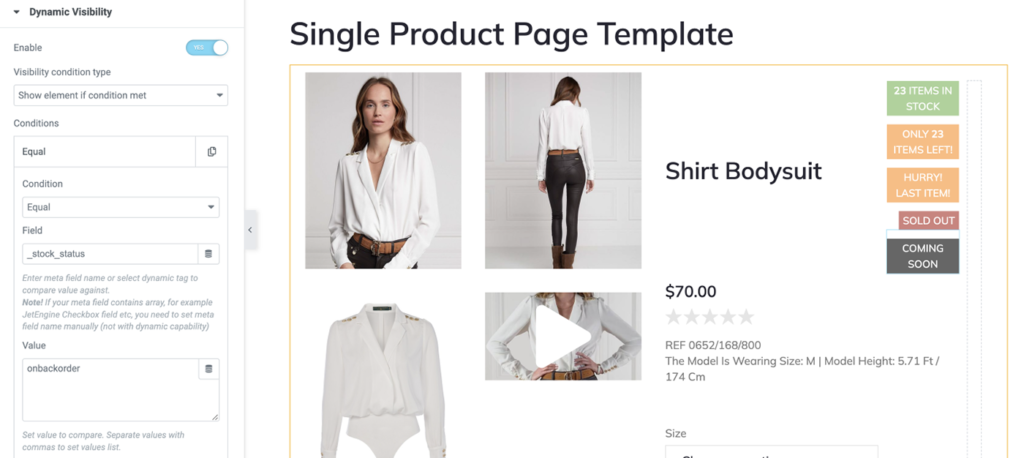
Update the template, and once a product is on backorder, there will be a Coming soon badge.
