How to Create a Booking Form
This tutorial explains how to build booking forms and manage their settings using the JetFormBuilder and JetEngine plugins.
Before you start, check the tutorial requirements:
- Elementor (Free version) and Block editor (Gutenberg)
- WooCommerce plugin (Free version) installed and activated
- JetFormBuilder plugin installed and activated
- JetBooking plugin installed and activated
JetFormBuilder Booking Form
Creating a Booking Form
Navigate to WP Dashboard > JetFormBuilder > Add New to create a new form.
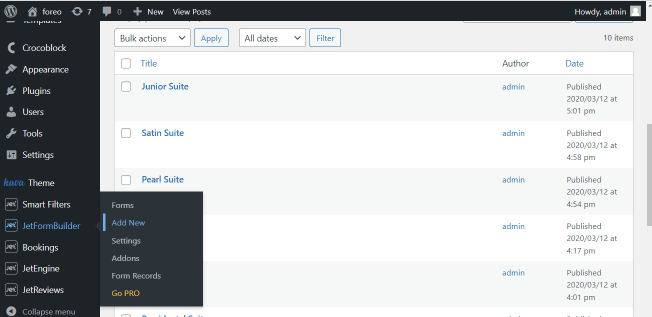
The form will be open in the Gutenberg editor. Add the form’s title (here, Booking Form).
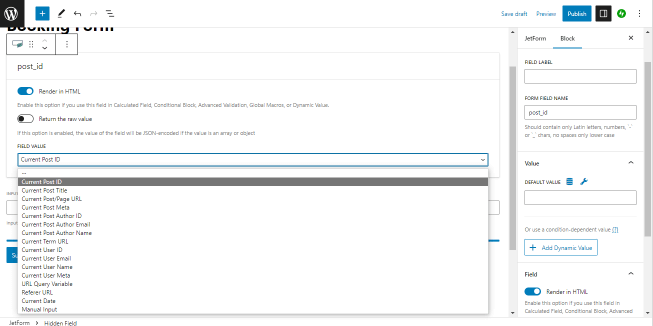
The form contains a hidden field block by default with the following settings: Name (post_id by default), Render in HTML toggle, and the Field (the Current Post Id option by default) value drop-down menu. If necessary, apply other settings.
The Form Creation Tutorial details how to build JetFormBuilder forms.
Adding Text Fields
Add the Text field block or customize the default one.
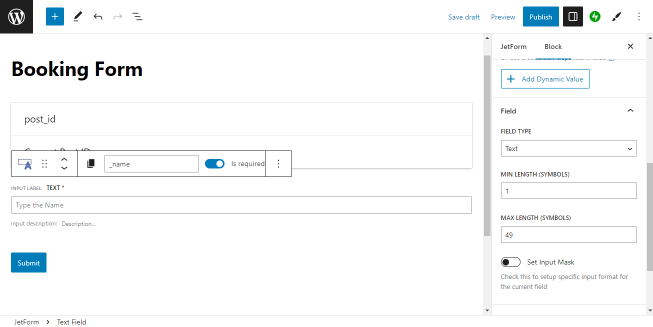
Navigate to the Settings block of the Text field and specify the necessary settings, partially:
- General > Form Field Name, if you want to use this field for collecting data (here, _name);
- Field > Field Type from the drop-down menu if you want to collect unique data as a text email, URL, tel, and password;
- Field > Min (Max) Lengths, if you’re going to limit the input text (the field ranges from 1 to 49 symbols);
- Field > Set Input Mask toggle to setup specific input format for the current field;
- Advanced > Field Visibility from the drop-down menu as for all, only for logged or not-logged users.
note text=’Switch the Is required toggle for every necessary field.’
Adding Check-in/Check-out fields
Find the JetForm Check-in/Check-out field block and drag-n-drop it where needed.
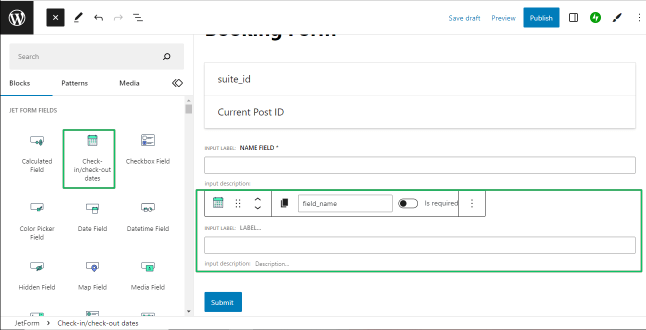
Navigate to the Check-In/Check-Out field settings and specify the field settings, i.e., the layout or position, Labels, Placeholders, and more:
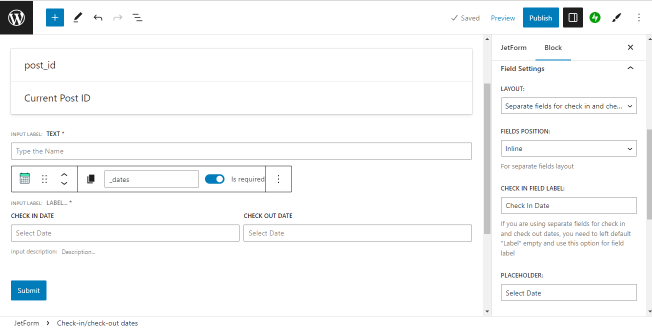
- General > Form Field Name, if you want to use this field for collecting data or calculations (here, _dates);
- Field Settings > Layout drop-down menu to select the Single field or Separate check in and check out dates layouts;
- Field Settings > Date Format, Field Settings > Date Field Separator, and Field Settings > First Day of the Week drop-down menus;
- Advanced > Field Visibility from the drop-down menu as for all, only for logged, or not-logged users.
note text=’Users should complete the Date Format, Date Field Separator, and First Day of the Week settings of the CheckIn/CheckOut field; otherwise, the form will not be submitted..’
Adding Checkbox fields
Drag-n-drop the Checkbox field.
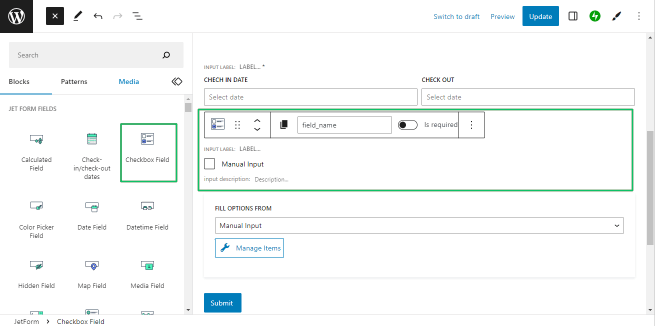
Press the “Manage Items” button and add the necessary checkbox fields.
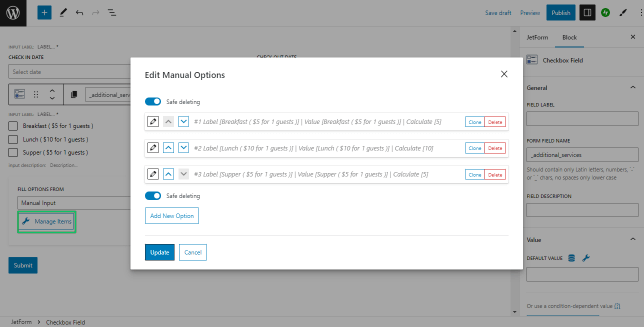
The Manual Input setting from the Fill Options from drop-down menu is set by default.
If you want to use this field for collecting data or calculations, navigate to the Checkbox field settings and specify the settings, i.e., General > Form Field Name (here, _additional_services).
Adding Number Fields
Find the Number Field block and drag and drop it into the form. Specify its name and the Min/Max Values and Step settings.
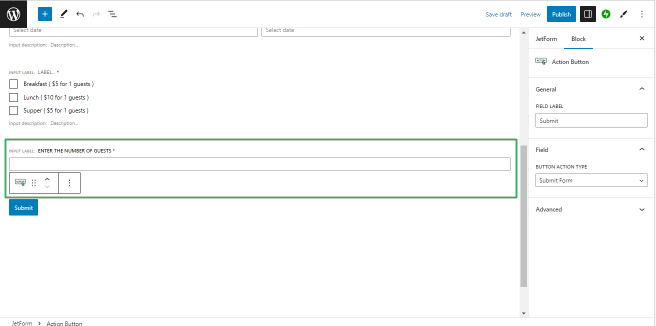
The JetFormBuilder: Fields and Buttons Full Guide details the JetFormBuilder field settings.
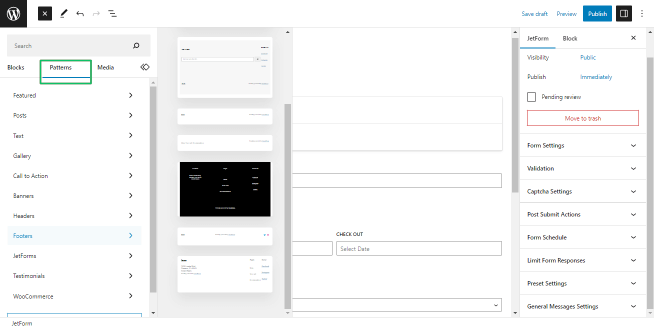
Add other fields or pre-made JetFormBuilder patterns to make the form user-friendly.
Adding CPT Meta Fields
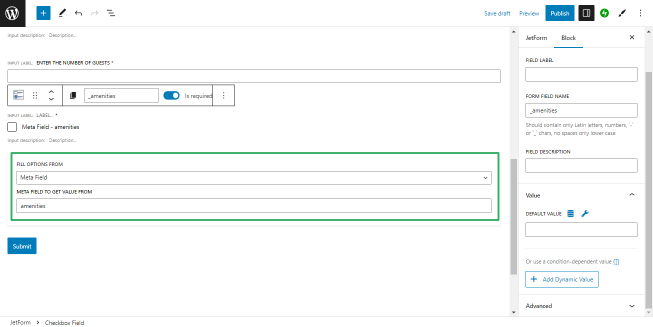
Use the Checkbox field to display the meta fields from the CPT on the form you build. Select the Meta field option from the Fill Options From drop-down menu and type the necessary meta field name (here, amenities).
Adding Calculated Fields
Find the Calculated field block and drag-n-drop it where needed.
Add the formulation to calculate. For example, the Calculated field below multiplies the input data and CPT meta field data (here, from the Rooms CPT); and has the following compounds:
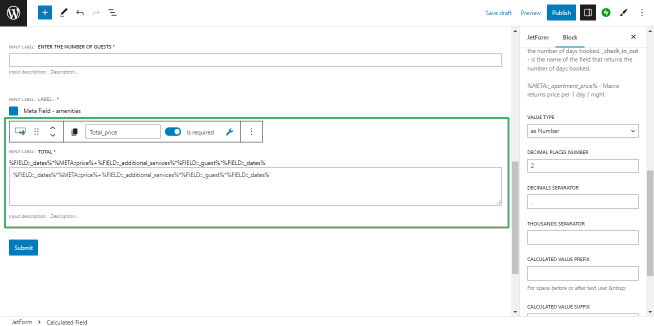
- %FIELD::_dates%*%META::price% 一 the CPT meta field price is multiplied by the number of booking days (the form field _dates);
- %FIELD::_additional_services%*%FIELD::_guest%*%FIELD::_dates% 一 the form fields _additional_services, _guest, and _dates are multiplied.
The tutorial explains How to Combine Hidden and Repeater Fields with the Calculated Field.
Read more about the JetPlugins in the Macros Guide.
Adding Submit Buttons
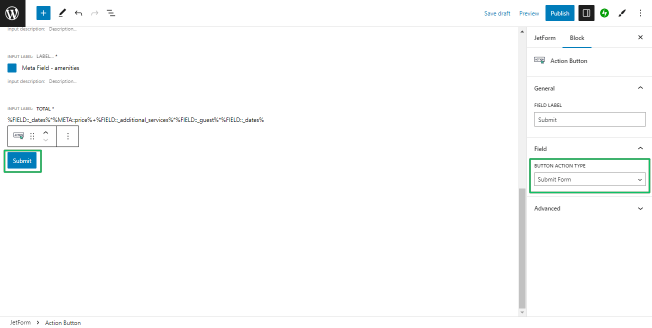
The Action button is added to the form by default. To customize the button text (here, Submit) and Button Action Type, navigate to the Settings block, type the necessary text, and select another action (instead of the Submit Form action) from the drop-down menu.
Post-Submit actions
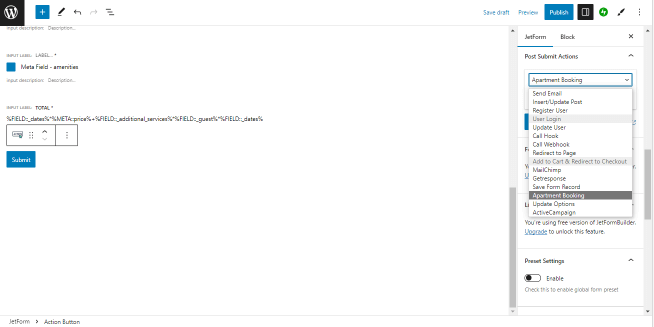
Navigate to the JetForm settings, unroll the Post Submit Actions tab, and select the Appointment Booking option from the drop-down menu.
Booking integration with WooCommerce
The JetBooking plugin allows integration of the submitted data with the WooCommerce plugin data. If the Bookings > Settings > General > WooCommerce integration toggle is enabled, the Appointment Booking pop-up displays the Disable WooCommerce Integration switcher.
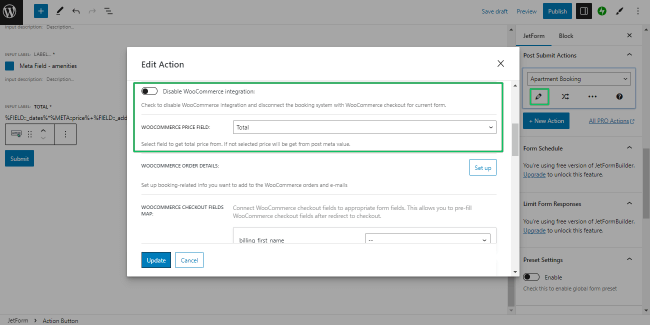
If disabled, this switcher sets up WooCommerce order details and connects WooCommerce checkout fields to appropriate form fields.
The tutorial details How to enable WooCommerce integration for Bookings.
Add another post-submit action if necessary by pressing the “+Add New Action” button.
The tutorial How to Use Post-Submit Actions overviews the main features of post-submit actions.
Adding the booking form data to CPTs
If you need to collect the submitted data or add them to the specified CPT, select the Insert/Update Post option from the Post Submit Actions tab drop-down menu. Pressing the pencil icon opens the pop-up window allowing users to select the Post Type (here, Orders CPT) to add the submitted information from the form, Post Status, and drop-down menus to specify meta-fields to save the appropriate data.
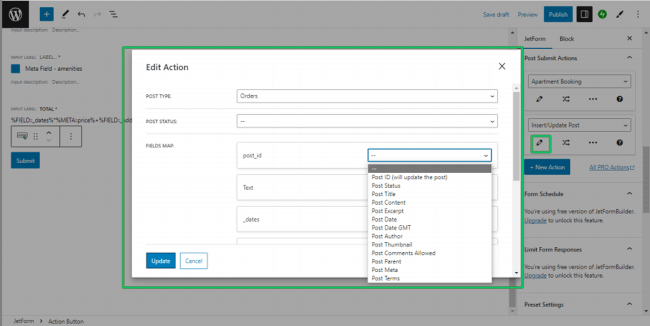
Press the “Update” button to save changes.
Preset Settings
To add the preset user’s data to the form, navigate to the Preset Settings tab, turn on the Enable toggle, and select the data source from the Source drop-down menu.
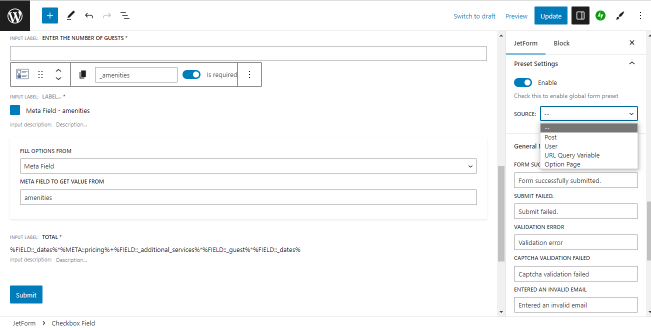
Type the texts in the General Message Settings fields, i.e., Submission Failed or Form Successfully Submitted fields.
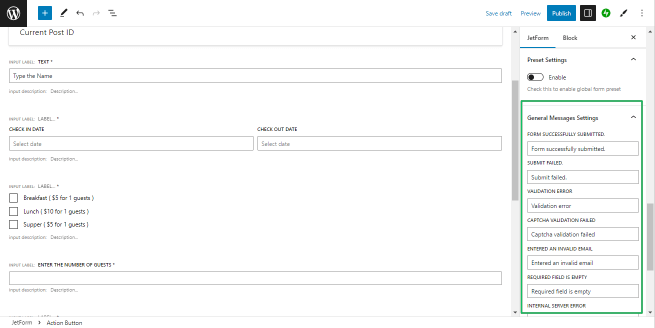
Press the “Publish” button to save changes.
Adding the Form to a Single Page
The built form is available for adding to single pages in the Elementor and Gutenberg editors.
The tutorial explains How to Create a WordPress Single Post Page Template.
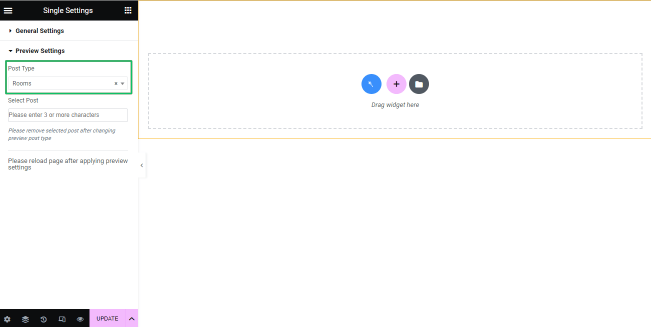
Create a single page for CPT and navigate to the single settings to set the CPT (here, Rooms) as a source for this single page through the PostType drop-down menu.
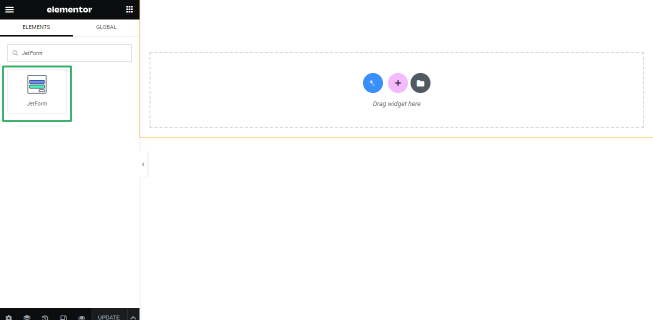
Drag-n-drop the JetForm widget to the place you need.
The tutorial explains How to Insert the Form into the Page.
Select the previously built form from the drop-down menu and customize its appearance.
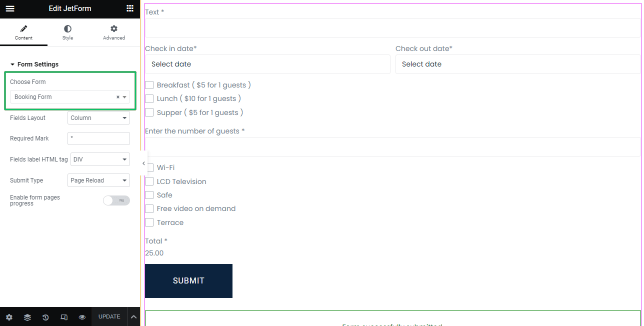
The built form on the front end looks as follows:
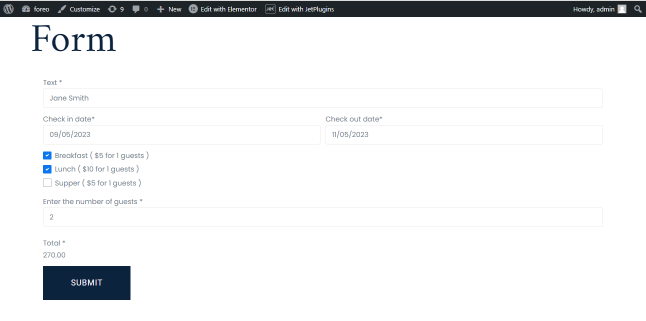
That’s all about creating JetFormBuilder booking forms.
JetEngine Booking Form (Legacy)
It’s time to proceed with creating a booking form. Navigate to the JetEngine > Forms and add a new one. The tutorial dedicated to booking form functionality can be found here.
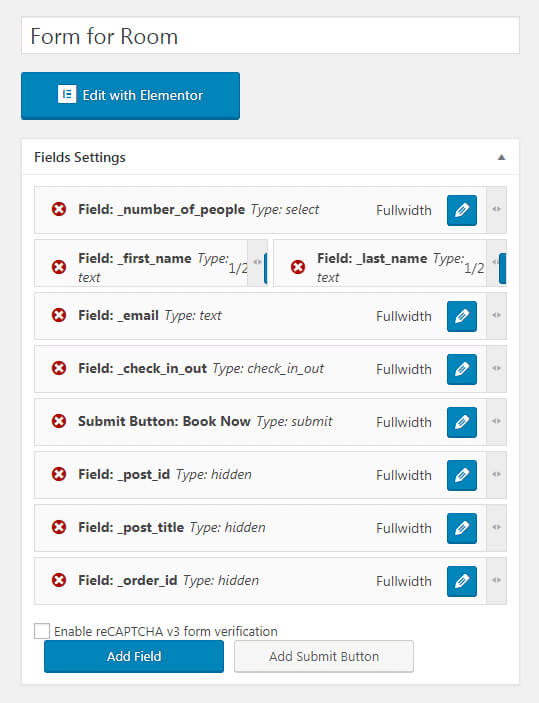
Fields settings overview
As for our particular case, we’ve created a form called Form for Room. Let’s overview it closer. For our tutorial, we created such fields as Number of People, which could be selected by the visitor, First Name and Last Name, e-mail.
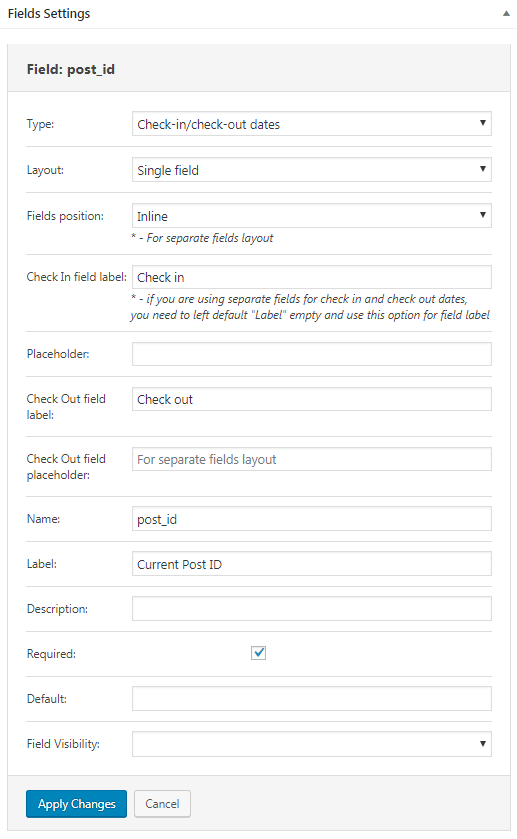
The Hidden field in the booking form
The booking form creates a hidden field called post_id by default. Please, don’t delete it, while we need it further.

Notifications settings overview
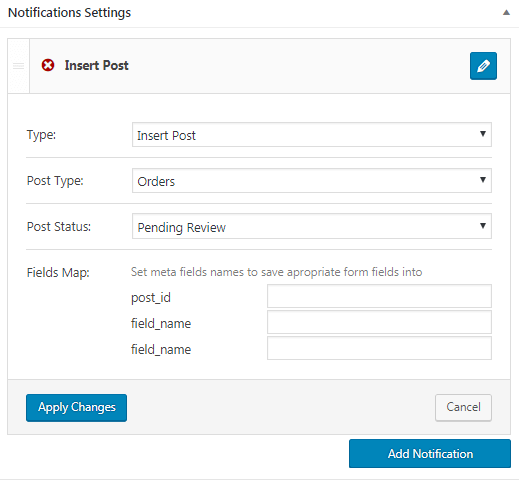
Let’s move to set up your booking form’s Notifications Settings block. Add a new one and choose the Insert Post type, which means that the information from the submitted form will be added to the CPT we’ll specify.
Do you remember that we created the second CPT called “Orders”? It should be selected in Post Type’s settings.
Below, you can see the Fields Map, which stands for pulling the meta fields, created with the CPT we want the information to be added to. As for Orders CPT, we haven’t created any meta fields, that’s why we’ve got only post_id.
Save the changes and proceed with the adding of a new notification.
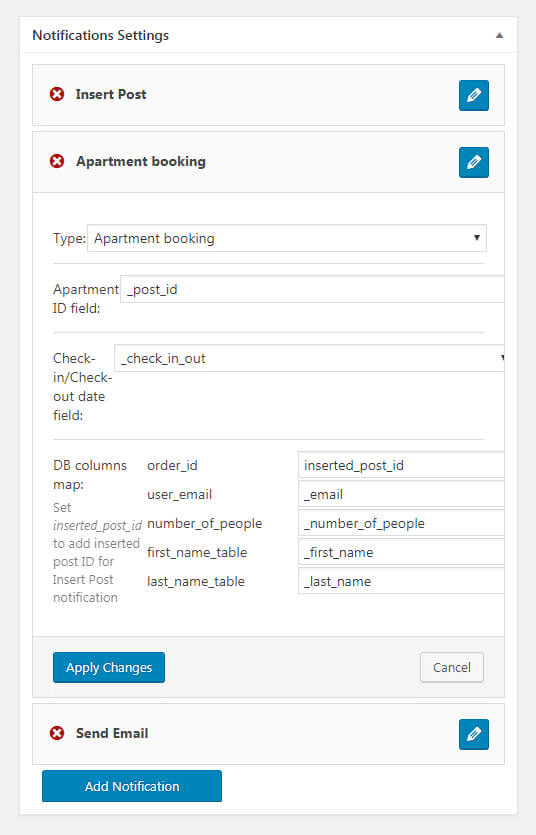
Setting the booking notification type
In the newly added notification, you need to choose a Booking type. Then, in the Apartment ID field, you need to select your post_ID. It’s information from the hidden field, we added in Step 3.
Next, there’s a field called “Check-in/Check-out date”. Here you need to select the corresponding field from the Fields settings.
And finally, in the DB columns map block you see names of the columns created before.
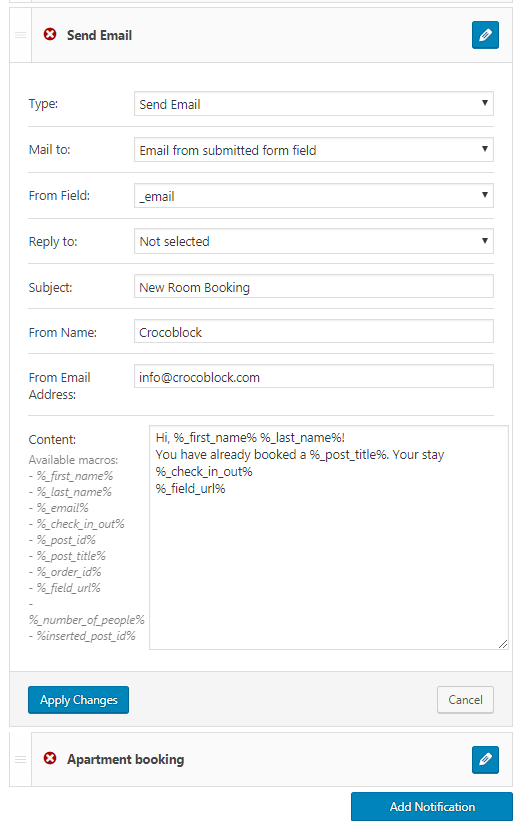
Adjusting the send email notification type
Alright, the last part of the booking form we need to set up is the Send Email notification. It allows sending an email to your clients after they have successfully booked the housing. Please feel free to follow this tutorial where you can learn more about the notification settings.
We’ve built a booking form and now we need to display it on the website!
Follow the next tutorial to find out how to do it.