Sorting Filter Overview
This tutorial uncovers the ropes on how to apply the Sorting Filter widget of the JetSmartFilters plugin to any kind of content: either the posts or the products.
This widget doesn’t have any settings in the WordPress Dashboard. That’s why we bring it into play exactly from the Elementor editor.
Let’s have a closer look at how to show the items with the help of the JetSmartFilters plugin, sorted by author or by other features.
Creating Filter for Posts/Products
This stage involves adding the filter with the help of the JetSmartFilters plugin to the posts or the products.
Additional and more specific information about the Types of Filters you can find in our Filters Overview.
Applying Sorting Filter to Posts/Products
Let’s imagine that you have already set the desired type of filter (checkbox, select, range, visual, or any other one) for the posts or products.
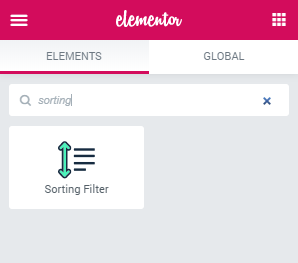
The following vital action will be dropping the Sorting Filter to the page with the content to make it range the items the way you want and need. You will find the widget in the Elementor search panel.

Now let’s keep up with the available settings.
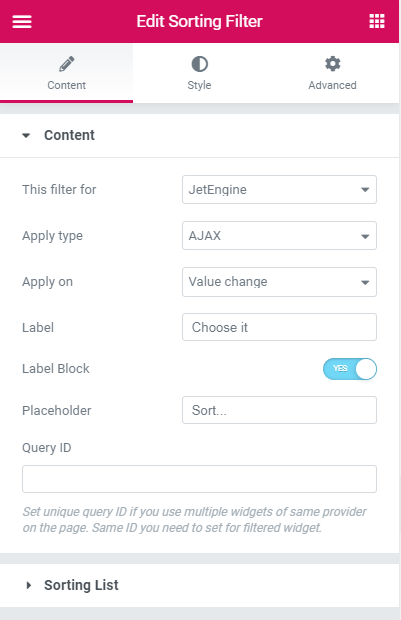
In the Content > Content tab, it’s essential to adjust the source the filter applies for.
If your content consists of posts, then there will be a variety of available options.
For instance, for the posts created with Elementor Pro, you need to use one of these options:
- Elementor Pro Portfolio;
- Elementor Pro Posts;
- Elementor Pro Archive.

In case the posts were created with the JetEngine power, then choose such option, as
- JetEngine (for the usual listing) or
- JetEngine Calendar (for the Calendar range of the events, as it implies).
For product sorting, you have to choose one of the following options.
In case you have displayed the products with Elementor Pro, then you can choose one of these options:
- Elementor Pro Archive Products;
- Elementor Pro Products.
If you have installed the JetWooBuilder plugin, which are eagerly using, then select one of these options depending on the core widget:
- JetWooBuilder Products Grid;
- JetWooBuilder Products List.
For the WooCommerce plugin usage pick:
- WooCommerce Archive;
- WooCommerce Shortcode.
After the source has been selected, it’s time to proceed to the other settings for the Sorting Filter widget.

Then you need to apply the type of filtering – Ajax or Page reload. Here decide on how it would be assigned – on value change or after clicking on the apply button.
Next, set up the Label in the so-named field to make it noticeable.
Here you can also change the Placeholder from the default to the one you need.
The last but not least option in the Content tab is defining the same widget to become filtered.
In the Query ID field, point out the widget’s ID in case you have several of them on the same page. It will help the Sorting Filter widget to focus on the specific content source and finally work well.
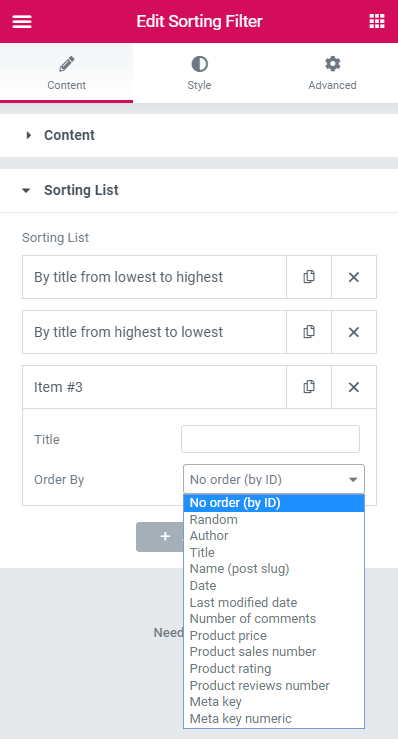
Let’s go to this widget’s key setting, which is located in the Content > Sorting List tab.

Here you can set the title for the option in the filter. We recommend you point out the criteria here to make it easy for the customers.
After that, you should specify the criteria to filter the items on. Let’s dive into each of them so that you can understand clearly which one suits a certain case.
- No order (by ID) involves the option which disables any kind of sorting and can be applied if the customer needs to drop it at all.
- Random kind will make it possible to arrange the items in a haphazard way.
- Author option means ordering based on the author’s name.
- Title criteria sort the items based on the title in alphabetical order.
- Name (post slug) works almost the same way as the previous one but implies using the slug name instead of the displayed title.
- Date pickup will sort the items based on the date of creation.
- Last modified date, in comparison with the preceding one, will order the items in accordance with the latest (or oldest) modified ones.
- Number of comments option will sort the items based on the number of comments (which is the default feature of WordPress).
- Product price allows ranging the products on the price values set in the Product > General > Price field.
- Products sales number will show the products on the order by the number of sales.
- Product rating will display them in accordance with the number of ratings which is specified in the default WooCommerce settings.
- Product reviews number arranges products by the number of reviews. This pickup works in the same way as the Number of comments does.
- Meta key option with the following value (the meta field should be of the text type) will sort the text values alphabetically.
- Meta key numeric option involves the text type of the meta field but with the numeric value, sorted accordingly.
Add to the Sorting List as many items as you need your customers to sort the posts or products.
Kindly proceed to the Style tab, where you can find several tabs to make the filter look appealing.
That’s it; now you know how to use the Sorting filter available with the JetSmartFilters plugin.