Location & Distance Filter Overview
From this overview, you will learn about the “Location & Distance” filter available with the JetSmartFilters and JetEngine plugins.
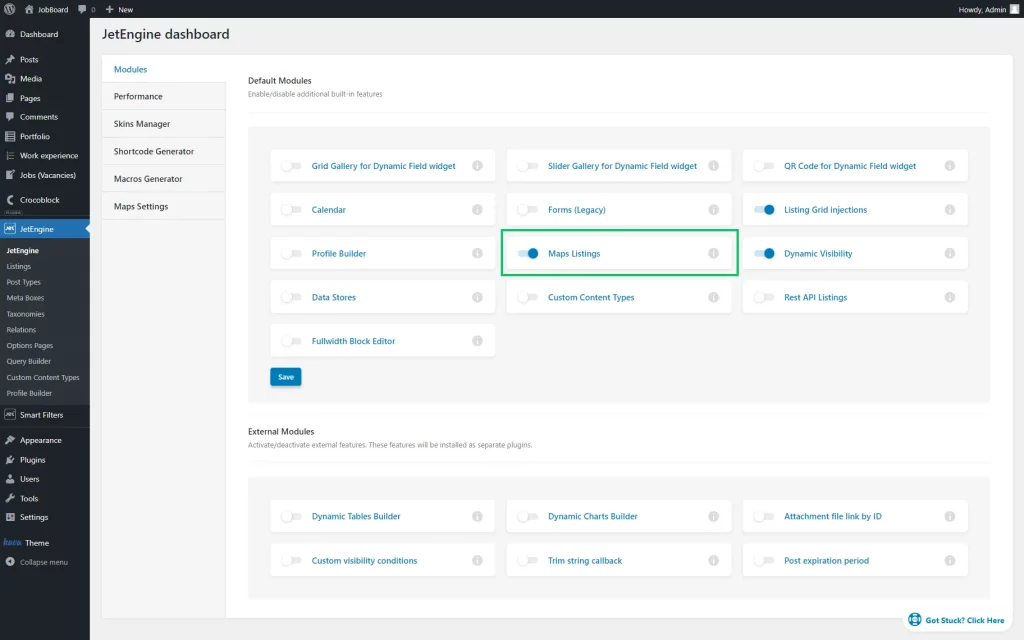
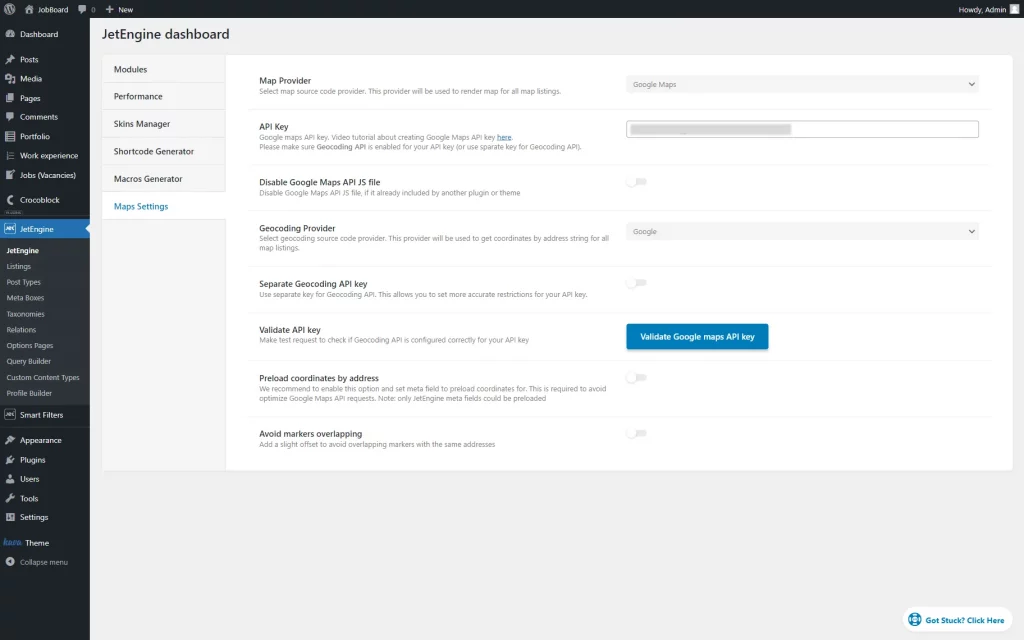
Map Listings Module Activation
Filter Settings
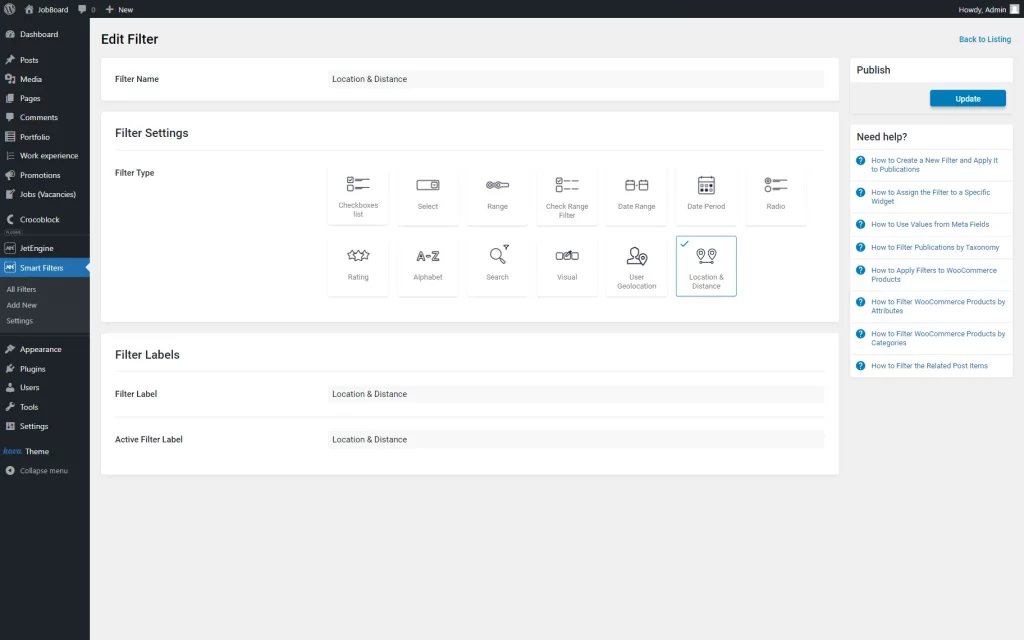
The needed settings can be found by following the WordPress Dashboard > Smart Filters > Add New path.
After opening filter settings, one should complete the Filter Name field with the needed value.
Then, the “Location & Distance” Filter Type should be selected among all the options.
Also, one should fill in the Filter Label and Active Filter Label fields to display the corresponding values. The first feature serves as the title that can be displayed next to the filter, and the second one is required for Active Tags and Active Filters blocks/widgets.
The filter doesn’t need any other customizations now, so the changes can be saved by pushing the “Update” button.
Query Builder Settings
The “Location & Distance” filter works only on a geolocation query basis, which can be built with JetEngine’s Query Builder.
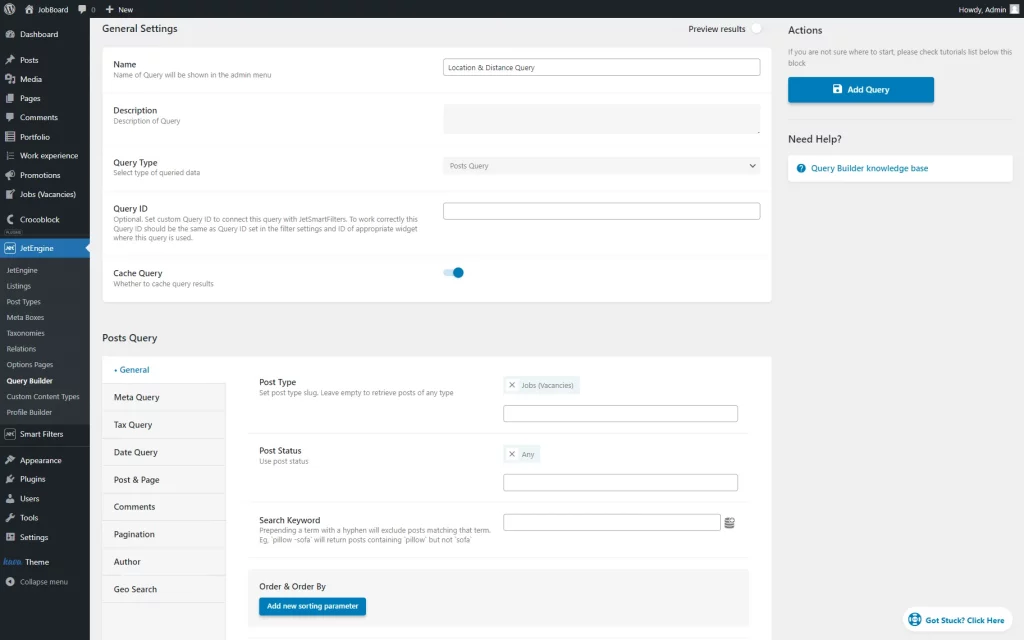
To create a new query, it’s necessary to go to WordPress Dashboard > JetEngine > Query Builder and press the “Add New” button.
The General Settings section can be completed with the basic information. It is important to pick the needed Query Type. The geolocation query can be created for such types: “Posts Query,” “Terms Query,” “Users Query,” and “Custom Content Type Query.”
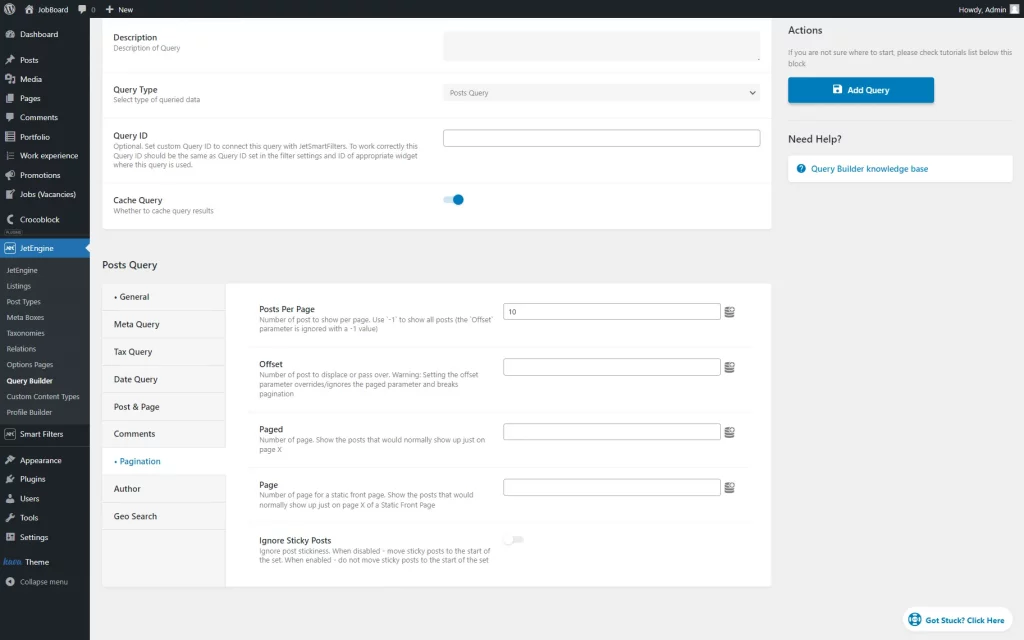
In the General tab of the Post Query settings section, the Post Type and Post Status should be selected.
Also, the Pagination tab should be opened to edit the Posts Per Page value. Here, the maximum number of displayed posts should be set.
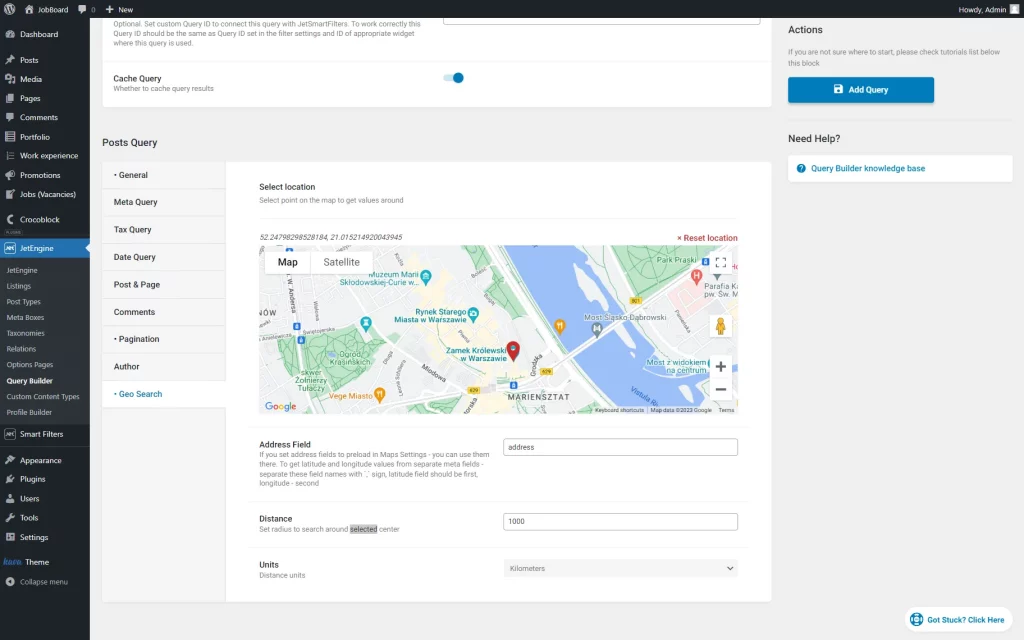
After selecting and adjusting the needed Query Type, the Geo Search tab should be opened.
Here, one should select the map center on the map located under the Select location label. It will be a starting point for the search.
In the Address Field, one should insert the meta field key containing the address.
Also, the Distance field should be completed with the radius for a search around the indicated map center. Then, the Units applied to the provided distance should be specified.
To save the result, the “Add Query” button should be pressed.
Now, the filter can be placed on the page edited with Gutenberg or Elementor.
Location & Distance Filter Widget in Elementor
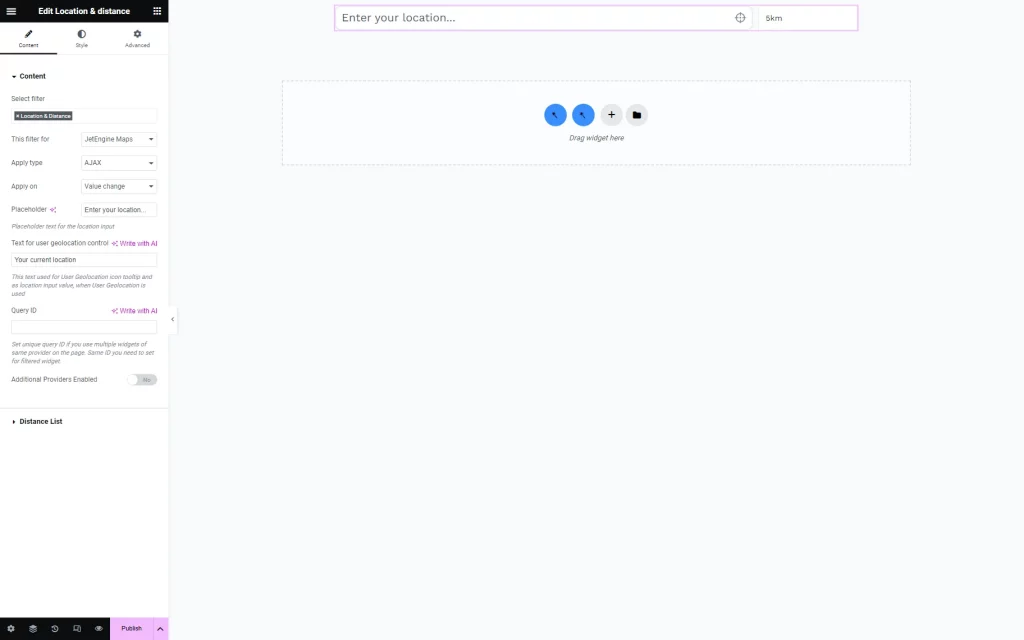
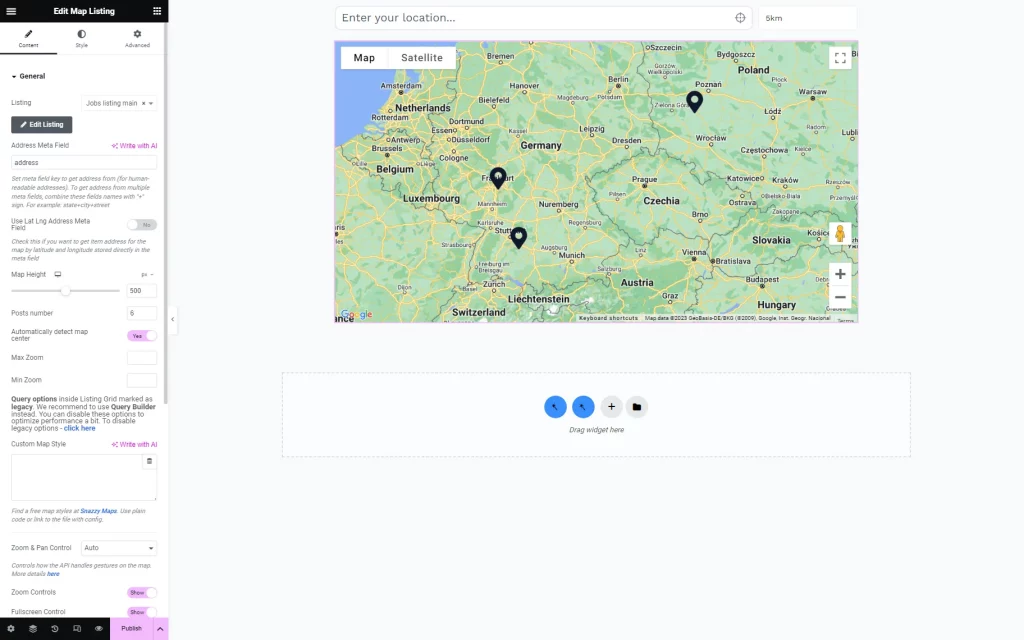
In Elementor, the corresponding Location & distance widget can be placed on the page.
Content
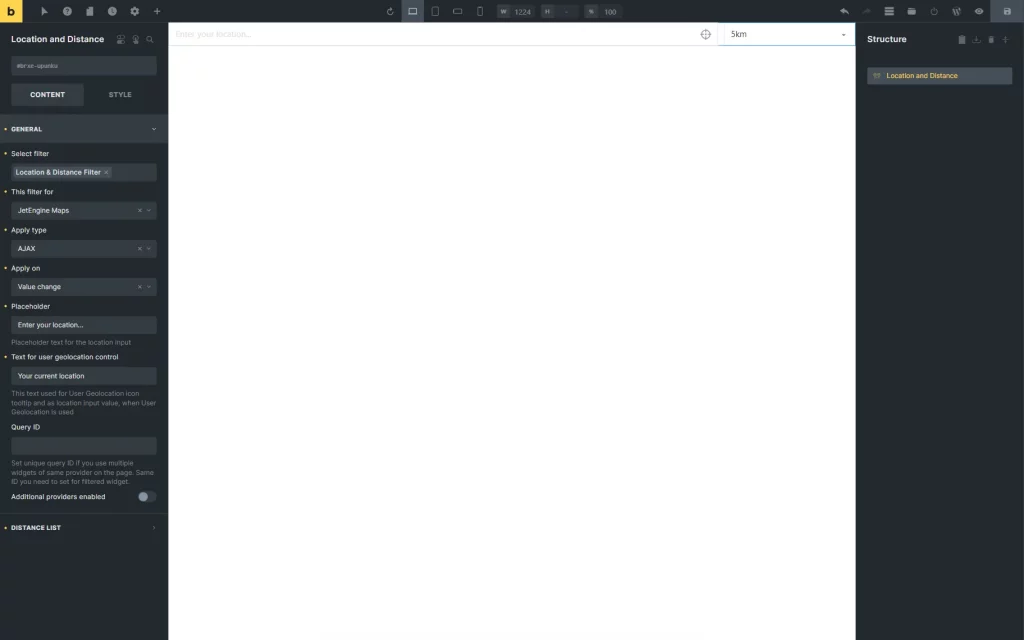
Right away, the Content tab with the main settings is opened:
- Select filter — a bar where one can start writing the filter name to set it as a main source;
- This filter for — a drop-down menu with a list of available providers;
- Apply type — a list of the available submit types: “AJAX,” “Page Reload,” or “Mixed.” The “AJAX” option doesn’t reload the page, “Page Reload” reloads a page, and “Mixed” transforms the URL but doesn’t reload the page;
- Apply on — a selector of the submit trigger. It can be either “Value change” or “Click on apply button” option. If the second variant is picked, one should also add the Apply Button widget to the page;
- Placeholder — a text displayed on the search bar;
- Text for user geolocation control — a text that is used as a tooltip for the user geolocation feature icon;
- Query ID — a field that can be used to set the Query ID and connect the filter with the query;
- Additional Providers Enabled — a switcher that allows setting extra providers except for the one picked in the This filter for field.
If the Additional Providers Enabled feature is enabled, the Additional Providers List appears. Here, the “Add Item” button should be pressed once the new provider is needed.
Every item has its settings: Additional Provider drop-down list and Additional Query ID.
Distance List
The settings section is already completed by default but can be changed if needed.
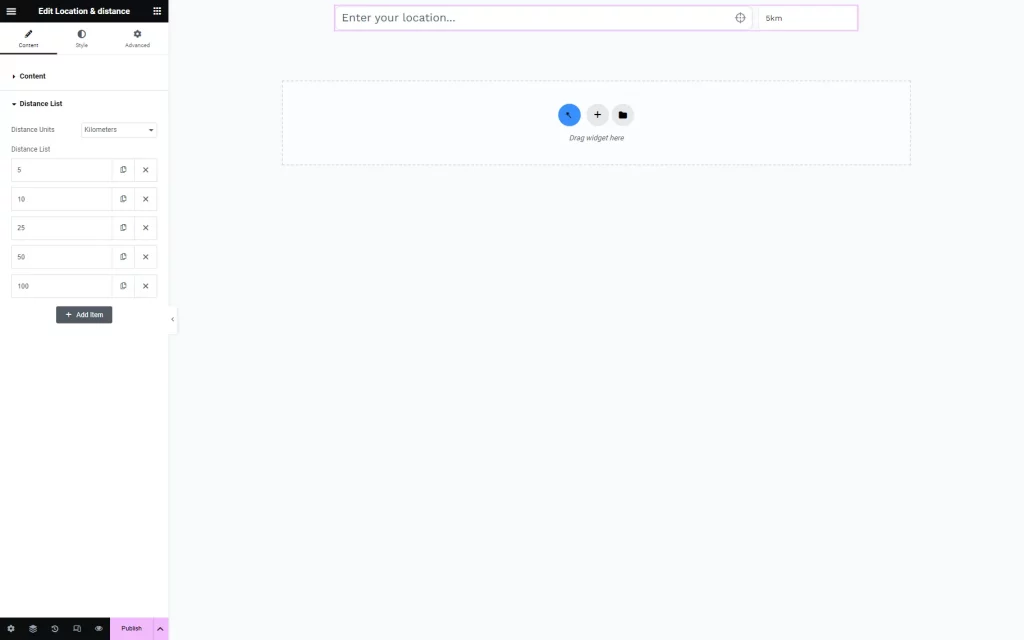
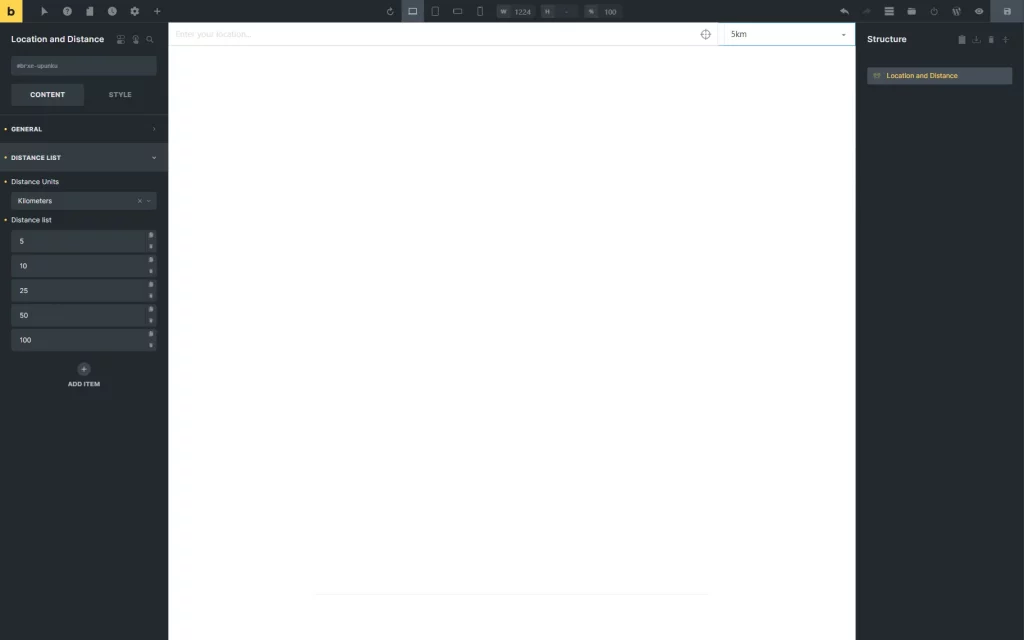
At first, the Distance Unit can be selected. Among the options are “Kilometeres” and “Miles.”
In the Distance List, there are five options presented: “5,” “10,” “25,” “50,” and “100.” These can be edited (by clicking on the item), dragged to change item order, duplicated, or deleted (the last two options are presented by special icons).
Once the needed item is clicked, the Distance value can be changed.
To create a new value, the “Add Item” button should be hit.
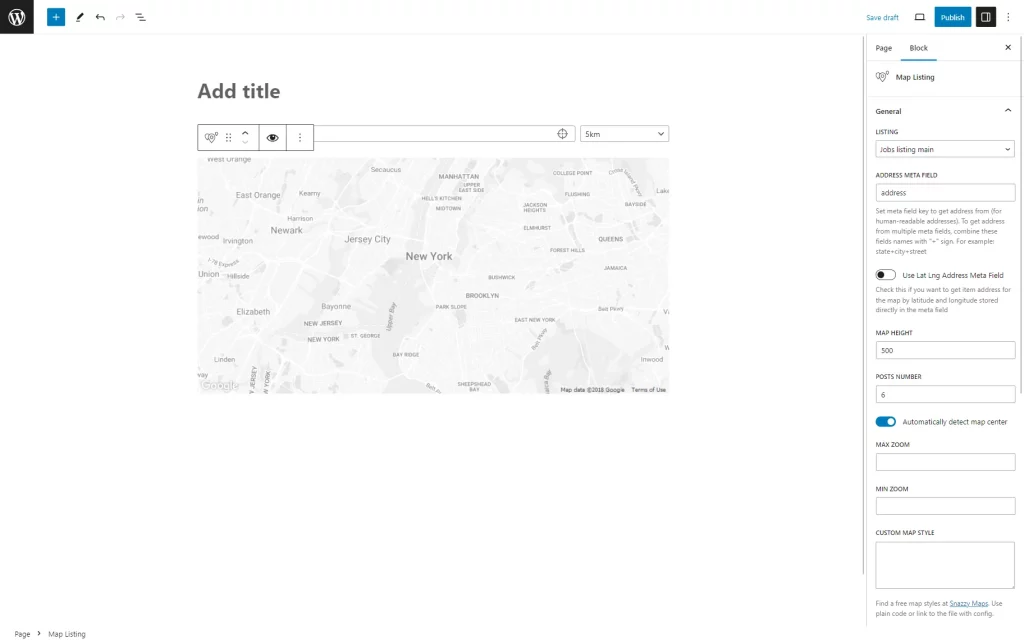
Then, the provider widget should be added to the page. In the given case, the provider is Map Listing.
In the General settings tab, one should select the Listing built beforehand and specify the Address Meta Field that stores addresses attached to the posts of the needed post type.
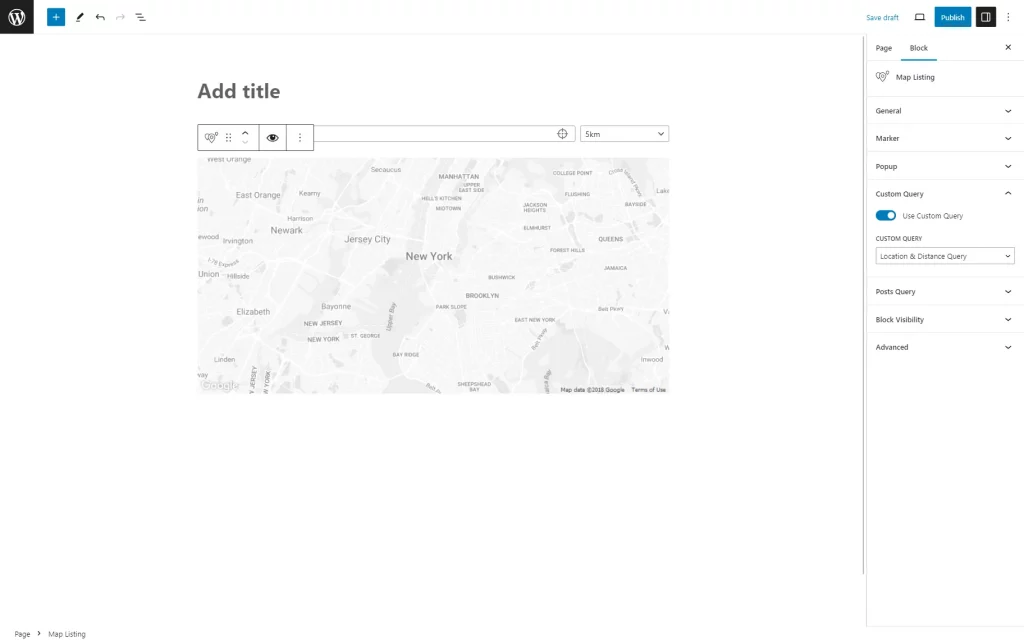
After that, the Custom Query tab should be opened. Here, the Use Custom Query switcher should be enabled, and the Custom Query selected.
With the basic customizations made, changes can be saved by pushing the “Publish/Update” button.
Location & Distance Filter Block in Gutenberg
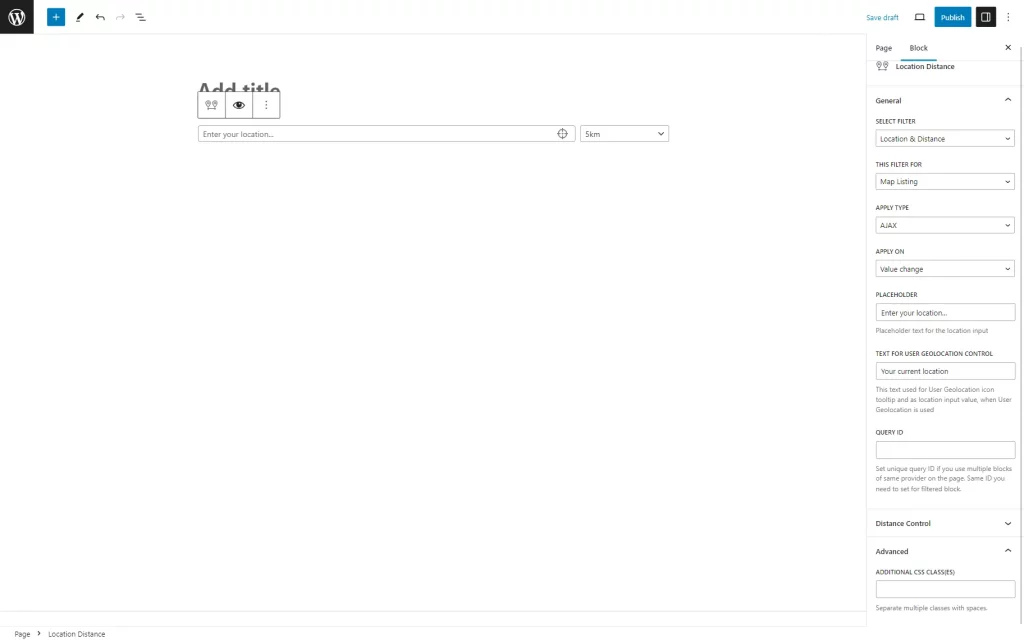
The Listing Distance Filter block can be found in the Gutenberg editor.
General
The settings presented in the General tab are the same as in the Content tab of Elementor.
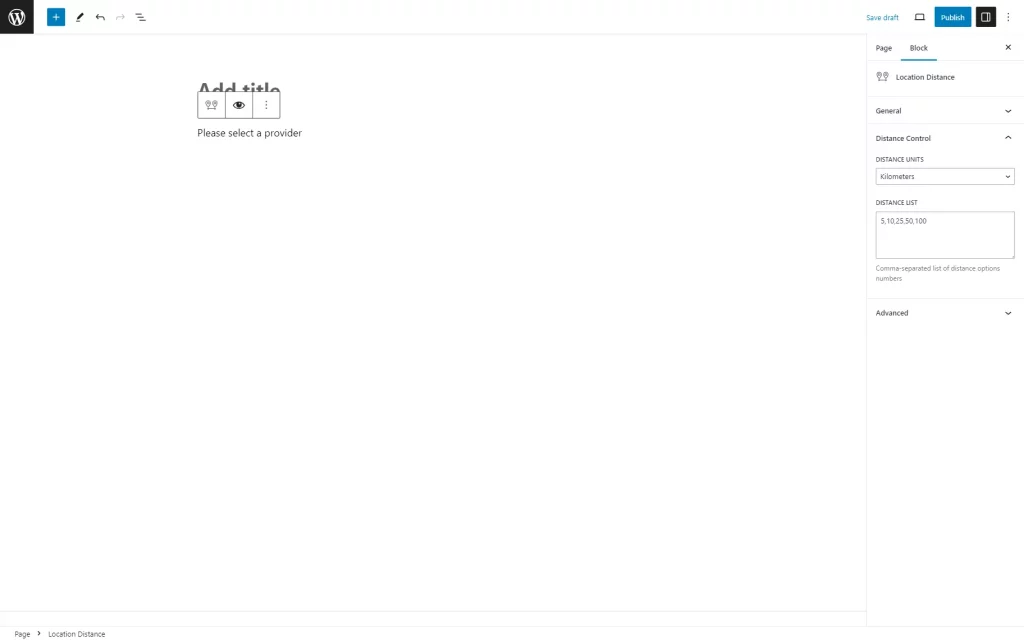
Distance Control
This tab is similar to the Distance List tab in Elementor. However, the Distance List is presented as a text area where values should be placed in one field and separated by commas.
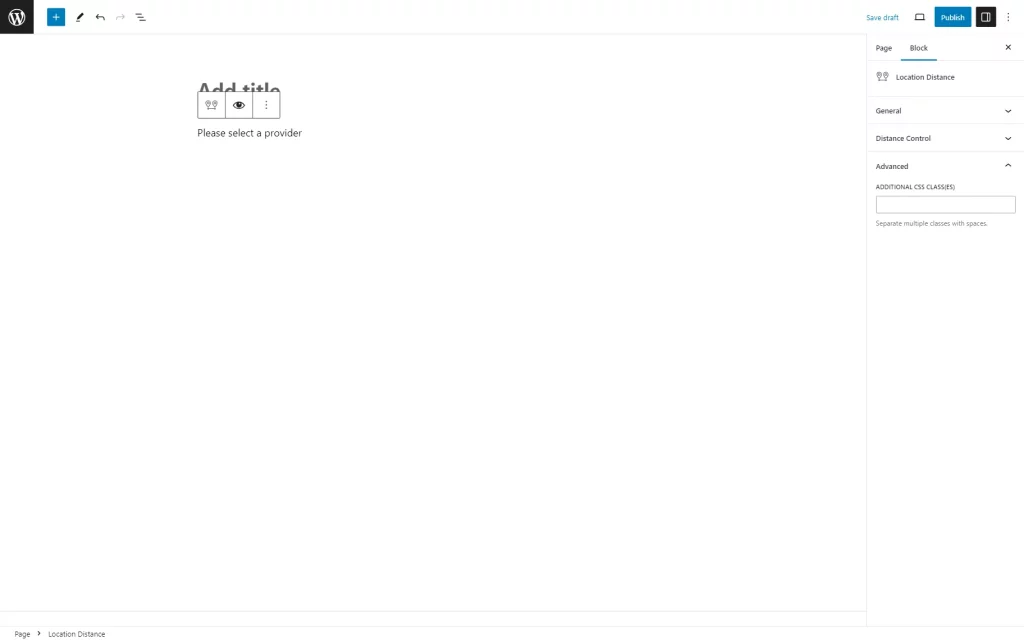
Advanced
The tab is only presented in Gutenberg and includes one field called Additional CSS Class(es), where the code for block styling can be put.
Alternatively, to edit the field, the JetStyleManager plugin’s functionality can be used.
In Gutenberg, the Maps Listings block should also be added for proper feature work.
In the General settings tab, one should specify the Listing and Address Meta Field.
The Custom Query should also be set in the corresponding tab; this tab is the same as in Elementor.
Location & Distance Filter Element in Bricks
The Bricks editor also includes the Location & Distance Filter element. It can be found by typing its name in the search bar.
Content
The settings displayed in the General tab are identical to those located in the Content tab of Elementor.
Distance List
The Distance List settings are also the same as in the Elementor corresponding section.
Results
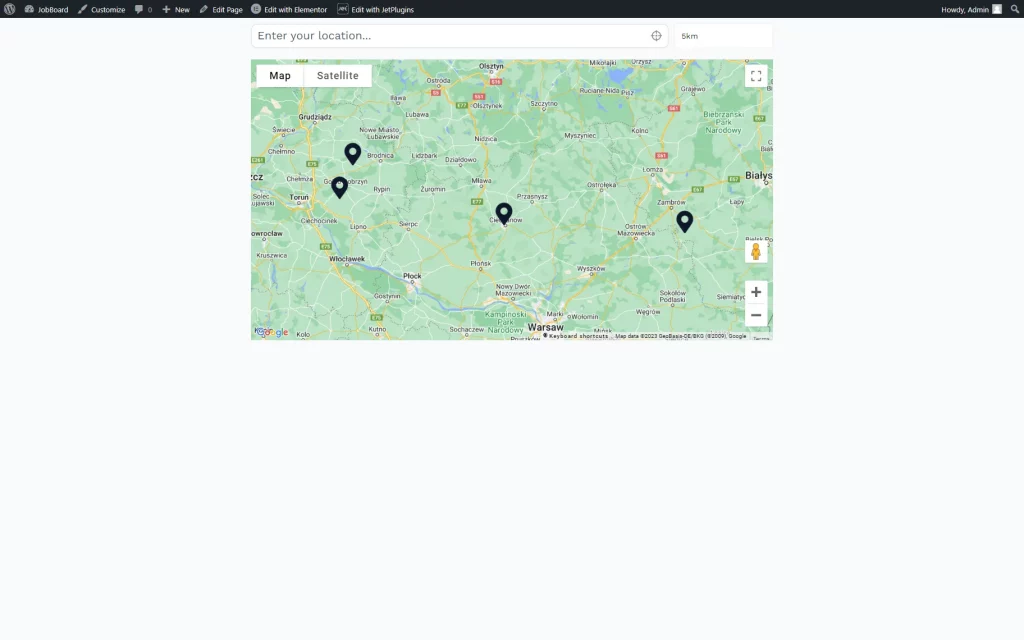
Now, the page can be opened on the front end. The filter and the Map Listing are now functional.
Initially, the map is centered around the point adjusted in the query.
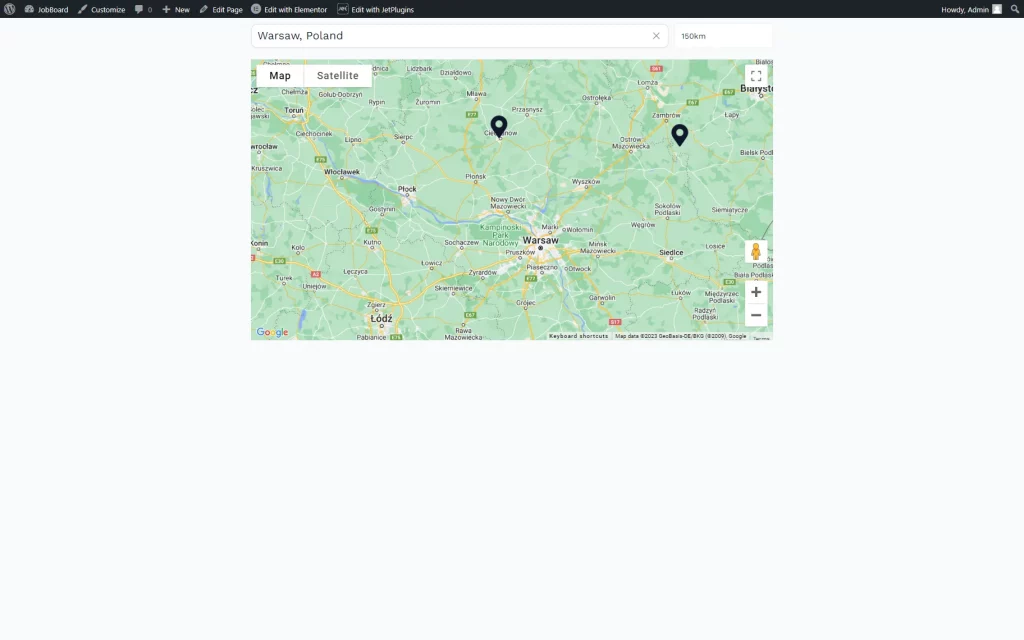
To search, one can complete the field with the desired location. Options will be displayed as the field is filled out.
Next to the bar, the distance units drop-down list is displayed as well.
So, in cooperation, these two features display items within the specified distance from the desired location.
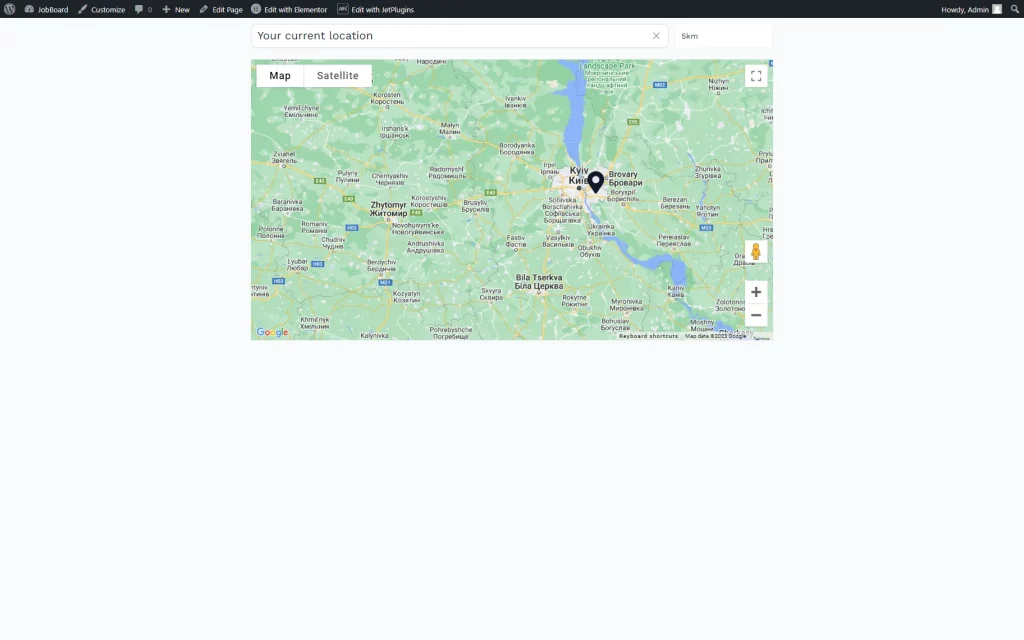
Pressing the “Your current location” button will center the map around the user’s current location and according to the set distance.
That’s all about the “Location & Distance” filter available as a part of the JetEngine and JetSmartFilters plugins for WordPress websites.
