How to Sort Items According to the Rating
From this tutorial, you will learn how to place the data about the average rating of an item to the special meta field and afterward use that field to sort the items using JetSmartFilters functionality.
The JetSmartFilters plugin allows you to sort the items in the Listing Grid according to the value of the Post Type’s meta field. As to the JetReviews plugin, it has the option to store the average rating the users give the item in a separate meta field. So, if you combine those two plugins, you can create a filter that will be able to sort the items according to their rating, which is really useful for different tour/apartment rental websites.
Let’s assume for now that you already have the Custom Post Type, the Listing template, and the Listing Grid for it created. Also, you should read how to use the Average Rating functionality first.
Add a Meta Field for Rating
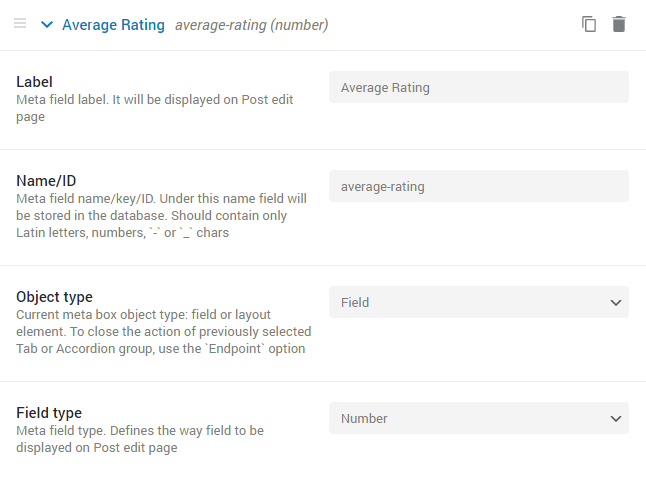
Open your WP dashboard and go to JetEngine > Post Types. Open the post type that you would like to sort further, scroll to the Meta Fields section and add a new field by clicking the “New Meta Field” button. It can be the Text or Number field. Afterward, hit the “Update Post Type” button.
Link the Rating and the Post Type
Go to JetReviews > Settings, scroll the page down, and enable the Post metadata toggle. Paste the slug of the meta field to the Average rating metadata key bar and set the Post meta radio bound. Don’t forget to click the “Sync rating data” button.
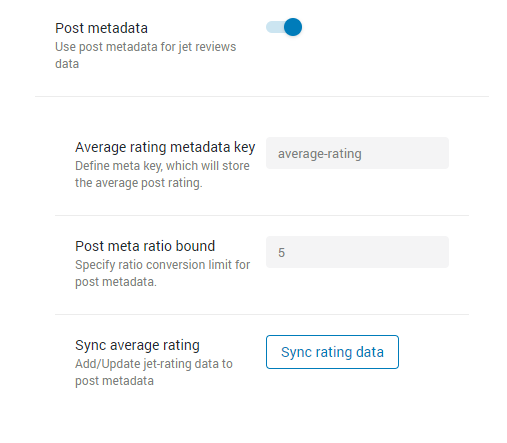
No matter what will be the maximum number in separate ratings of the item – all of them will be recalculated to fit the number you place to the Post meta radio bound bar. For example, let’s assume you have two ratings within one rating type. The rating “A” has a maximum number of 10, the rating “B” – 5, and the Post meta radio bound has been set to 5. The user has rated the item 8 points in “A” and 2 in “B”. To calculate the average rating, the plugin functionality will recalculate the “A” field, so that its maximum number will be 5. This means that the user’s rating will be not 8 but 4. Now we take the rating “A” and “B”, add the values and divide it by 2. The resulting average rating will be 3.
Create a New Rating Filter
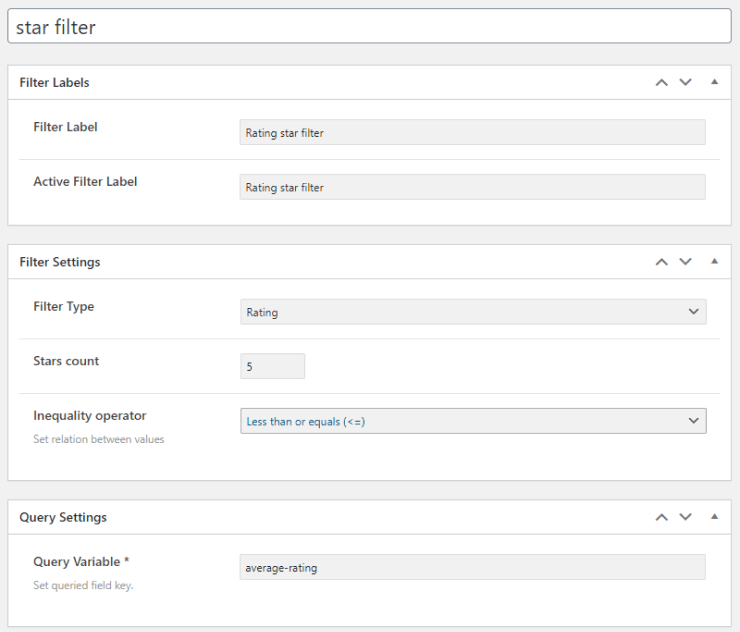
Open the JetSmartFilters > Smart Filters directory and click the “Add New” button. Name the filter and give it Labels. In the Filter Type drop-down menu, choose the “Rating” option. The number you put to the Stars count bar should match the number you have chosen in the Post meta radio bound bar. Choose the Inequality operator and paste the name of the meta field where the average rating will be stored into the Query Variable bar. Afterward, click the “Publish” button.
Add the Filter to the Page
Go to the page where you’ve placed the Listing Grid and open it in the Elementor page builder. In the widget menu, find the Rating Filter widget and drop it near the Listing Grid.
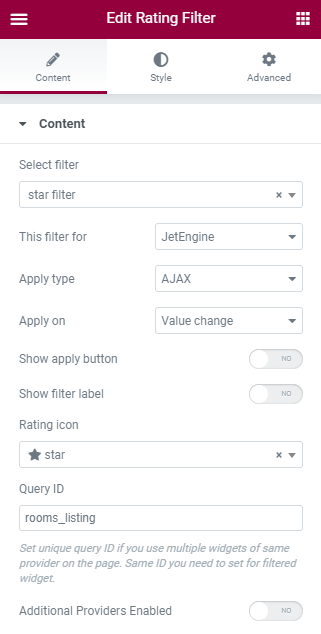
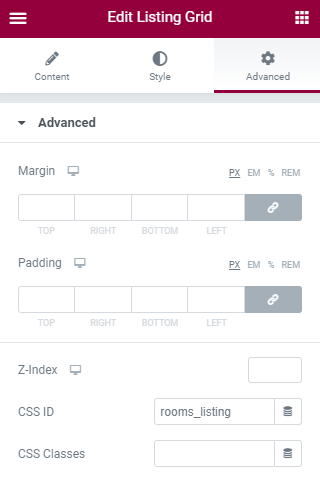
In the Select filter drop-down menu, choose the filter you’ve just created. Set This filter for to “JetEngine”, choose the Apply Type and Apply on options. If there are several Listing Grids created via JetEngine on the same page, you can specify the necessary one in the Query ID bar. Just click on the Listing Grid, open the Advanced menu tab, and set the CSS in the Advanced section. Afterward, paste that ID to the Query ID bar.
Customize the look of the filter in the Style tab and check how it works.
Now you know how to combine the JetReviews and JetSmartFilters plugins to sort the items according to their rating.