How to Add New Products to WooCommerce
From this tutorial, you will learn how to add a new product using the WooCommerce plugin.
Adding a new product to an online shop has become more accessible thanks to WooCommerce. You don’t need to have any coding skills or hire a WordPress developer to code for you. Let’s walk through the process of creating a new product in WooCommerce.
Before we start, make sure the WooCommerce plugin is installed and activated.
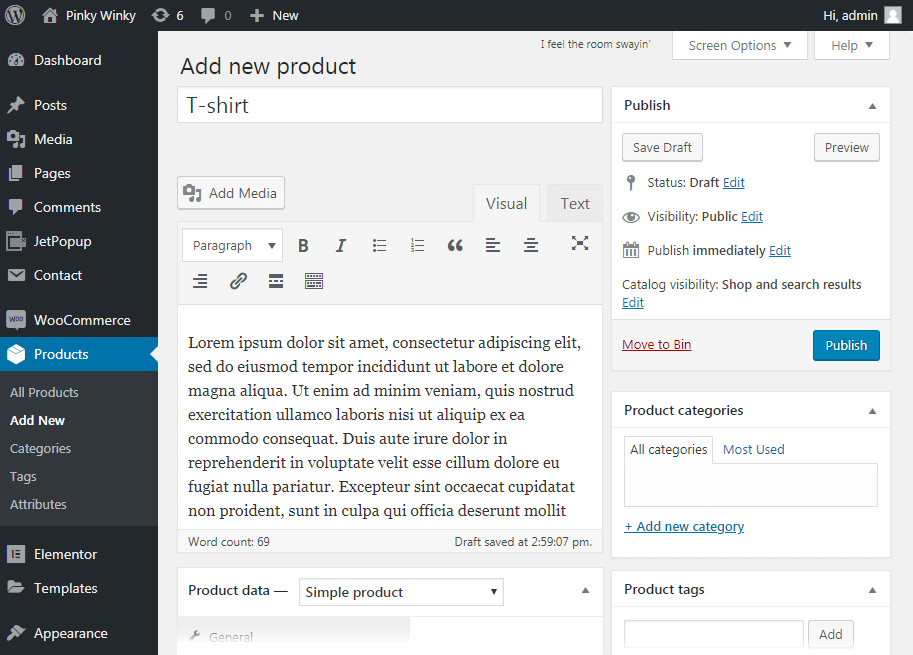
Firstly, log in to the WordPress Dashboard and proceed to the Products > Add New tab.
Type the product’s title into the Product Name field and add the description to the field below.
After that, proceed to the Product data block. Here select the type of your future product from the Product data dropdown.
Afterward, set the Regular (the product price) and Sale (the discounted price that can then be scheduled for specific date ranges) prices for a product.
Later, switch to the Inventory tab, where you can manage the stock for the product individually, allowing customers to add only a certain number of products to the cart, etc.

You can also define how your new product will be related to others in the Linked Products tab.
Fill in the Slug field to create a unique URL address for this particular product.
Scroll the page down to the Product short description section. Add a brief excerpt that will appear next to the product on the listing page or hover.
You can add a category and a tag in the Product Categories and Product tags sections.
The last step is to scroll up to the Publish section and click the Publish button.
Now you can add new products to WooCommerce. Go to your website, and reload a page to view the newly added product. You can come back later and change any information about the product if necessary.