How to Create WooCommerce Product Variations
Learn more about how to manage WooCommerce functionality on your site. From this tutorial, you’ll learn what a variable product is and how to add it to your WooCommerce shop.
In case you need to show different sets of one product on your WooCommerce site and enable the customer to choose the product in a certain color or complectation, you can use the Variable Products option. Also, learn how to add external products from this tutorial.
For example, you have one type of dress in various sizes and colors. Here is where the Variable Products option comes into play. From this tutorial, you’ll learn how to use it.
Creating Variable Product
First, navigate to the Products > Add New screen on your WordPress Dashboard. Here you can create a new product. Type in its name and add all the necessary content as you usually do.
In the Product Data block, select the Variable product option in the drop-down list.
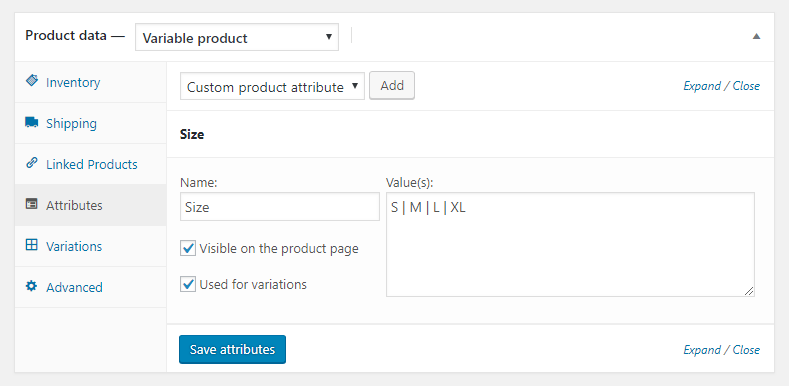
Switch to the Attributes tab and choose the Custom Product attribute option in the drop-down list. Then click the Add button.
Type in the attribute’s name (e.g., Size) in the Name field, and fill in the attribute values (e.g., S, M, L, XL). To separate attribute values, please, use | separator. In our example, we used the Size and Color attributes.

Check the Visible on the product page option to make the attributes shown on the product page.
Also, check the Used for variations option to use the attribute for product variations.
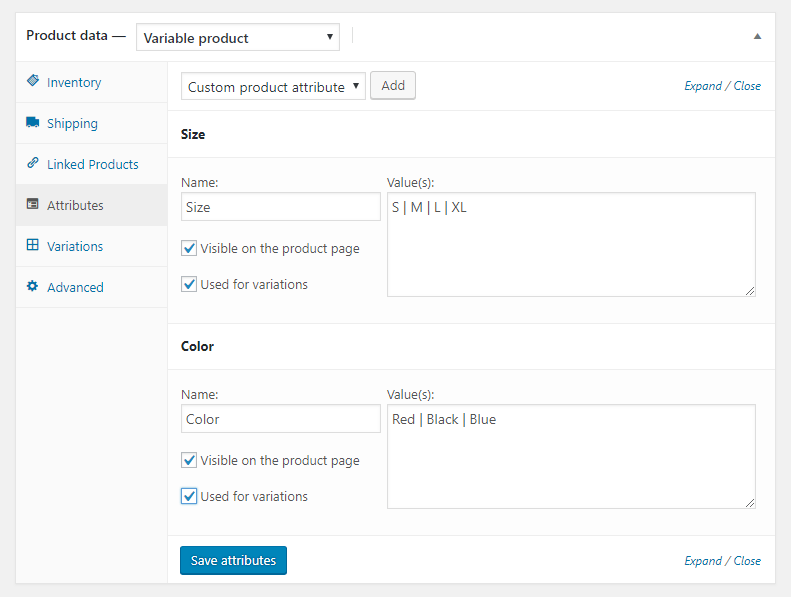
Now, let’s add one more attribute and click Add. In my case, it will be Color – red, black, blue. It looks like this.

After everything is done, click the Save attributes button to save the changes.
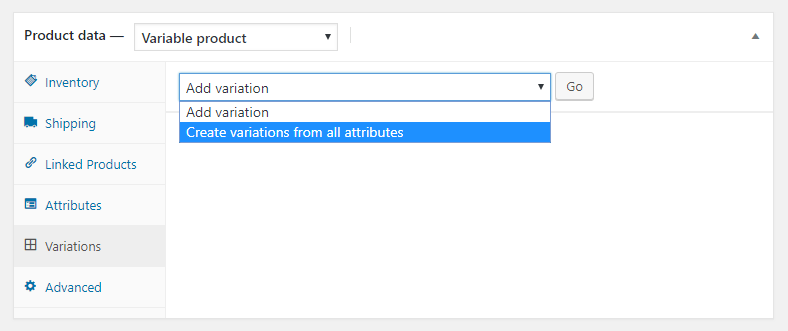
Now, let’s proceed to the Variations tab. Here you can add variations to the product. Select the Create variations from all attributes option from the corresponding drop-down menu and click the Go button.

When Are you sure you want to link all variations? the notice appears, click the OK button. After that, you’ll see 2 variations added notice, informing you about the success.
After that, you’ll see different variations according to the attributes you’ve created. The next step is to click the Expand button. New sections with features of each product will expand.

Here you can add an SKU (short for the stock-keeping unit – the product code that allows to track a product for different purposes) to the variation (if you don’t know what it is for, please, read this tutorial), upload an image to show the variation to the customers, change the product variation’s regular price, sale price, select its stock status, weight, and dimensions.
Note that if you have too many products that have common characteristics, you don’t need to enter properties one by one. You can click on an arrow near Add variation, select variation (e.g., Set regular prices) or any other property, and click Go.
Lastly, click the Save changes button and Publish.
Now you know how to create product variations for your WooCommerce store.provides