How to Enable WooCommerce Integration
Go through this tutorial to discover how to connect the JetAppointment plugin’s form with WooCommerce checkout.
If you enable WooCommerce integration for the JetAppointment plugin, you can adjust online payment right after the visitor books the service. It seems to be a must-have option for having a successful business, doesn’t it? This tutorial will show you how to enable WooCommerce integration and use all the additional functions of JetAppointment.
By this time, you have probably already passed the basic plugin installation. Before we start, please make sure that you have created and applied default WooCommerce pages. It is a vital moment because the redirect from the appointment form to the checkout page will be created automatically.
Enabling WooCommerce integration
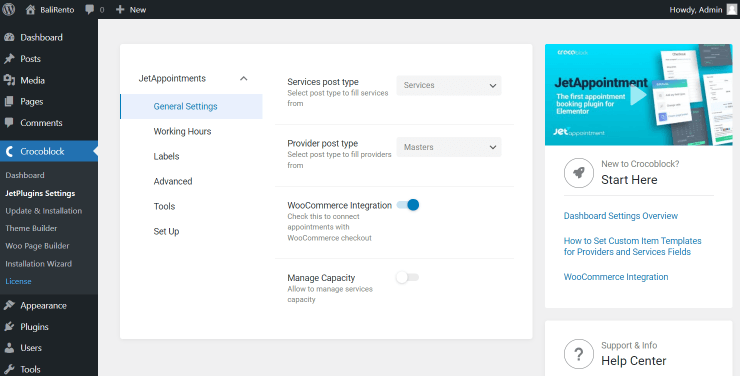
Navigate to Appointments > Settings and enable the WooCommerce Integration toggle.
Then, proceed to the WooCommerce > Products and check whether a new product appeared on your products list.
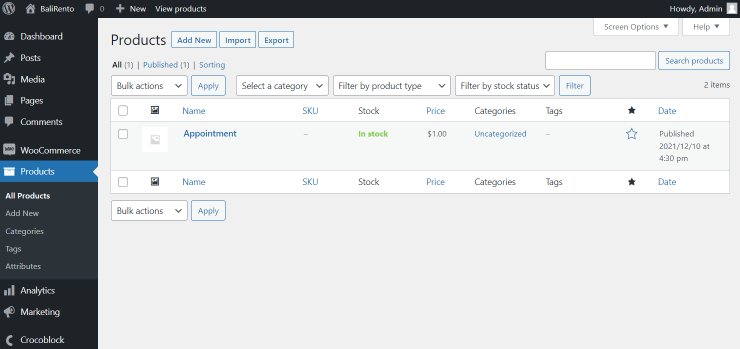
It is a sample product created automatically, and you don’t need to make any changes here.
Setting the Price for the Services
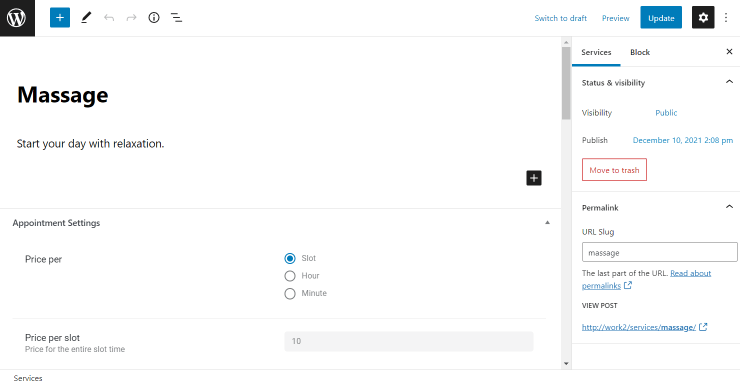
Please note that there is no need to set the price in the Woo product. Navigate to the services post type, open the needed service, set the Price per value, and type the price in the newly appeared field.
Once the price is set, click the “Update” button.
Define the form’s Notification Settings
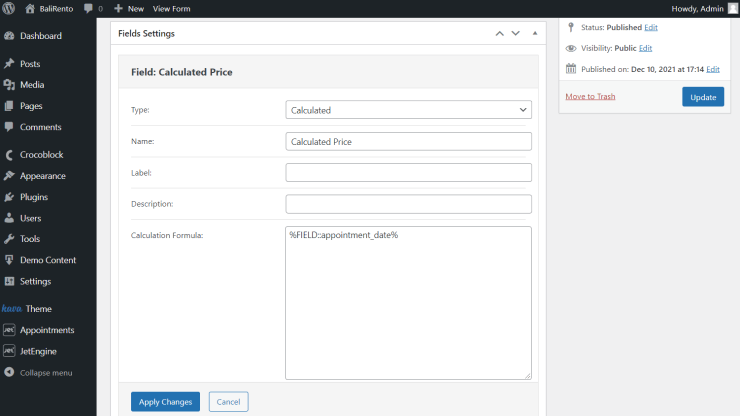
Make sure that you have proper notification settings in your forms. Go to JetEngine > Forms, find one of the appointment forms created automatically, and click the “Edit” button. Firstly, you have to create an additional calculated field for price. Click the “Add Field” button.
Set the Type to “Calculated,” define Name and Label, and paste the following Calculation Formula:
%FIELD::appointment_date%, where ‘appointment_date’ represents the “Appointment Date” field.
Don’t forget to click the “Apply Changes” button.
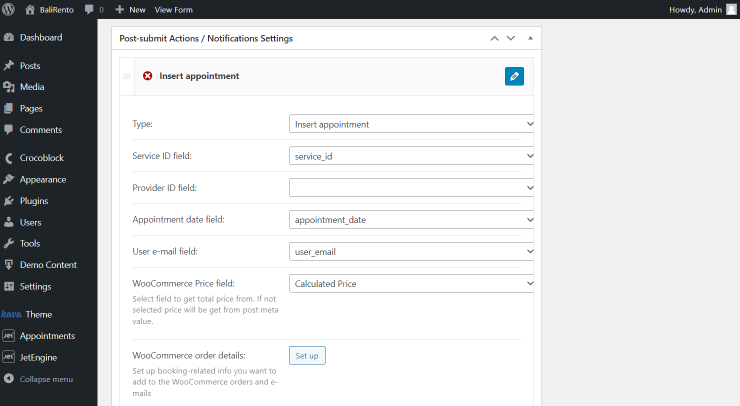
 When you create an additional price field, it is time to deal with the Post-submit Actions / Notifications Settings block. Hit the button with the pencil icon to start editing the Insert appointment settings section. The first five rows are filled automatically. However, you can change the values if necessary.
In the WooCommerce Price field, select the price field you just created.
To define how the WooCommerce order will look, click the “Set up” button near the WooCommerce order details option. Check this form and the WooCommerce linking tutorial.
WooCommerce checkout fields map allows you to set the auto-filling of checkout form fields. All the data the user already typed into the form will be automatically inserted into the checkout form fields.
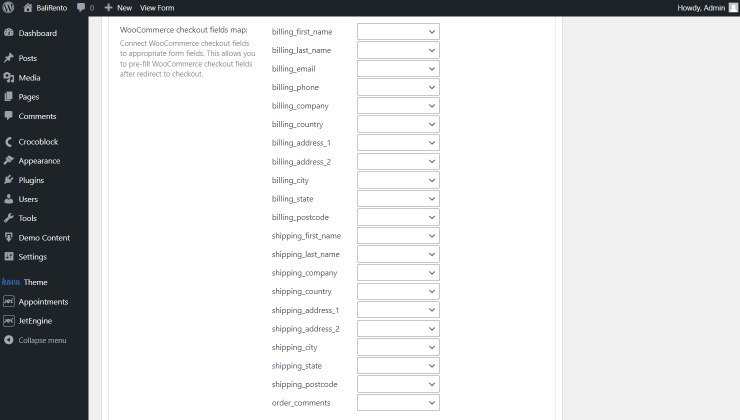
Push the “Update” button after you have adjusted the fields.
Book & Pay
Check the progress.
Now you know how to integrate WooCommerce with the JetAppointment plugin.