

How to Create a Drop-Down Menu with Mega Menu Widget in Elementor
From this tutorial, you will learn how to create and customize a stylish drop-down menu with the JetMenu plugin.
JetMenu plugin allows changing the menu’s appearance and creating a stylish drop-down menu as well as powerful horizontal and vertical mega menus. Follow the steps described below in order to find out more about the drop-down menu and the way to build it.
Creating and Styling Up a Drop-Down Menu
The first step is to install and activate the JetMenu plugin.
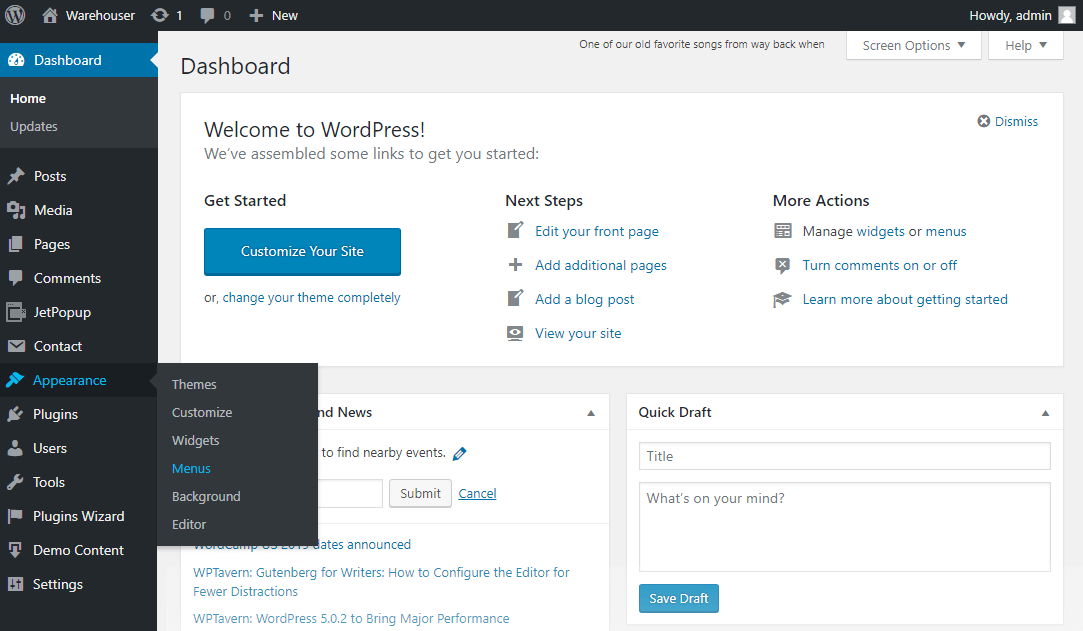
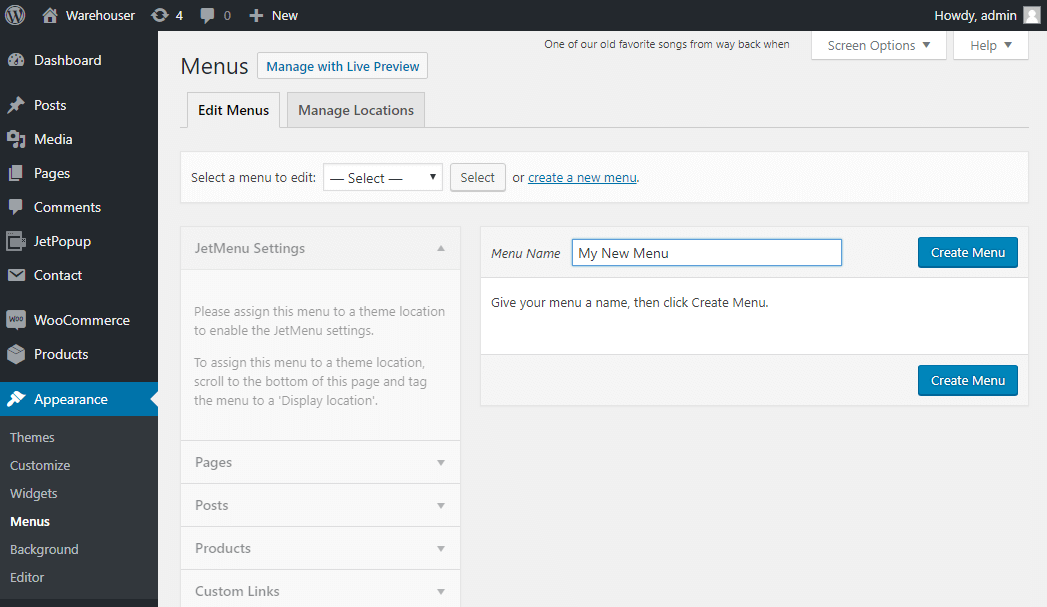
After that, go to Appearance > Menus section in WordPress Dashboard and create a new menu by clicking Create Menu option.

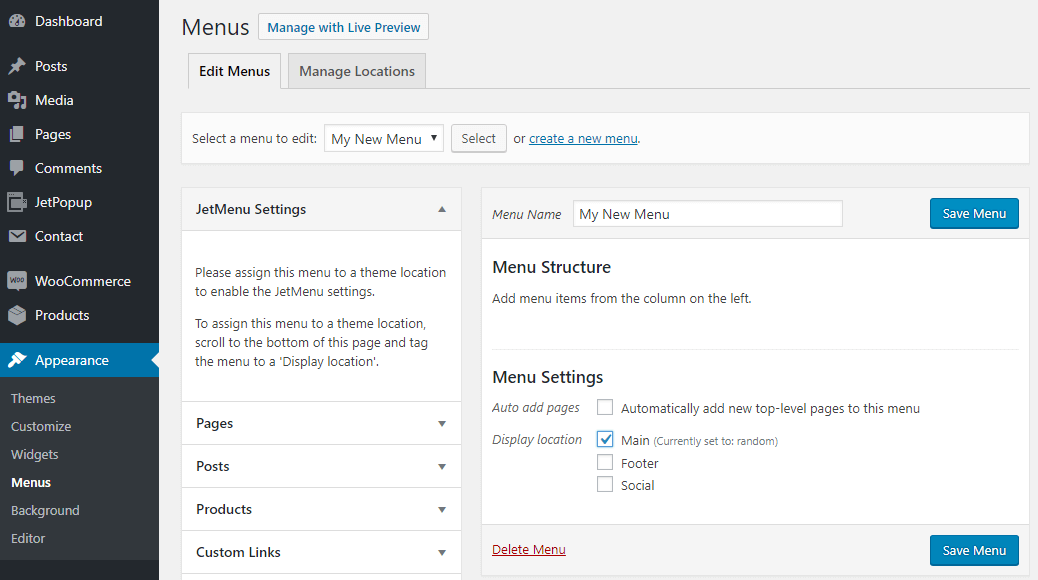
Provide a name for the new menu and choose the menu’s location on the page from the list. Then, click Save Menu.

Your new menu can be shown anywhere on the page, the menu locations list totally depends on the theme active on your site. Make sure to enable JetMenu for the current location in the JetMenu Settings panel and click the Save Menu option.

Customize the Menu’s Items
Now fill up your menu with the pages, posts, or custom links, that you want to be displayed in the menu.
Then, proceed to build the structure of the menu. Also, you can arrange the menu blocks in the order you prefer.
Let’s imagine you want certain items to become the children of any other item. All you need to do is to grab and drag the items a bit to the right under the certain main item where you want to add sub-items.
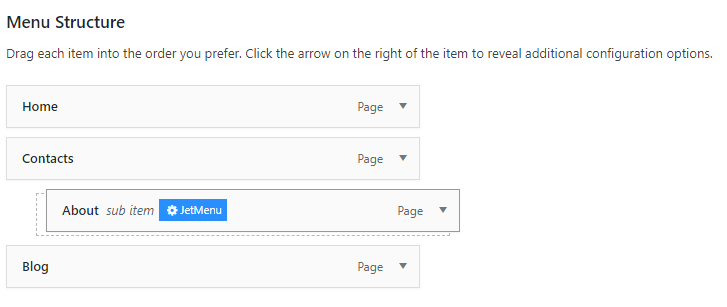

It is also possible to add several levels of sub items using the preferable hierarchy in order to expand the menu. When the structure is created click Save Menu.
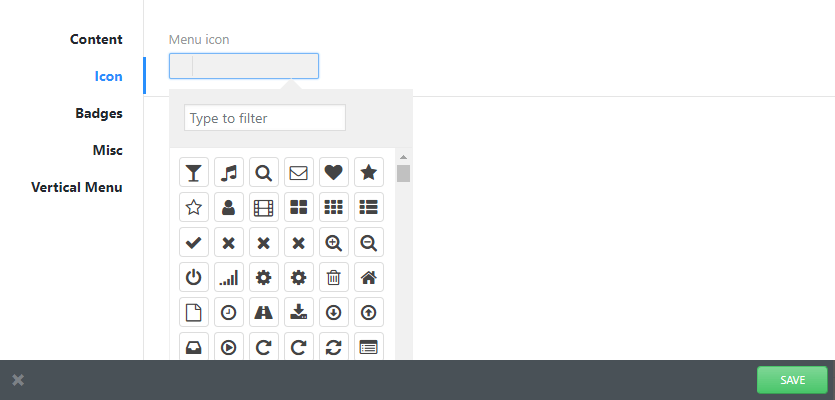
With the help of the JetMenu plugin, you can assign icons and badges to your menu items. When you hover over the item you are going to see the JetMenu button on the left of the title. Click it.
As a result, a new window will appear, where you have got several tabs. In the Icon section, you can select one of the icons from the icons library to use for the menu item.

Then, go to the Badges tab, type in the text, which should be displayed as the badge, and choose the color for the text and the badge itself using the color picker tool. Close the window and repeat the process for all items, to which you want to add an icon and a badge.
Style Settings in JetMenu for Submenu Items
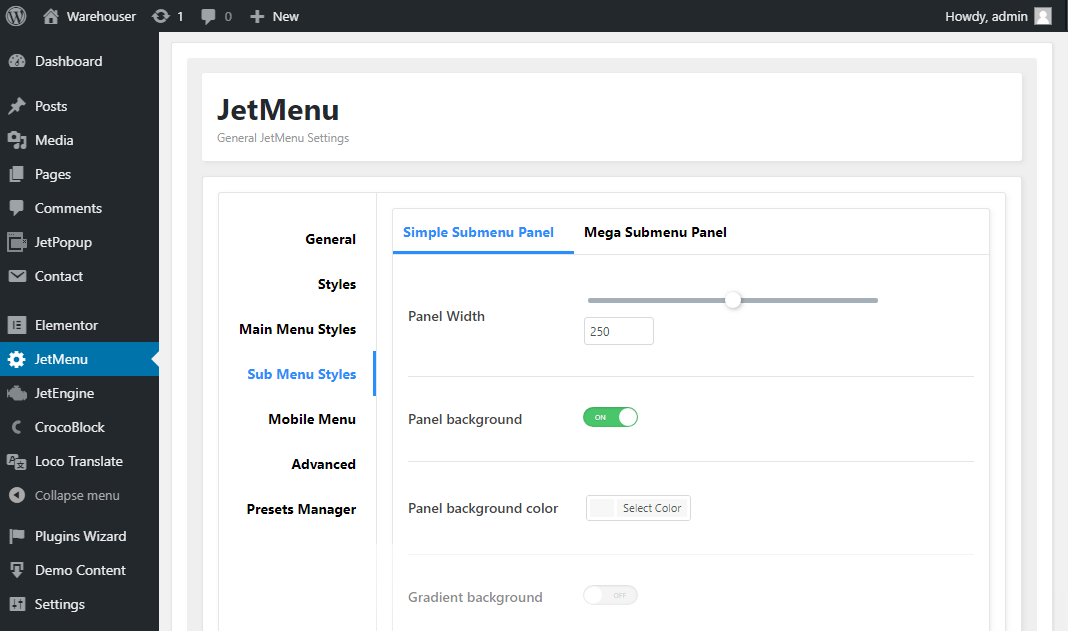
You can access lots of stylization options if you go to the JetMenu Settings block in WordPress Dashboard. Here you are going to find the whole bundle of stylization settings, which let you decorate and customize your menu the way you like.
Proceed to Sub Menu Styles and make sure you’re on the Simple Submenu Panel tab now.

This block allows managing the following stylization settings:
- Panel width – the general width of the submenu panel, set in px;
- Panel background – turn this option on to access the panel background color option. If you want to use the gradient background, turn this option on as well and pick the second background color to apply for the panel;
- Panel background gradient direction – here you can choose the direction of the gradient in order to define how the two colors should blend (from left to right, from top to bottom, etc.);
- Panel background image – here you should pick an image to use for the submenu panel as a background. After you’ve set an image, feel free to set its attachment, position, repeat, and size;
- Panel border – enable this option to view the settings available for the border. In case you’ve decided to use the border for the submenu panel, here you’ll be able to set the border style (solid, dotted, dashed, etc.), its width and color settings.
- Panel box shadow – enable this option to access the shadow settings and apply the shadow around the submenu panel.
In this block, you can as well access the panel padding, border radius, and margin values to customize the submenu panel’s appearance according to your needs.
Enable Submenu Item Description and customize its typography.

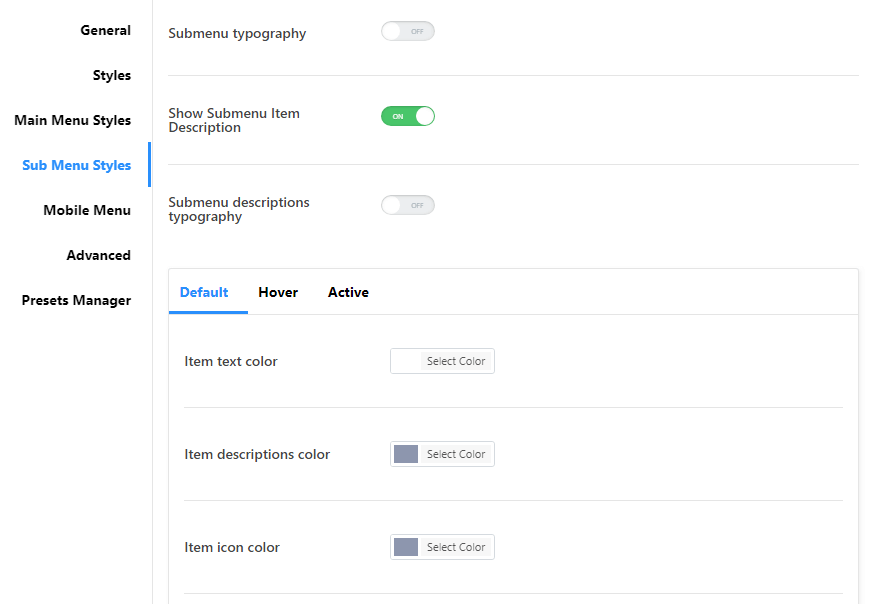
Choose the colors of items, text, background, etc. You can set colors in 3 modes: Default, Hover, and Active.
JetMenu Submenu Styles Customization within Elementor Page Builder
If you are using the Elementor Pro or JetThemeCore plugin, you are able to add the newly created menu to the heading template with the help of the JetThemeCore or Elementor Pro library.
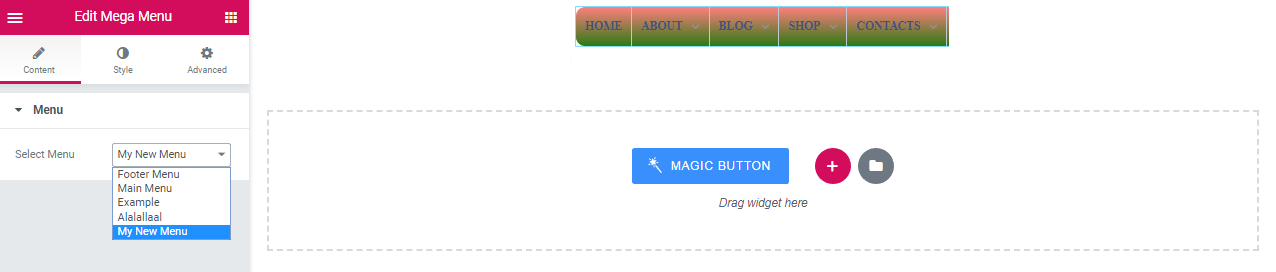
Open the template for editing and find the Mega Menu widget among the elements on the left panel.
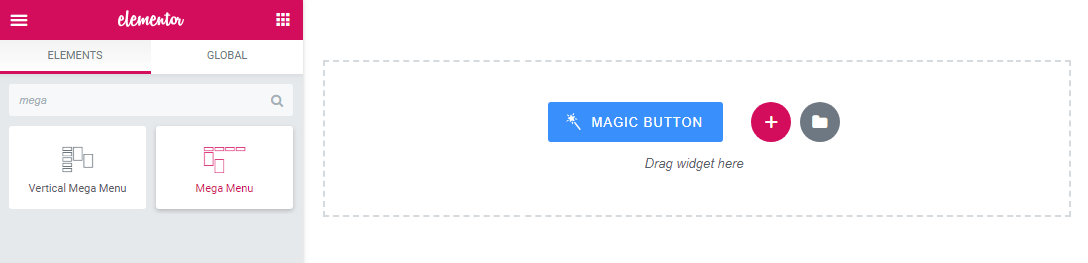

Drag it to a new section and then select the menu that you want to be displayed.

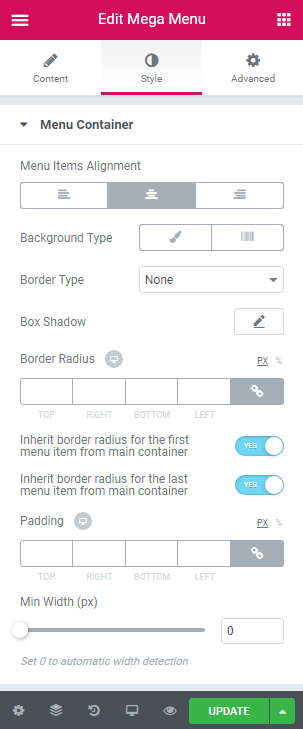
You can manage the widget’s style settings from the Style block available for the JetMenu widget. These would be the same stylization settings as were available in Sub Menu styles from the JetMenu block in WordPress Dashboard.

So, here we go. Your drop-down menu is eventually ready. Save all the changes and go to the page to have a look at the new menu.
Now you know how to create a stylish drop-down menu easily.