Sometimes you want to visualize your content, and WordPress table may be the most suitable option. It is not only convenient for you but also catches the eye of the user.
Of course, there are various alternatives for structuring information in tables. You can build a static table in Gutenberg or use other WordPress table plugins to create a dynamic one. Discover how to make one that will be just perfect for your website.
Table of Contents
- WordPress Tables Types
- Creating WordPress Static Table in Gutenberg Editor
- Creating WordPress Dynamic Table in Gutenberg Editor
- Gutenberg Static and Dynamic Table FAQs
- Bottom Line
WordPress Tables Types
The main point that helps to divide tables into types is the way it pulls out the information. That’s why there are two main types of WordPress tables.
Static WordPress Table
This type refers to the content typed in manually, so it can’t pull out the data from other data. That means that the person who creates a table should fill in all the data, which will be static.
Dynamic WordPress Table
Once you deal with such a table type, the data is pulled out from the defined sources. As an example, it can be SQL-based tables that can be uploaded to WordPress.
Creating WordPress Static Table in Gutenberg Editor
To create a WordPress static table, head to WordPress > Pages and click on the “Add New” to create a new page. Another option is to choose an existing page and place a table there.
So when the page has opened, give it a title and click on the “Plus” icon to open the blocks list. Find a “Table” block and click to place it.
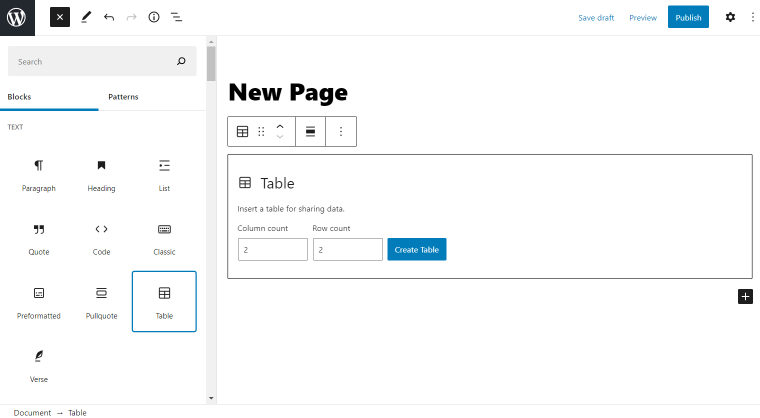
Set how many columns and rows will be displayed using Column count and Row count drop-down menus. Create a table by pushing the similarly named button. Click on the gear icon on the top left part of the page editor to open the WordPress Table block settings.
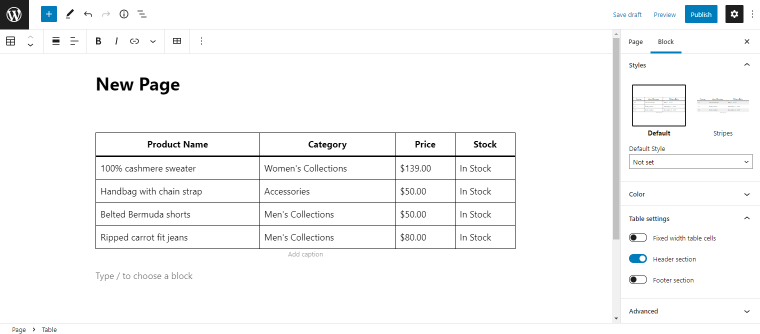
- Styles — define the table appearance type and its default style;
- Color — pick a color of the text and background;
- Table settings — enable three toggles that let you set Fixed width table cells and adjust Header and Footer sections;
- Advanced Settings — set an HTML anchor and add Additional CSS class(es).
Customize all the needed sections and click on the “Publish” button. Or update if you placed the table on the existing page. Go to the front-end to check the new table.

The static table is ready.
Now let’s learn more about dynamic tables.
Creating WordPress Dynamic Table in Gutenberg Editor
The following step is creating a dynamic table. For this purpose, I will use the JetEngine plugin. Make sure that Tables Builder is installed and enabled before building a dynamic table in WordPress.
Enable Dynamic Tables Builder module
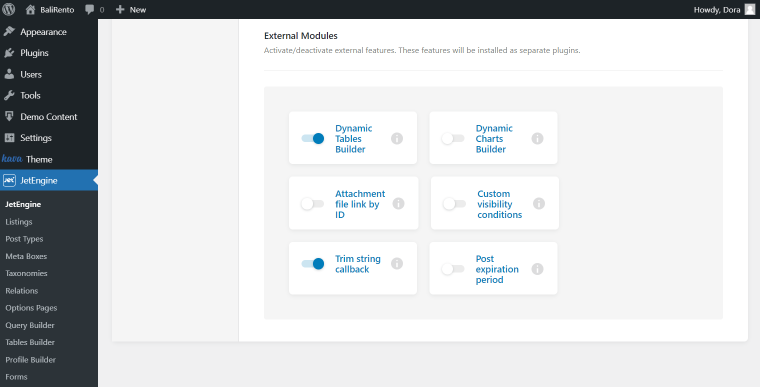
To check if it is enabled, go to JetEngine > Modules > External Modules. Activate Dynamic Tables Builder if it isn’t toggled on.
Besides, we have a well-covered Tables Builder overview. Check it to make the work with the module more convenient.
Create a Query
To build a Dynamic Table, firstly, I should consider working with Query Builder.
To make a query, go to the JetEngine > Query Builder and click on the button to add a new query.
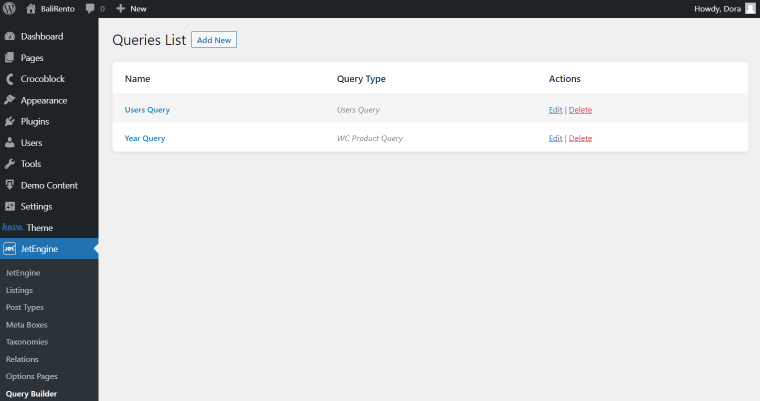
Now I will work with SQL Query.
For this, you need an SQL file with the table. To display and use it with the query, go to PhpMyAdmin, find your website database, and click on the “Import” button.
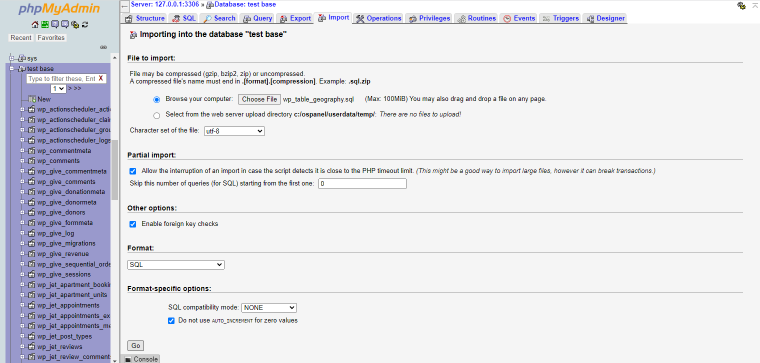
Choose the file and click on the “Go” button.
Note that for correct work, you need to begin typing the title with table prefix. By default, it is set to “wp_” unless you have changed it yourself earlier.
Once the import is successful, you will see a corresponding message.
Now the SQL file will be available during the query editing. Restart the WordPress website and come back to the query to set the SQL table file.
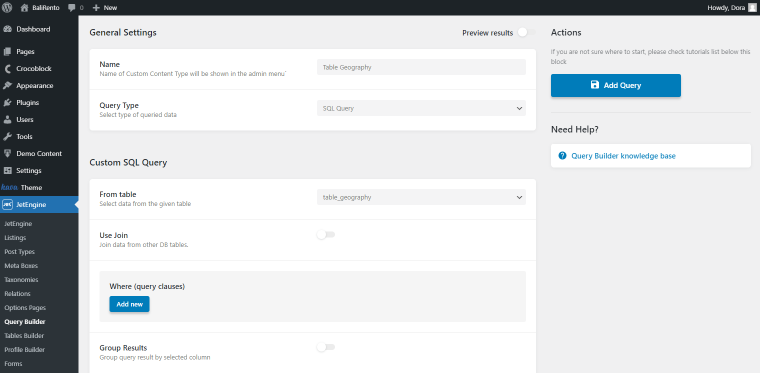
Name the query and select the “SQL Query” option from the Query Type drop-down menu.
Now I will use a Query built on Crocoblock YouTube channel statistics. I can set an order for some of the columns data. Proceed to the “Order & Order By” line and click on the “Add new sorting parameter”.
For instance, I will set an order by views.
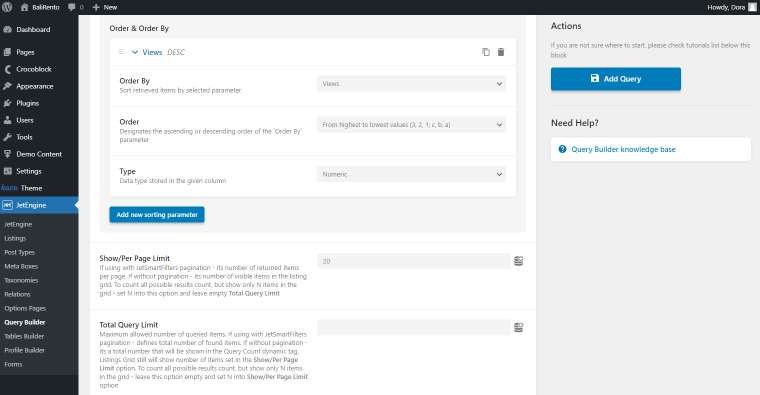
Also, we can set a Show/Per Page Limit to limit the number of items on the page.
Complete all the needed fields and publish the query by pushing the “Add Query” button.
Add new table
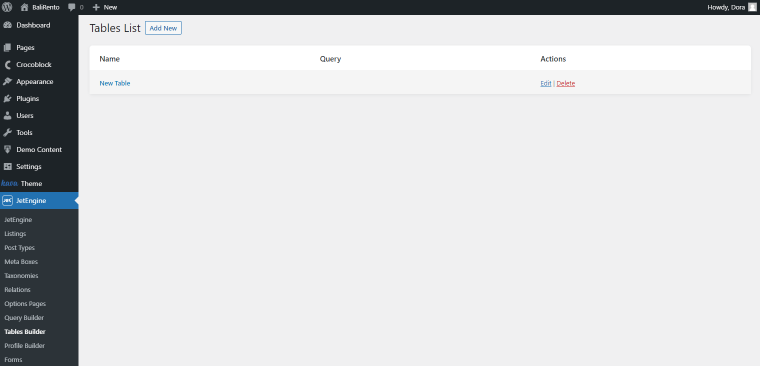
Now go on directly to Tables Builder. Head to JetEngine > Tables Builder and add a new table.
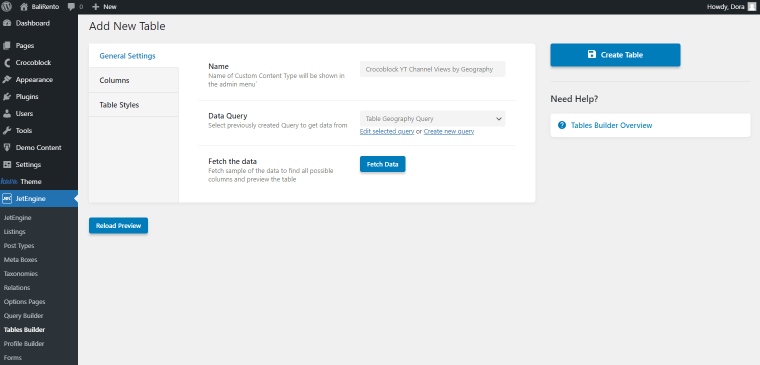
Start with the General Settings. Name the table and select the newly created query as the data source. Don’t forget to click on the “Fetch the data” button to connect the query with the table.
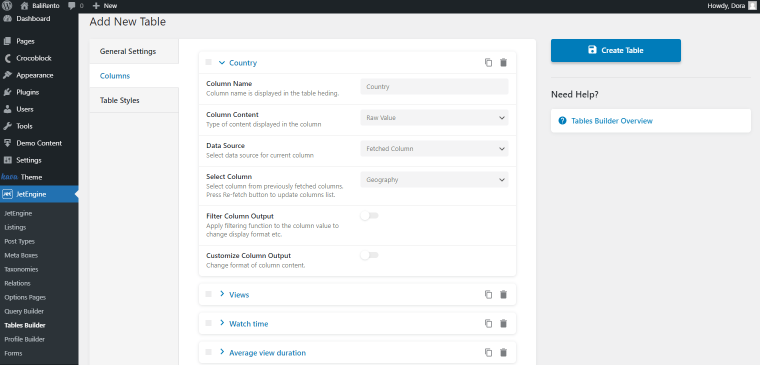
Proceed to the Columns tab and attach all the needed columns. I use “Raw Value” as the Column Content and “Fetched Column” as the Data Source for SQL-based tables.
Style WordPress table
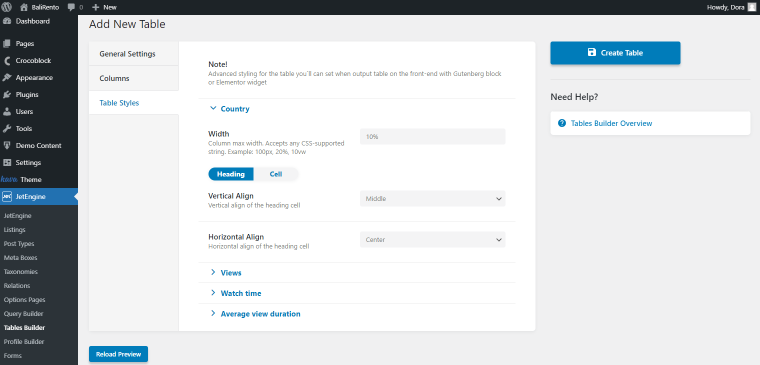
The next tab is Table Styles. Customize the columns accordingly. The further style editing will be available in the Gutenberg editor when JetStyleManager is installed and activated.
Optionally, you can reload preview by pushing the same name button.
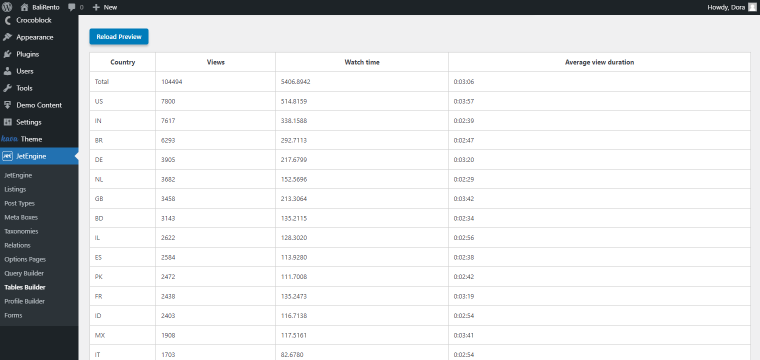
After finishing the editing, click on the “Create Table” button.
Add table to the page
The further stage is to add a table on the page. Go to Pages > Add New. Name the page and place the Dynamic Table block on the page editor.
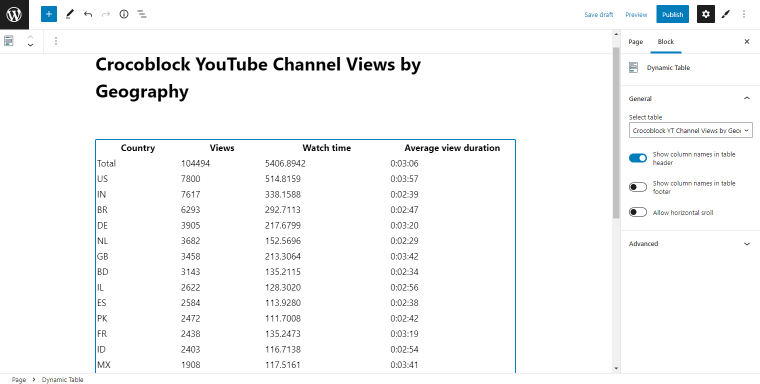
Enable all the needed toggles in the General Settings and work on the Advanced settings if desired.
Move on to the JetStyleManager style settings by clicking on the “Brush” icon on the right top part of the page editor.
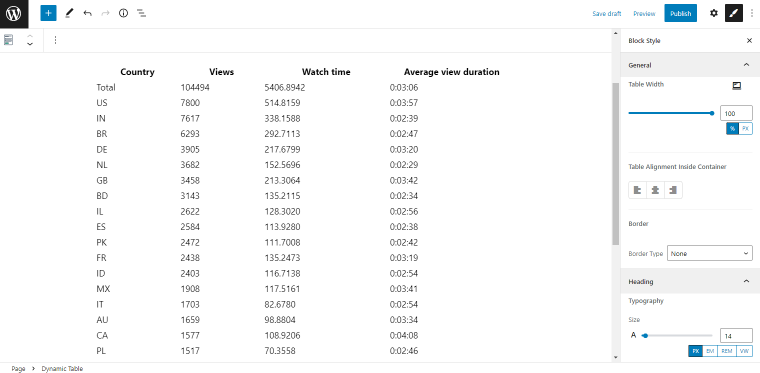
Set the Table width, Table Alignment Inside Container, and Border Type in the General Settings.
The next are Heading and Body Settings. There you can customize the appearance of the heading and included items accordingly.
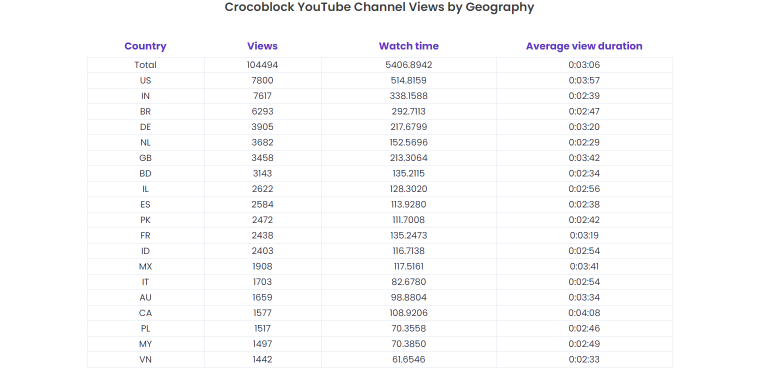
Publish the page after all the customizations and check it on the front-end.
📚Furthermore, check our blog article about creating a WordPress table with WooCommerce products.
Gutenberg Static and Dynamic Table FAQs
To build a static table, work with a Gutenberg Table block. Type all the values manually and add a table to the needed pages.
To make a dynamic table, you can use Tables Builder by JetEngine. It allows you to fetch the data from the Query Builder that you customize according to your wishes.
You can insert a table into any WordPress page. To place a static table, open the Gutenberg Editor from WordPress. After that, click on the “Plus” icon to open the blocks list. Find the Table block and click to put it on the page. Select the number of columns and rows, fill in the table with the required information, and customize the table using block settings.
To insert a dynamic table onto the page, you can work with JetEngine plugin. Open the blocks list and type “Dynamic Table” in the search bar to find the samely named block. Place it on the page and pick a created table. Customize it in a more complex way than you could do while the table editing early on.
Once the table is created, it can be added to the post.
The first way to do it is to add a table to the separate posts:
1. Go to the post where you want to add a table and click on the “Edit” button. That will redirect you to the Gutenberg block editor.
2. Pick a Table block from if you want to create a static table. This one will be input manually and can’t pull out the dynamic data.
However, you may want to add a dynamic table.
3. In this case, search for it in the blocks search bar if the JetEngine plugin is installed and activated. You need to create a table using Query Builder and Tables Builder beforehand.
Another way to display one table that will be displayed with all the posts is to add the Table block or Dynamic Table block to the posts listing template. When doing so, all the posts will be accompanied by the table.
While working with an SQL-based table, you will need to know what the table prefix is. So, it is the standard value for all the tables added with the help of PhpMyAdmin. This value should be put directly before the SQL file title to make it work. Otherwise, the table will not be displayed on the WordPress website.
By default, it is set to the “wp_”. For instance, to make a table visible for WordPress, you should name the table as “wp_comparison_table” and not just “comparison_table”. Note that you also can change the default table prefix into a desired one. That will make the website less vulnerable to hackers and spammers.
If you want to add some data to the WordPress table, you can do it either yourself or by using SQL files.
1. In the former case, go straight to the page where you want to place the table.
2. Select a Table block by Gutenberg and manually type in the needed fields after choosing the number of rows and columns.
Nonetheless, if you want to pull out the data from other sources, you may use SQL tables. They can be uploaded to the WordPress website using PhpMyAdmin.
3. Mind the naming, as the SQL title should include a table prefix. By default, its value is fixed as “wp_”. But if you have changed the table prefix earlier, type this value before the SQL file name.
4. Update the WordPress site and proceed to the Query Builder. There you can set a query that will be based on the added table.
5. After customizing the query, go on working with Tables Builder. Select the created query and fetch its data.
6. After the editing, head to the page to place the table. Choose the “Dynamic Table” block and select the needed table from the drop-down list.
Bottom Line
Creating tables can ease content systematization. It does not only arrange the information but also makes the website more attractive for users. It goes without saying that the information will be acquired more effectively than the standard plain text.
And now you know about the table creation process. The ways to build a table are so many-sided that you can pick whichever you prefer.

